
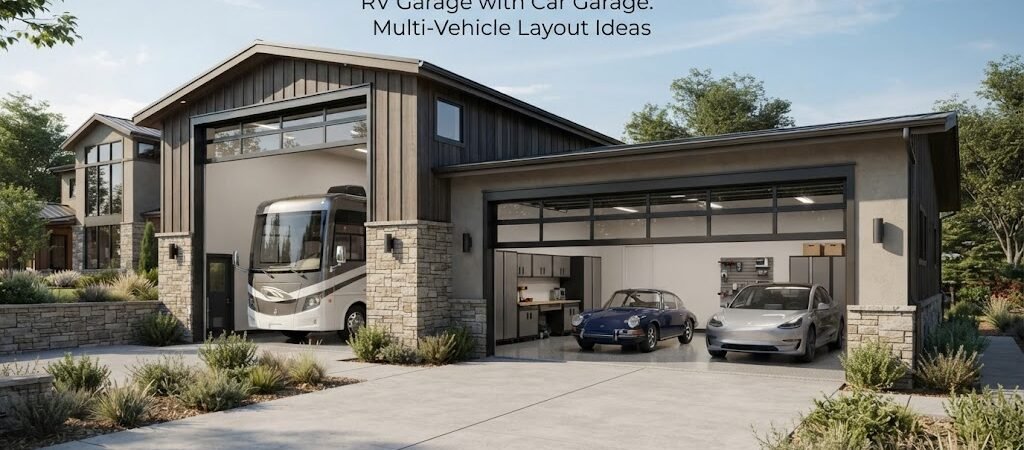
RV Garage with Car Garage: Multi-Vehicle Layout Ideas
You’ve got an RV taking up half the driveway and your cars parked on the grass. It works, but it’s not ideal. Building one structure that shelters everything is a smart move, and it’s more common than you might think. The tricky part is figuring out how to fit a 35-foot motorhome under the same roof as your daily drivers without wasting space or creating a layout you’ll regret in six months.
The right setup depends on what you own, how you use it, and what your property allows. Here are the layout ideas and planning details that actually matter.

Start with What You’re Storing
Before you sketch anything out, get real measurements. Not the brochure numbers. The actual length, width, and height of your RV with mirrors extended, AC units on the roof, and anything else sticking out.
A Class A motorhome can run 30 to 45 feet long and around 8.5 feet wide. A travel trailer might be shorter but just as tall. Fifth wheels can push 13 feet in height or more. You also need at least a couple of feet of clearance on each side so you can open compartments and walk around without scraping the walls.
Cars and trucks are simpler. A standard sedan fits comfortably in a 12-foot-wide bay. A full-size pickup or large SUV is happier with 14 feet. If you have two vehicles, you’ll want two bays or one very wide open area.
Add it all up and you’ll start to see why these buildings tend to be large. A typical RV garage with a two-car setup often ends up somewhere in the 40 to 60-foot-wide range and 40 to 50 feet deep, depending on the configuration.
Side-by-Side with a Tall RV Bay
This is the most popular layout for a reason. The RV gets its own tall bay on one end of the building, and one or two standard-height car bays sit right next to it.
The RV bay usually needs to be at least 14 feet tall at the door, and many people go to 16 feet to accommodate larger coaches. The car bays can stay at 10 to 12 feet. This creates a step-down roofline that’s easy to build and keeps the overall structure from looking like a warehouse.
A common arrangement is a 16-foot-wide RV bay next to two 12-foot car bays, giving you a building that’s roughly 40 feet wide. If you only have one car, you can shrink the footprint or use the extra bay for storage, a lawnmower, or a small workbench.
The big advantage here is simplicity. You pull the RV straight in through its own door, park the cars through theirs, and everything has a dedicated spot. No juggling vehicles around each other.
Tandem and Drive-Through Layouts
If your lot is narrow but deep, a tandem layout might make more sense. The RV parks in the back of the building and the cars sit in front. You drive past the cars to reach the RV bay.
This works well when width is limited but you have plenty of room to stretch the building lengthwise. The downside is obvious. If you need the RV and someone else needs a car at the same time, somebody’s moving their vehicle first.
A drive-through setup solves that problem. The RV bay has doors on both ends so you can pull in from one side and exit from the other. This is a great option if your property allows access from two directions. It also makes backing up unnecessary, which most RV owners will appreciate.
Offset and L-Shaped Configurations
Not every lot is a perfect rectangle. If you’re working around trees, a septic field, property lines, or an existing structure, an L-shaped building can give you the room you need without forcing everything into a straight line.
In this layout, the RV bay extends off the main garage at an angle or perpendicular to the car bays. It creates a natural separation between the big vehicle and the smaller ones, and it can give you a sheltered area outside the building for a patio or covered workspace.
L-shaped buildings are a bit more complex to frame and roof, so they tend to cost more than a simple rectangle. But if your site demands it, the extra effort is worth it.
Open Bay with Flexible Parking
Some people skip the divided bays entirely and go with one massive open interior. Think of a clear-span building that’s 50 feet wide and 40 feet deep with no interior walls or columns. You park the RV on one side, the cars on the other, and you still have room to move around.
This approach gives you the most flexibility. If you sell the RV and buy a boat, the space adapts. If you want to set up a workbench along the back wall for a few months, there’s room. The tradeoff is that you lose the defined structure of separate bays, and climate control or insulation becomes harder if you ever want to heat just part of the building.
If you’re leaning toward this kind of open layout, comparing different garage and workshop plans can help you see how others have divided up similar spaces.
Door Sizes and Placement
This is where a lot of people make mistakes. They plan the building around the RV’s body dimensions and forget about the doors.
Your RV door needs to be taller than your RV. That sounds obvious, but you’d be surprised how many folks order a 14-foot door for a rig that’s 13 feet 8 inches tall and then realize the roof AC unit adds another foot. Measure from the ground to the highest point on the RV, then add at least a foot of clearance. Two feet is better if you ever plan to upgrade.
Width matters too. A 14-foot-wide door is standard for most RV bays. If your rig is wide or you’re not confident in your backing skills, go wider.
For the car bays, 9 to 10-foot-tall doors are fine for most vehicles. If you drive a lifted truck, bump that up to 12 feet.
Think about door placement in relation to your driveway and the direction you’ll approach the building. Backing a 40-foot motorhome through a tight angle into a side-facing door is a miserable experience. Whenever possible, line the RV door up with your natural approach path.
Roof Height and Building Style
The RV bay is going to be the tallest part of your building, and that affects the whole roofline. You have a few options.
A single-slope roof that peaks at the RV bay and slopes down over the car bays is simple and affordable. A gable roof with the RV bay in the center gives you a more traditional look but costs more to frame. Some people use a monitor-style roof where the center section is raised, which works well if the RV bay is in the middle of the building.
Pole barn construction is one of the most popular ways to build these multi-vehicle garages because post-frame buildings can span wide distances without interior support posts. That clear interior space makes a huge difference when you’re trying to maneuver a large motorhome into position.
Planning for the Extras
Once the vehicles are accounted for, think about what else the building needs to do. Most people want at least some storage space for camping gear, tools, and outdoor equipment. Many want electrical hookups for the RV, including a 30-amp or 50-amp outlet so the batteries stay charged and the fridge runs during storage.
If you want to add a dedicated workshop area, a man cave, or even a small apartment above the garage, those decisions need to happen early. They affect the foundation, the framing, the electrical plan, and the overall size of the building. Browsing a building plan collection that includes multi-use layouts can help you see what’s realistic for your budget and lot size.
Ventilation is another thing to think about. A large metal building full of vehicles can get hot and humid, especially in the summer. Ridge vents, gable vents, or even a couple of large fans can make a big difference in keeping the interior comfortable and reducing condensation on your vehicles.
A Few Things to Check Before You Build
Local rules vary a lot, so talk to your building department early. Height restrictions, setback requirements, and lot coverage limits can all affect how big and tall your garage can be. Some areas have specific rules about RV storage on residential property, and you don’t want to find out about those after the concrete is poured.
Also think about drainage. A building this size creates a lot of runoff. Plan your gutters and grading so water moves away from the foundation and doesn’t pool around the doors.
And if there’s any chance you’ll upgrade to a bigger RV in the next few years, build the bay larger now. Adding a few extra feet of width and height during construction is relatively cheap. Trying to expand the building later is not.

Next Steps
Getting the layout right is the most important part of this whole project. Once you know how the vehicles fit and what the building footprint looks like, everything else falls into place a lot easier.
If you’re ready to start comparing actual layouts and dimensions, a good set of pole barn garage plans will give you a much clearer picture of what’s possible on your property and help you avoid the most common sizing mistakes.