
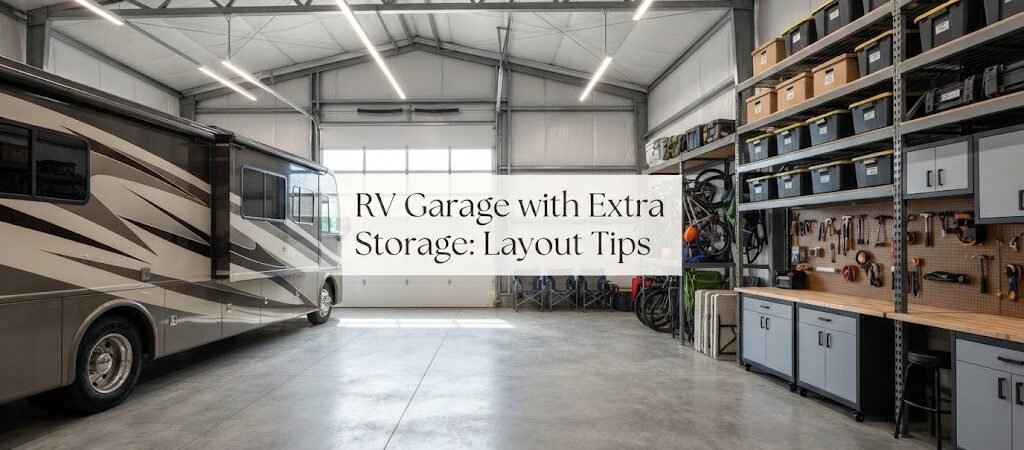
Owning an RV is great until you need a place to put it. A standard car garage usually won’t work because recreational vehicles are taller and longer than typical cars. You also probably have other stuff to store. Maybe you have lawn equipment, tools, or seasonal decorations. Building a structure that fits the RV and handles extra storage takes some thought. You want to avoid wasting space or building something you outgrow too fast.
A good layout makes daily life easier. You can pull in without worrying about scraping mirrors. You can find your tools without moving the vehicle. Here is how to plan a setup that works for your rig and your stuff.
Start with the RV Dimensions
The first step is measuring your vehicle. Do not guess. Get a tape measure and check the height, length, and width. Write these numbers down. You need to add extra space around these measurements for clearance.
Height is usually the biggest concern. Many RVs stand about 12 to 13 feet tall. If you build a wall that is exactly 12 feet high, you might not fit. You need room for the roof air conditioner and any antennas. Most people aim for a clear height of 14 to 16 feet inside the building. This gives you space to open hatches and clean the roof safely.
Length matters too. You want space in front of the RV for walking around. You also want space behind it for storage or a workbench. If your rig is 35 feet long, a 40-foot building feels tight. A 50-foot or 60-foot length gives you breathing room. Width depends on how comfortable you are backing in. Wider buildings make it easier to park without hitting walls.
Before choosing a layout, comparing different pole barn plans can help you see how the available space could be used. You might find a standard size that fits your needs without requiring custom engineering.

Designing Storage Around the Vehicle
Once the RV fits, look at the remaining space. Do not let the vehicle take over the whole building. You can create zones for different items. Think about what you need to access often versus what stays put for months.
Wall space is valuable. You can install heavy-duty shelving along the sides. This works well for bins, tires, or camping gear. Pegboard panels are useful for hanging tools. If you plan to work on the RV or other projects, leave room for a workbench. A corner dedicated to repairs keeps the main floor clear.
Overhead storage is another option. You can mount racks near the roof trusses. These are perfect for lightweight items like kayaks or ladders. Just make sure the structure can support the weight. Never hang heavy items from roof panels alone. They need to attach to the framing.
If the building will include both vehicles and workspace, looking at garage and workshop blueprints can give you ideas for arranging the interior. Seeing how others separate storage from parking can spark ideas for your own build.
Door Sizes and Placement
The door is the most critical part of an RV garage. A standard residential garage door is too small. You likely need a commercial-sized door or a specific RV door. Height should match your interior clearance. If the inside is 14 feet high, the door opening should be close to that number.
Width is also important. A single wide door is common. Some people prefer two smaller doors side by side. This can help with insulation and access if you only need to pull out a truck later. Make sure the driveway outside is wide enough too. You do not want to hit landscaping every time you turn in.
Do not forget a human-sized entry door. You do not want to open the big door just to grab a flashlight. Place a walk-in door near the storage zone. This lets you access tools without moving the RV. Windows are optional. They bring in light but reduce wall space for shelving. Many owners prefer solid walls for maximum storage room.
Concrete and Flooring Details
The floor takes a lot of weight. An RV can weigh several thousand pounds. The concrete slab needs to be thick enough to handle it without cracking. Most slabs are around 4 to 6 inches thick, but heavier loads might need more. Reinforcement with rebar or wire mesh helps prevent cracks.
Drainage is another factor. You want water to flow away from the building. A slight slope in the concrete helps rain or wash water drain out. Some people add a floor drain inside. This is useful if you plan to wash the vehicle indoors. Check local rules about where that water can go. Some areas require oil separators or specific drainage systems.
A vapor barrier under the concrete is smart. It stops moisture from coming up through the ground. This keeps the inside drier and protects anything you store on the floor. If you plan to heat the space, insulation under the slab edges helps keep temperatures stable.
Utilities and Lighting
Good lighting makes the space usable at night. LED high-bay lights are common for tall buildings. They brighten the whole area without using too much power. Place them so the RV does not cast shadows where you need to work. Switches should be near the entry door and the workbench.
Electrical outlets are necessary for battery tenders and tools. You might need 120-volt outlets for chargers. If you use heavy equipment like welders or compressors, you might need 240-volt power. Plan for more outlets than you think you need. It is easier to install them during construction than to add them later.
Heating and cooling depend on your climate. If you store items sensitive to heat or cold, insulation is key. Metal buildings can get hot in the sun. Proper insulation in the walls and roof helps regulate temperature. Ventilation is also important to prevent moisture buildup. Vents near the roof peak let hot air escape.
Reviewing planning guides before construction helps you anticipate utility needs. You can learn about typical electrical layouts and insulation options for metal structures.
What If You Run Out of Room?
Sometimes the RV takes priority. You might fill the garage with the vehicle and leave little space for anything else. This is common if you have a large motorhome and a modest building. Do not try to force too much into one structure. It makes the space cramped and hard to use.
If you need more room for tools or lawn gear, consider a separate building. A smaller shed nearby can handle the overflow. This keeps the main garage clear for the vehicle. It also lets you organize items by category. You can keep messy projects in the shed and clean storage in the garage.
Keeping things separate also helps with security. You can lock the RV garage tightly while using the shed for daily access items. This reduces wear and tear on the main building doors.

Final Thoughts
Building an RV garage with storage is about balance. You need to fit the vehicle comfortably while leaving room for your life. Measure everything twice. Think about how you will use the space every day. Do not forget about doors, floors, and power. These details matter just as much as the size of the building.
Take your time during the planning phase. Changes on paper are cheap. Changes after construction are expensive. Talk to builders in your area about soil conditions and local rules. Every location has different requirements for setbacks and permits.
If you are ready to start designing, browsing a building plan collection is a smart next step before you break ground. You can find layouts that match your needs and adjust them to fit your property.