
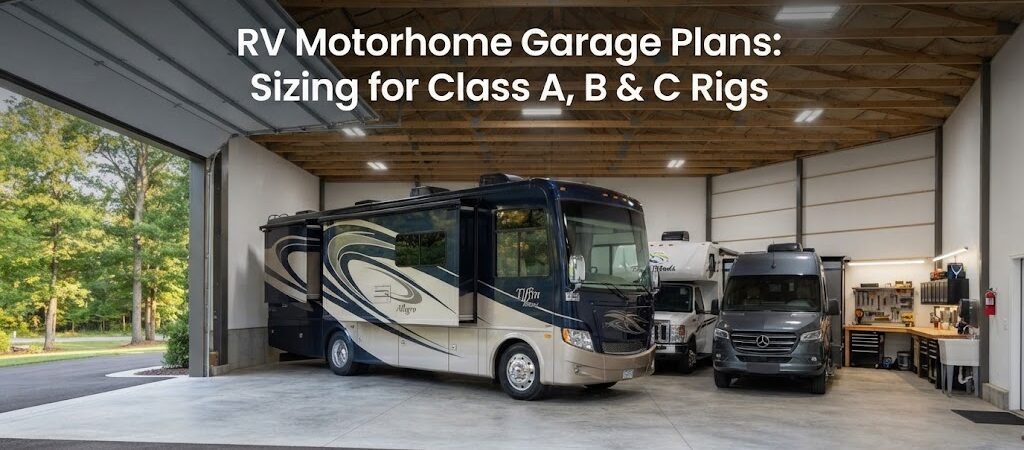
RV Motorhome Garage Plans: Sizing for Class A, B & C Rigs
If you own an RV or you’re about to buy one, you already know it doesn’t fit in a normal garage. Parking it outside works for a while, but sun damage, hail, tree sap, and winter weather add up fast. A lot of RV owners eventually decide to build a dedicated garage or pole barn to protect their rig, and the first question is always the same: how big does it need to be?
The answer depends almost entirely on which class of motorhome you have. A Class B camper van and a Class A diesel pusher are completely different animals, and the building you need for each one will look nothing alike. Getting the size wrong is an expensive mistake, so it pays to think this through before you pour a slab or set your first post.

Know Your RV Class First
Before you look at any plans, grab a tape measure and write down your RV’s actual length, width, and height. Don’t just go off the brochure numbers. Mirrors, ladders, AC units on the roof, and hitch extensions can all add inches that matter when you’re trying to squeeze through a garage door.
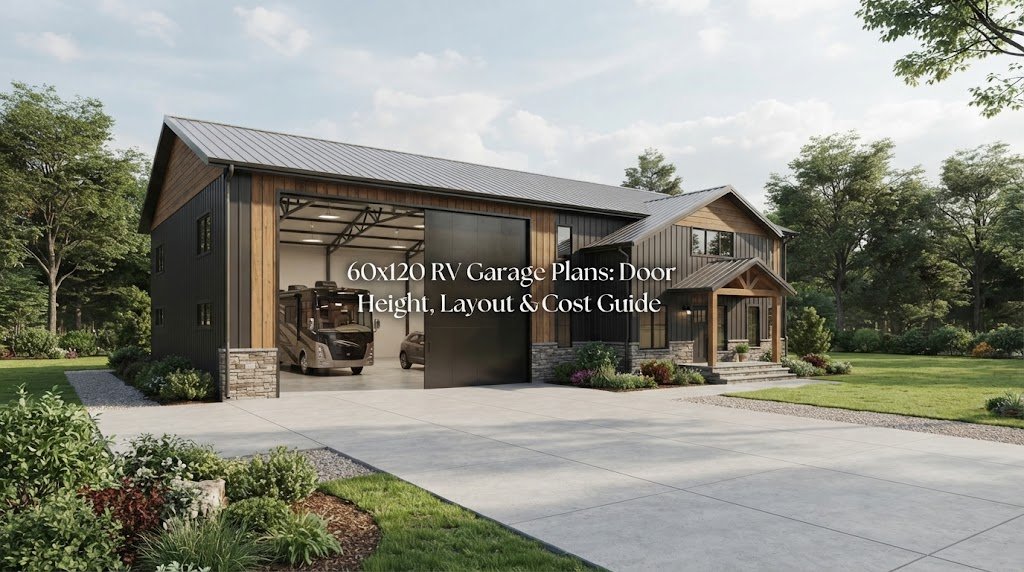
Class A Motorhomes
These are the big ones. Class A motorhomes look like buses and range anywhere from about 26 to 45 feet long. Most are around 8 to 8.5 feet wide and stand 11 to 13 feet tall, sometimes more if you have rooftop satellite dishes or extra AC units.
A Class A rig demands a serious building. You’re looking at a structure that needs a door opening at least 14 feet tall and 12 to 14 feet wide just to get the coach inside comfortably. Length-wise, a 40-foot motorhome needs a bay that’s at least 45 to 50 feet deep so you have room to walk around the front and back.
Class B Camper Vans
Class B rigs are the smallest motorhomes on the road. They’re built on van chassis and usually run 17 to 23 feet long, about 6.5 to 7 feet wide, and 9 to 10 feet tall.
Because they’re so compact, a Class B can sometimes fit inside a generously sized standard garage. But most people who build dedicated RV storage want room for shelving, a workbench, or a second vehicle, so the building still ends up bigger than a typical two-car garage. A bay that’s 12 feet wide, 12 feet tall, and 25 to 30 feet deep handles most Class B vans with room to spare.
Class C Motorhomes
Class C motorhomes are the ones with the over-cab bunk. They typically measure 21 to 35 feet long, about 8 to 8.5 feet wide, and 10 to 12 feet tall.
They fall right in the middle for building size. A door opening of 12 to 14 feet tall and 12 feet wide works for most Class C coaches. Plan on a bay depth of 30 to 40 feet depending on the length of your specific rig.
Sizing the Garage Door and Bay
The door is the part that causes the most headaches. You need enough height to clear the tallest point on your RV, which is almost always the roof AC unit. A good rule of thumb is to add at least 1 to 2 feet of clearance above the tallest point of the rig. If your motorhome measures 12 feet 6 inches to the top of the AC, you want a 14-foot door at minimum.
Width is just as important. You don’t want to thread the needle every time you pull in. Give yourself at least 2 feet of clearance on each side of the RV. So an 8.5-foot-wide motorhome needs a door that’s at least 12 feet wide, and 14 feet is even better if the budget allows it.
For depth, add 3 to 5 feet in front of and behind the RV. This gives you space to open the hood, access the rear engine compartment on a diesel pusher, and walk around without bumping into walls.
Planning for Slide-Outs and Extra Clearance
Here’s something a lot of first-time RV garage builders forget. If your motorhome has slide-outs, you might want to extend them while the rig is parked inside. That’s a great way to keep the seals from getting stuck and to air out the interior.
Slide-outs can add 2 to 3 feet of width on each side. So a motorhome that’s 8.5 feet wide with the slides in could be 12 to 14 feet wide with them out. If you plan to use the slides while parked, your building needs to be wide enough to handle that. A 20-foot-wide bay is a comfortable fit for most rigs with slides extended, and 24 feet gives you real breathing room.
If you don’t care about extending the slides inside, you can go narrower and save on material costs. Just make sure you know your plan before you start framing.
Adding Space for Storage or a Workshop
Most people don’t just want a metal box to park the RV in. They want room for outdoor furniture, a grill, camping gear, bikes, a riding mower, or a workbench. Some folks want a full workshop on one side of the bay.
If that sounds like you, plan on adding at least 10 to 15 feet of width to the building beyond what the RV bay requires. A 40-foot-wide building with a 14-foot-tall RV bay on one side and a 10-foot-tall workshop area on the other is a popular layout. If you’re thinking about combining vehicle storage with a dedicated workspace, browsing garage and workshop blueprints can help you see how other people have arranged similar floor plans.
You can also add lean-tos or side bays after the main structure goes up, but it’s almost always cheaper to build the full footprint from the start.
Height, Width, and Length Guidelines
Here’s a quick summary to help you ballpark the building size based on your RV class:
Class A (large diesel pusher or gas coach):
Door height 14 to 16 feet. Door width 12 to 14 feet. Bay depth 45 to 55 feet. Overall building width 20 to 30 feet if you want side clearance or slides-out space.
Class C (mid-size cab-over motorhome):
Door height 12 to 14 feet. Door width 12 feet. Bay depth 30 to 40 feet. Overall building width 16 to 24 feet.
Class B (camper van):
Door height 10 to 12 feet. Door width 10 to 12 feet. Bay depth 25 to 30 feet. Overall building width 14 to 20 feet.
These are starting points. Your exact dimensions will depend on your specific rig and what else you want to store inside.
Choosing the Right Building Type
Pole barns and metal buildings are the most popular choices for RV garages because they span wide distances without interior support posts. That open clear-span space is exactly what you need to maneuver a large motorhome. A traditional stick-built garage can work too, but the cost goes up fast once you start needing 14-foot walls and 40-foot roof spans.
A pole barn with a steel roof and siding is usually the most cost-effective route, especially for larger Class A coaches. The post-frame construction handles tall walls and wide openings well, and you can finish the interior later if you want insulation or living space above.
If you haven’t settled on a building style yet, comparing different pole barn garage plans is a smart way to see what sizes and layouts are actually available before you commit to a design.
A Few Things to Keep in Mind
Local building codes will affect your door height, wall height, and setback requirements. Some areas have height restrictions that can make a 16-foot door tricky to get approved, especially near property lines. Check with your local building department early so you don’t end up redesigning the whole thing after you’ve already ordered materials.
Wind and snow loads also play a role in how the building gets engineered. A 14-foot-tall door in a high-wind area needs a heavier header and stronger framing than the same door in a sheltered location. Your building supplier or a local engineer can help you figure out what your area requires.
Drainage is another detail that gets overlooked. RVs are tall, which means the building is tall, which means a lot of rainwater coming off the roof. Make sure you plan for gutters, downspouts, and grading that moves water away from the slab. The last thing you want is water pooling around the foundation of your new garage.

Getting Started on Your RV Garage
The best time to plan your RV garage is before you order the building kit or schedule the concrete crew. Measure your rig, decide whether you want slide-out clearance, figure out how much extra storage or workspace you need, and then pick a plan that covers all of it.
Browsing a building plan collection that includes RV-sized garages and large workshops can save you a lot of guesswork. You’ll be able to see real dimensions and layouts instead of trying to sketch everything from scratch.
If you’re new to post-frame construction or you want a better sense of how the whole process works from site prep to finishing, a pole barn planning guide is a solid place to start. It covers the basics of sizing, materials, and layout decisions so you can move forward with confidence.
Build it a little bigger than you think you need. You’ll find uses for the extra space faster than you expect.