
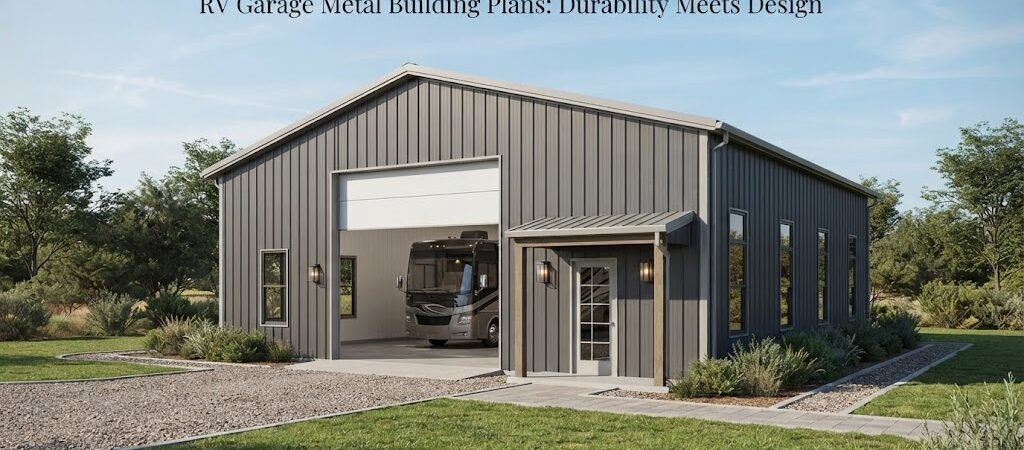
RV Garage Metal Building Plans: Durability Meets Design
You spent a lot of money on your RV. Maybe it’s a Class A motorhome, a fifth wheel, or a travel trailer you pull out every summer. Either way, leaving it parked outside year-round is rough on it. Sun fades the paint and graphics. Hail dents the roof. Snow and ice sit on top for months. Tree sap, bird droppings, and windblown debris add up fast.
A metal RV garage solves most of those problems. And if you’ve been looking into building one, you’ve probably noticed there are a ton of options out there. This guide walks through the practical stuff you need to think about before you commit to a set of plans.

Why Metal Makes Sense for RV Storage
Metal buildings have become the go-to choice for RV owners, and it’s not just because they look clean. Steel frames and metal panels hold up well against weather that would chew through wood over time. You don’t have to worry about rot, termites, or warping. Maintenance is pretty minimal compared to a traditional wood-frame garage.
The other big advantage is clear span construction. Metal buildings can span wide distances without needing interior support columns. That matters a lot when you’re trying to park a 40-foot motorhome and still have room to walk around it, open the slide-outs, or pull a truck in alongside it.
Metal also handles heavy snow and high winds better than many alternatives, though the exact engineering will depend on where you live and what your local conditions demand.
Getting the Size Right
This is where a lot of people make mistakes. They measure their RV and order a building that barely fits. Then they realize they can’t open the awning, walk around the back, or store their camping gear inside.
Start with your RV’s actual dimensions. Measure the height to the top of the air conditioner, not just the roofline. Measure the width with the mirrors extended. Measure the full length including the hitch or the ladder on the back.
Then add breathing room. A good rule of thumb is to add at least 2 to 3 feet of width on each side and a few extra feet of length. For height, you want the door opening to clear your RV by at least a foot, and ideally more if you plan to work on the roof or install a lift later.
Common RV garage sizes fall somewhere around 14 to 16 feet wide for a single RV and 12 to 14 feet tall at the eave. Length depends entirely on your rig, but 40 to 50 feet is common for larger motorhomes. If you want to park a truck in front of the RV or add a workshop area, you’ll need to go bigger.
Layout Options Worth Considering
A standalone RV garage that holds just the RV is the simplest option. It’s straightforward to plan and usually the most affordable route.
But a lot of property owners want more from the building. If you’re thinking about combining your RV storage with other uses, looking at garage and workshop plans can help you figure out how to arrange the space so everything fits without feeling cramped.
Here are a few popular layouts:
RV plus vehicle bays. A wider building with the RV on one side and one or two car bays on the other. This works well if you want everything under one roof but don’t want to move the RV every time you need your truck.
RV plus workshop. A longer building with the RV in the front and a workshop section in the back, separated by a wall or just open space. This is popular with people who like to tinker or need storage for tools and equipment.
RV plus lean-to. The main enclosed building holds the RV, and an open lean-to on one side provides covered parking for boats, trailers, or farm equipment. This keeps the cost down while still protecting your other toys from the weather.
Doors, Insulation, and Ventilation
The overhead door is one of the most important parts of the whole building. You need a door tall and wide enough for your RV to pass through comfortably, with room to spare. Roll-up doors and bi-fold doors are the two most common choices for RV garages. Roll-up doors are simpler and usually less expensive. Bi-fold doors give you a wider clear opening and a more finished look, but they cost more.
Insulation is another decision that depends on your climate and how you plan to use the space. If you live somewhere with extreme heat or cold and you spend time inside the garage working on the RV, insulating the walls and roof makes a big difference in comfort. If the building is strictly for storage and you’re in a mild climate, you might skip it entirely.
Ventilation matters more than people think. An enclosed metal building can trap moisture, especially if you’re parking a wet RV inside after a rainy trip. Ridge vents, gable vents, or even a powered exhaust fan can help keep air moving and prevent condensation from building up on the metal panels.
Planning and Permits
Before you order materials or finalize any plans, check with your local building department. Permit requirements for metal buildings vary a lot depending on where you live. Some counties are very relaxed about agricultural or storage buildings. Others require full engineered plans, site inspections, and specific setbacks from property lines.
Your local rules may also affect the maximum building height, the type of foundation you need, and whether you can place the structure in a certain part of your property. It’s much easier to sort this out before you start building than after.
If you’re comparing different building styles, browsing pole barn plans alongside metal building options can help you decide which approach fits your property and budget best. Both styles work well for RV storage, but they have different foundation requirements and construction timelines.
Foundation and Site Prep
Most metal RV garages sit on a concrete slab. The slab needs to be thick enough to handle the weight of your RV, which can be 15,000 to 30,000 pounds or more for a large motorhome. A common approach is a 4 to 6 inch slab with thicker edges and footings around the perimeter, but the right specs depend on your soil conditions and local frost depth.
Site prep matters too. The ground needs to be level and well-drained. If water pools around the building, it can undermine the foundation over time. Grading the site so water flows away from the slab is a small step that prevents big headaches later.
What to Expect Cost-Wise
It’s hard to give a single number because so many variables affect the final price. The size of the building, the gauge of the steel, the type of doors, insulation, foundation work, and local labor rates all play a role. A basic open RV carport will cost significantly less than a fully enclosed and insulated garage with a poured concrete floor.
Getting quotes from a few local metal building suppliers is the best way to understand what you’ll actually spend in your area. Be sure to ask what’s included in the price. Some quotes cover just the building kit, while others include delivery, erection, and the concrete work.

Getting Started on Your Build
The best first step is to nail down exactly what you need the building to do. Write down your RV dimensions, list everything else you want to store inside, and think about how you’ll use the space day to day. That information will guide every other decision you make.
Once you have a clear picture of the size and layout you want, you can start comparing actual plans. Browsing a full building plan collection is a good way to see different configurations and get a feel for what’s possible before you talk to a builder or supplier.
Take your time with the planning phase. A metal RV garage is a long-term investment, and getting the details right upfront will save you money and frustration down the road.
If your project is starting to take shape and you want a more detailed starting point, a planning guide can walk you through the steps from site selection to final construction so you know what to expect at each stage.