
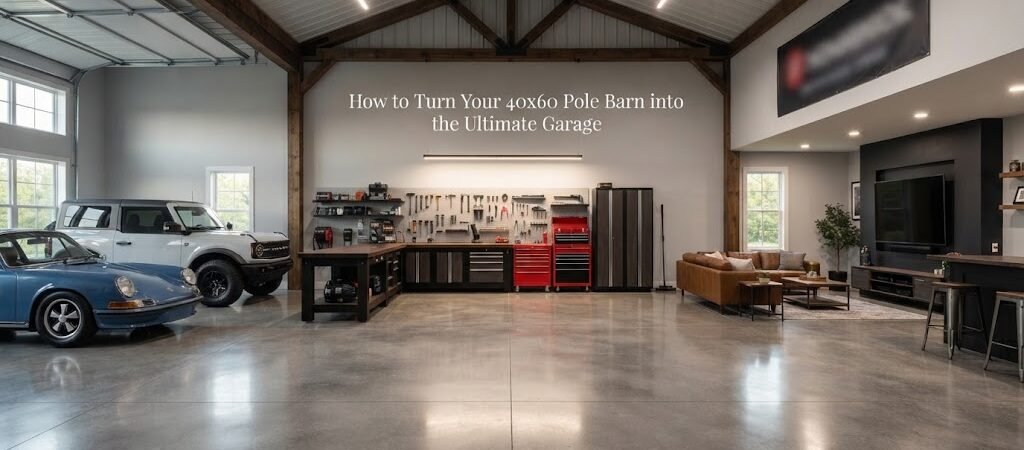
A 40×60 pole barn gives you a lot of room to work with. With 2,400 square feet under one roof, you can do much more than park a few vehicles. With the right layout, it can become a comfortable garage, serious workshop, equipment storage area, or a combination of all three.
The trick is to plan the inside before you start adding walls, doors, lights, and storage. A large open building can fill up surprisingly fast once you bring in vehicles, tools, workbenches, lawn equipment, and everything else that tends to collect in a garage.
Start With a Layout That Fits the Way You Work
Before choosing materials or ordering anything, think about what you actually want the building to do.
Will it mainly store cars and trucks? Do you need room for a tractor or trailer? Will you spend weekends working on vehicles? Maybe you want a woodworking area, welding space, or a place to restore old equipment.
Those uses will affect nearly every part of the design.
Looking through different pole barn layouts can help you see how other buildings divide parking, storage, and workspace.
A simple 40×60 building could have two or three vehicle bays along one side, with a workshop and storage area along the other. Another option is to leave most of the building open and place enclosed rooms or storage areas along the back wall.
Don’t feel like every square foot needs to be enclosed. An open floor plan is often one of the biggest advantages of a pole barn garage.
Plan the Vehicle Bays First
Your vehicles should get the first call on the floor space.
Start by measuring the vehicles you expect to keep inside. Then think beyond the vehicle itself. You’ll need space to open doors, walk around it, move tools, and possibly work with a jack or other equipment.
If you regularly work on trucks, boats, trailers, or larger equipment, plan around those items rather than a standard car.

Think About Door Placement
Large overhead doors can make a garage much easier to use. Their size and location should match the vehicles and equipment going inside.
Try to avoid placing doors where they create awkward corners or leave unusable strips of floor space. If you expect to pull a trailer through the building, think about the entire path from the driveway to the parking area.
A walk-in door is useful too. You won’t want to open a big overhead door every time you need to grab a tool or step inside.
Build Around a Real Workshop
A 40×60 pole barn gives you enough room to create a workshop without sacrificing all your parking space.
The best location depends on the type of work you do. A mechanic may want a workbench, tool storage, and vehicle work area together. Someone doing woodworking may want a dedicated area with better dust control. A fabricator may need room for welding, cutting, and handling long materials.
Think about workflow.
You don’t want your workbench on one side of the building and your tools, compressor, materials, and electrical outlets scattered randomly around the other side. Keeping related equipment close together can make the space much easier to use.
If you’re still figuring out the interior arrangement, garage and workshop blueprints can provide useful ideas for organizing work areas.
Use the Walls Before Taking Up Floor Space
One of the easiest ways to make a large garage feel smaller is to fill the floor with storage cabinets, boxes, tires, tools, and equipment.
Use the walls wherever practical.
Tall shelving can hold seasonal items and supplies. Pegboards or tool panels can keep hand tools within reach. Cabinets can hide smaller items and help keep dust off them.
Don’t forget about the space above eye level. Depending on the building’s design and structural requirements, overhead storage can be useful for things you don’t need every day.
Just keep frequently used items within easy reach. There’s little benefit to putting your toolbox twelve feet in the air.
Give Each Vehicle Enough Breathing Room
A common mistake is designing a garage based only on whether the vehicles technically fit.
A vehicle that fits on paper may be frustrating to live with.
Leave room to walk around parked vehicles and open doors. If you’ll be doing repairs, allow additional working space where needed. Also consider how you move equipment through the building.
For example, if one bay will be used for vehicle maintenance, don’t place a workbench or storage cabinet directly beside the area where you need to open doors and move tools.
A little empty floor space can be more useful than another storage cabinet.
Think Carefully About Lighting
Good lighting can completely change how a workshop feels.
Start with general overhead lighting so the entire building is easy to navigate. Then add task lighting where you’ll actually work.
A workbench, tool area, vehicle service area, and other detailed workspaces may each benefit from dedicated lighting.
Windows can also provide useful natural light during the day. Their location matters, though. Think about glare, heat, privacy, and where shelves or cabinets will eventually go.
Planning lighting before finishing the interior also makes it easier to put fixtures and switches where you actually need them.
Don’t Underestimate Electrical Planning
A serious garage usually needs more outlets than a basic storage building.
Think about where you’ll use compressors, chargers, welders, power tools, refrigerators, lifts, heaters, or other equipment. The exact electrical design should be handled according to your equipment needs and local requirements.
It’s much easier to plan outlet locations before the walls are finished than to add them later.
Also consider where the main electrical equipment and panels will go. Keep access clear and avoid putting them behind future shelving or large equipment.
Add Heat, Cooling, or Ventilation Based on Your Use
A garage that’s only used for parking doesn’t have the same comfort requirements as a workshop where you’ll spend hours working.
If you plan to use the building year-round, think about heating, cooling, and ventilation early in the design.
A vehicle workshop may also need good ventilation, especially when engines, paints, solvents, welding, or other sources of fumes are involved. The right system depends on the work being done and local requirements.
Insulation can also make a major difference in how the building performs, but the best approach depends on your climate, building design, and how you plan to use the space.
Create a Dedicated Storage Zone
Even the best garage layout can become cluttered if storage doesn’t have a home.
Set aside a specific area for things such as lawn equipment, spare parts, seasonal decorations, tires, camping gear, or building supplies.
If you have large equipment, measure it before designing the storage area. A riding mower or ATV may fit easily in an open bay but become difficult to move once shelves and workbenches are installed.
For smaller projects or additional storage, shed and workshop plans can also provide ideas that work well alongside a larger pole barn.
Consider a Mezzanine or Loft Carefully
A loft can add useful storage without taking more floor space, but it’s not something to add casually.
The structure needs to be designed for its intended use, including the expected loads and how people will access it. Local requirements may also affect the design.
If you need a lot of overhead storage, plan for it from the beginning rather than trying to retrofit something later.
Make the Floor Work for You
The floor takes a lot of abuse in a garage.
You’ll have vehicle tires, jacks, tools, dirt, oil, water, and heavy equipment moving across it. Think about how the finished floor will handle your normal work.
A smooth, durable surface is easier to sweep and clean than a rough surface with lots of cracks and uneven areas.
Drainage can also matter, especially if vehicles or equipment will regularly come inside wet or muddy. The right floor and drainage setup depends on the building design and local conditions.

Leave Room for the Future
You don’t have to fill all 2,400 square feet on day one.
In fact, leaving some open space can be a smart choice. Your needs may change. You might buy a larger truck, add a tractor, start a new hobby, or decide that the garage needs more workspace.
Try to avoid designing the building so tightly that every future change requires moving half the contents.
A flexible open area can be worth more than a permanent wall.
Make the Garage Easy to Use Every Day
The ultimate garage isn’t necessarily the one with the most equipment. It’s the one that’s easy to use.
Put commonly used tools where they’re easy to reach. Keep walking paths clear. Place lighting over work areas. Give vehicles enough room to maneuver. Keep storage organized by how often you use it.
Also think about small conveniences. A sink, utility area, refrigerator, durable workbench, or simple seating area can make a workshop much more comfortable if you have the space and need for them.
The goal is to create a building that works with your habits instead of forcing you to work around the building.
Start With the Building Plan
The best time to solve layout problems is before construction starts.
A 40×60 pole barn gives you plenty of flexibility, but that flexibility can work against you if there isn’t a clear plan. Start with your vehicles, then add work areas, storage, doors, lighting, electrical needs, and future uses.
If you’re still comparing layouts, take some time to look through pole barn plans and building plan collections before settling on your final arrangement. Seeing actual floor plans can make it much easier to picture how your own garage could work.
With a little planning, a 40×60 pole barn can be far more than a place to park vehicles. It can become a clean, organized space for working, storing equipment, tackling projects, and enjoying the property for years to come.