
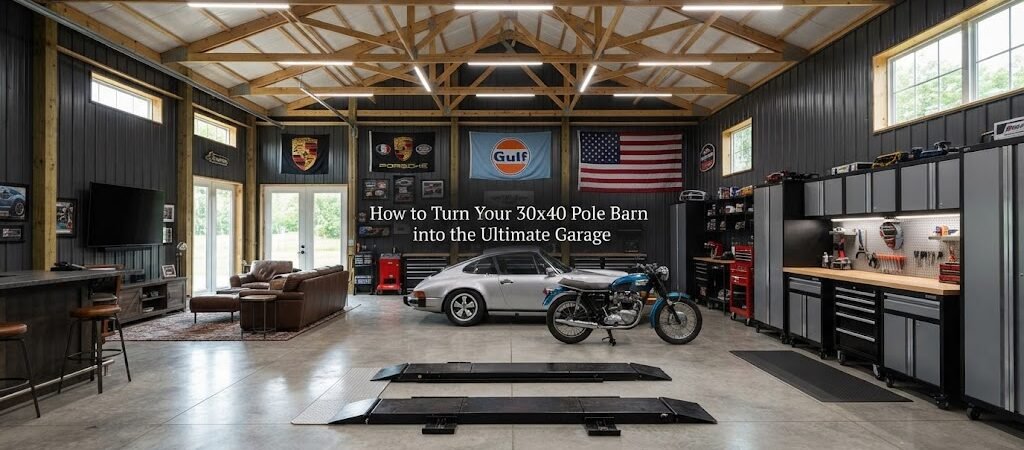
A 30×40 pole barn gives you plenty of room to build a garage that does more than store vehicles. With 1,200 square feet of floor space, you can fit cars, trucks, tools, equipment, workbenches, storage, and still have room to move around.
The trick is planning the space before you start filling it. A good garage layout should make everyday tasks easier, not leave you squeezing between vehicles and piles of stuff. Think about how you use the building now, and how you might use it a few years from now.
Start With a Garage Layout That Fits Your Needs
Before choosing doors, cabinets, or finishes, decide what you want the building to do.
A two-vehicle garage with basic storage needs a different layout than a shop where you’ll work on trucks, build projects, or store farm equipment. If you need ideas, comparing different pole barn plans can help you see how other layouts divide vehicle space, work areas, storage, and access.
For a 30×40 building, one simple approach is to dedicate one side to vehicles and the other side to a workshop and storage. Another option is to park vehicles toward the front and use the rear portion as a full-width shop.
Don’t automatically divide the building into equal sections. Your vehicles, equipment, and work habits should determine where the space goes.

Think About Traffic Flow
Leave enough room around parked vehicles for doors to open and for people to walk comfortably. You also want a clear path to workbenches, storage areas, and exterior doors.
If you regularly bring lawn equipment, motorcycles, trailers, or other large items inside, think about their route through the building. A layout that looks good on paper can become frustrating if you have to move three things just to reach the fourth.
Choose the Right Garage Doors
Garage doors have a major effect on how useful your pole barn becomes.
For vehicle storage, think about the vehicles you’ll actually park inside. A pickup truck, work van, or larger SUV may need more clearance than a typical passenger car. If you’re planning to own larger vehicles later, consider that before choosing your door locations and sizes.
Door placement matters, too. Two doors on the front can make a two-vehicle garage easy to use, while a large door on one end may work better if you need to drive equipment through the building.
If the garage will also be a workshop, consider placing a larger opening where long materials or equipment can enter without awkward turns.
The building’s framing and door openings should be designed together. Don’t assume a large door can simply be added wherever you want after the structure is built.
Create a Real Workshop Area
A garage becomes much more useful when there’s a dedicated place to work.
Start with the tools and projects you actually use. A basic workbench might be enough for household repairs. If you’re restoring vehicles, building furniture, repairing equipment, or doing fabrication work, you’ll need more room.
A good workshop area might include:
- A sturdy workbench
- Tool storage
- Shelving for parts and supplies
- Space for a rolling tool chest
- A clear work area
- Convenient electrical outlets
- Bright task lighting
Keep frequently used tools close to the workbench. Less-used items can go higher on shelves or into cabinets.
If you expect to add equipment later, leave some flexible floor space instead of filling every corner on day one.
Make Storage Part of the Design
Storage is often an afterthought in garages. That’s when boxes, tools, tires, and equipment start taking over the floor.
Use the walls and upper portions of the building whenever practical. Shelving, cabinets, pegboards, and wall-mounted storage can keep smaller items organized while leaving the floor open.
Think about storage in categories. Automotive supplies might stay near the vehicles. Garden tools can go near an exterior door. Seasonal items can occupy less convenient areas.
You can also plan a dedicated storage zone for bulky items such as tires, lawn equipment, coolers, or recreational gear.
If your projects include smaller outbuildings or a separate workshop, looking through shed and workshop plans can provide ideas for organizing tools and storage without crowding the main garage.
Plan Electrical Service Before Finishing the Walls
Electrical planning is much easier before the walls are closed up.
A garage workshop may need more outlets than a simple vehicle-storage building. Think about where you’ll park vehicles, set up benches, use power tools, charge batteries, and install lighting.
Don’t just count how many outlets you need today. Consider future equipment, too.
The electrical system should be designed and installed according to your local requirements and the needs of the equipment you’ll operate. A qualified electrician can help determine the appropriate service, circuits, outlet locations, and other details.
Use Good Lighting
Natural light is helpful, but it shouldn’t be your only source of illumination.
Overhead lighting can cover the main floor, while task lighting can make workbenches and detailed repair areas easier to see. Wall-mounted fixtures may also help illuminate darker areas around vehicles.
Try to avoid creating deep shadows around your work areas. Good lighting makes a garage more comfortable and can make detailed work much easier.
Think About Insulation and Interior Comfort
If you’ll only park vehicles inside, your insulation needs may be modest. A workshop that you plan to use for hours at a time is different.
Insulation, air sealing, ventilation, and heating or cooling can all affect how comfortable the building is. The right approach depends on your climate, building design, local requirements, and how you plan to use the space.
If you’re finishing the interior, decide early whether you want exposed framing or finished walls. Finished walls can give the garage a cleaner look and protect insulation, but they also affect the way you’ll mount shelves, cabinets, and other items.
Add a Dedicated Utility Area
Small details can make a big difference.
A utility corner could hold a compressor, pressure washer, shop vacuum, air hose, cleaning supplies, or other equipment. Keeping these items together can prevent them from spreading across the garage.
You might also want a utility sink if your projects involve dirty parts, tools, or equipment. If plumbing is part of the plan, decide where it belongs before construction rather than trying to work it in later.
The same goes for floor drains, water lines, or other specialty features. Local plumbing and building requirements can affect what’s possible.
Don’t Forget the Floor
The floor needs to match the way you plan to use the garage.
Concrete is a common choice for vehicle and workshop areas, but the slab design, thickness, reinforcement, drainage, and other details should be based on the intended loads and local conditions. Soil, climate, equipment, and local requirements can all matter.
Think about the finished surface, too. You don’t have to choose a coating immediately, but it’s worth considering how oil, dirt, water, and other messes will be handled.
A slight slope or drainage system may be useful in some garage designs, but this needs to be planned properly rather than added as an afterthought.
Use the 30×40 Footprint Wisely
One advantage of a 30×40 pole barn is that you don’t have to choose between vehicles and workspace.
For example, you could arrange the building around two main zones:
Front: Vehicle parking and daily-use access.
Middle: Workbench, tools, and frequently used equipment.
Rear: Shelving, seasonal storage, spare parts, and less frequently used items.
Or you could place vehicles along one side and create a long workshop zone on the other.
There isn’t one perfect arrangement. The best layout is the one that matches your vehicles, projects, equipment, and storage habits.
If you’re still working out the overall arrangement, garage and workshop blueprints can be useful for comparing different ways to combine parking and workspace.
Leave Room for the Future
It’s easy to design a garage around what you own today and regret it later.
Maybe you’ll buy a larger truck. Maybe you’ll add a lift, welding equipment, a motorcycle, or a second workbench. Maybe the garage eventually becomes a full workshop.
You don’t need to prepare for every possible scenario, but leaving some flexible space can be worthwhile.
Also think about future electrical needs, storage expansion, additional lighting, and equipment access. Planning for a few realistic changes is usually easier than trying to rebuild the space later.

Make Safety Part of the Layout
A busy workshop needs clear walking paths and sensible storage.
Keep flammable materials stored appropriately and away from ignition sources. Store heavy items where they won’t fall or create a hazard. Keep exits accessible and avoid running cords or hoses across major walking paths.
If you’re using welding equipment, fuel-burning equipment, paints, solvents, or other potentially hazardous materials, follow the manufacturer’s safety instructions and applicable local requirements.
The goal isn’t to make the garage look perfect. It’s to make it easy to work in without constantly tripping over things.
Plan Before You Build
A 30×40 pole barn can become a very capable garage, but the best results come from making the big decisions before construction begins.
Start with your vehicles and equipment. Then work out door locations, traffic flow, workspace, storage, lighting, electrical needs, and interior finishes. Once those pieces make sense together, the building becomes much easier to plan.
If you haven’t finalized your design yet, comparing pole barn plan collections is a practical next step. Seeing actual layouts can help you decide what works for your property before you commit to a particular arrangement.
A well-planned garage doesn’t need every possible feature. It just needs to support the way you actually use your property. Take the time to get the layout right, and your 30×40 pole barn can serve as a garage, workshop, storage building, and project space for years to come.