
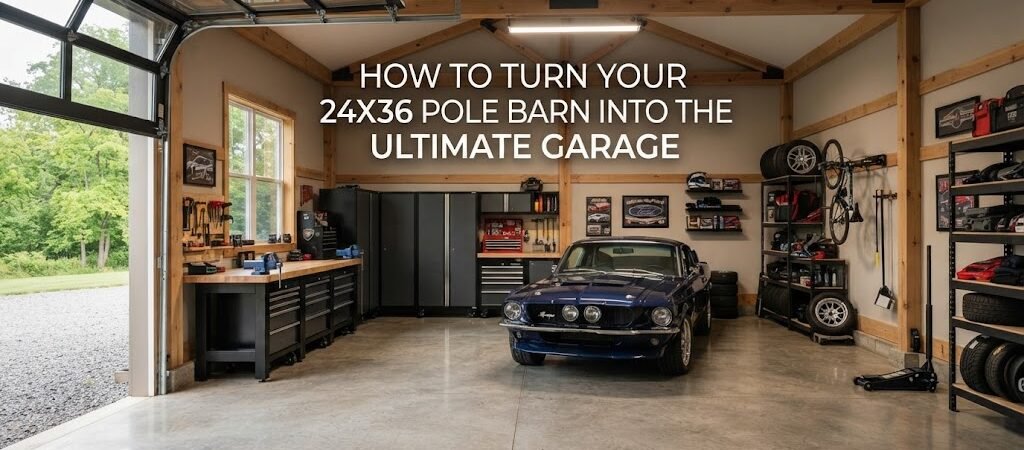
A 24×36 pole barn gives you 864 square feet to work with. That’s enough room for vehicles, tools, storage, a workbench, and plenty of the gear that tends to pile up around a property.
The trick is planning the space before you start filling it.
A good garage isn’t just a building with a few cars parked inside. It should be easy to move around, easy to organize, and set up for the work you actually do. With the right layout, your 24×36 pole barn can serve as a garage, workshop, storage building, or a mix of all three.
Start With How You’ll Use the Garage
Before choosing doors, cabinets, or workbenches, think about what needs to happen inside the building.
Will it mainly hold two vehicles? Do you work on trucks, tractors, motorcycles, or lawn equipment? Do you need space for woodworking or welding? Maybe you want room for a trailer, riding mower, compressor, or recreational equipment.
These choices affect almost every part of the layout.
For example, a building used mainly for vehicle storage can keep most of the wall space open. A serious workshop needs more room along the walls for benches, tools, electrical outlets, and storage.
It can also help to compare different pole barn layouts before settling on your own arrangement. Seeing how other buildings divide garage, storage, and work areas can make planning much easier.

Plan the 24×36 Layout Around Vehicle Space
At 24 feet wide and 36 feet long, the building has a fairly simple rectangular footprint. That’s a good thing because there are several ways to arrange it.
One common approach is to park vehicles lengthwise, with doors on the 24-foot end. This leaves the side walls available for shelving, cabinets, and work areas.
Another option is to use a wider vehicle door on one side and arrange the interior around it. The best choice depends on your driveway, property layout, vehicle sizes, and how you expect to use the building.
Don’t plan around a vehicle that barely fits. Give yourself room to open doors, walk between vehicles, carry tools, and move equipment.
Also think about what happens when a vehicle is parked inside. A workbench that looks perfectly placed on paper may become a problem if you can’t comfortably walk around a truck with both doors open.
Think About Door Placement Early
Garage doors are one of the biggest layout decisions because they affect traffic flow and usable wall space.
If you’re building from scratch, decide where the doors will go before planning the interior. Consider how vehicles approach the building, where the driveway sits, and whether you need a walk-in entry door.
A separate man door is especially useful. You won’t have to open the large garage door every time you need to grab a tool or step inside.
Windows should also be planned early. Natural light can make a workshop much more pleasant during the day, but windows shouldn’t interfere with storage, cabinets, or future equipment.
Build a Real Workshop Area
If your pole barn is going to double as a workshop, give the work area a defined home.
A sturdy workbench along one wall can become the center of the shop. Above it, you can use wall-mounted storage for hand tools and supplies. Lower cabinets or drawers can hold heavier equipment.
Try to keep the main work surface away from the busiest vehicle path. You don’t want to squeeze between a truck and a workbench every time you need a wrench.
Think vertically, too. Pole barns often have plenty of unused wall space. Shelving, pegboards, cabinets, hooks, and overhead storage can help keep the floor clear.
If you regularly work with long materials, leave enough open space to handle them. A workshop layout that works for small repairs may not work for lumber, sheet goods, or large equipment.
For more ideas, looking through garage and workshop blueprints can help you see how different work areas are arranged before you commit to your own setup.
Don’t Forget Electrical Planning
It’s much easier to plan electrical needs before the walls and ceiling are finished.
Think about where you’ll need outlets, lights, switches, and power for larger equipment. A workbench may need several outlets, while vehicle areas might benefit from outlets positioned for chargers, shop vacuums, or other equipment.
Good lighting matters just as much as the number of outlets. General overhead lighting can handle most of the building, while brighter task lighting can be placed over the workbench or other areas where you need to see details.
The exact electrical design should follow local requirements and be handled appropriately for the building. If you’re unsure about the electrical work, talk with a qualified electrician before installation.
Make Storage Part of the Design
Storage is one of the easiest things to underestimate.
At first, an empty 24×36 building looks huge. Then you add a couple of vehicles, a mower, toolboxes, shelves, tires, camping equipment, seasonal items, and spare materials. Suddenly, the floor starts disappearing.
Plan storage from the beginning instead of adding random shelves later.
Wall-mounted shelving is useful for smaller items. Cabinets can keep tools and supplies contained. Heavy items should have storage that can safely support their weight.
You can also reserve one section of the garage for bulky items that don’t need to be accessed every day.
Overhead storage can be useful when properly designed, but don’t treat the area above vehicles as automatically usable storage. Anything suspended or supported overhead needs to be planned for the building and installed safely.
Choose the Right Floor
A garage floor takes more abuse than a typical indoor floor.
If you’re pouring a concrete slab, think about how you’ll use the building before the concrete work begins. Vehicle weight, equipment, drainage, surface finish, and local site conditions all matter.
A good garage floor should also be easy to clean. Oil, dirt, mud, snow, and water are much easier to deal with when the space has been planned for regular cleanup.
You may also want a small area where dirty equipment can be worked on without tracking mess through the entire building.
The right slab design depends on the site, soil, building design, loads, and local requirements, so don’t rely on a one-size-fits-all slab specification.
Keep the Building Comfortable
A garage doesn’t have to feel like a dark storage shed.
Insulation can make a major difference if you plan to spend time inside during hot summers or cold winters. Your climate, wall and roof assembly, and intended use will determine what insulation approach makes sense.
Ventilation is also worth considering, especially if you work with equipment, finishes, dust, or fumes. A garage workshop needs fresh air and safe handling of anything that creates harmful vapors or particles.
If you plan to heat or cool the building, choose the system based on the finished space and how often you’ll use it. A building used for occasional storage has very different needs from one that functions as a daily workshop.
Leave Some Room to Grow
One of the biggest mistakes in garage planning is using every available square foot on day one.
You may only own one truck now, but that doesn’t mean you’ll never have another vehicle, trailer, mower, motorcycle, or piece of equipment.
Leave some flexible space if you can.
A good garage layout should be able to change as your needs change. Movable shelving, modular cabinets, and open wall sections can make that easier.
It’s also worth thinking about future upgrades before finishing the building. If you might add a lift, larger equipment, extra storage, or a different door later, plan the structure and utilities accordingly. Any structural changes should be reviewed by the appropriate professional for your building.

Make the Exterior Work for the Garage
The space outside the pole barn matters almost as much as the space inside.
A well-planned driveway makes parking easier and reduces the chance that vehicles will block each other. Think about where visitors will park, where trailers will sit, and how you’ll move equipment in and out.
Drainage is another important consideration. You don’t want water flowing toward the building or collecting around the entrance.
If the garage is part of a larger property, consider how it fits with existing roads, homes, barns, sheds, and outdoor work areas.
A Simple Way to Divide 24×36
You don’t need complicated walls to create useful zones.
One practical approach is to keep the main portion of the building open for vehicles and use the side or rear areas for work and storage.
For example, you might have two vehicle bays toward the front, a workbench along one side wall, and shelving or cabinets along the opposite wall. The back section could handle seasonal storage, lawn equipment, or a dedicated project area.
The exact arrangement should follow your vehicles and equipment rather than a standard template.
If you’re still working out the overall building size or arrangement, browsing pole barn plans can help you compare different footprints and layouts before construction starts.
Plan First, Then Build
The best 24×36 pole barn garages aren’t necessarily the ones with the most expensive finishes. They’re the ones that make everyday work easy.
Measure your vehicles and equipment. Sketch where the doors will go. Mark walking paths, storage, work areas, and electrical needs. Think about what you use every week and what only comes out once a year.
Then look at the plan again and imagine the building five years from now.
If you’re still sorting out the details, comparing building plan collections is a good next step. It can give you practical layout ideas and help you spot features you may want before construction begins.
A little planning on paper can save a lot of frustration once the posts are in the ground and the garage starts filling up.