
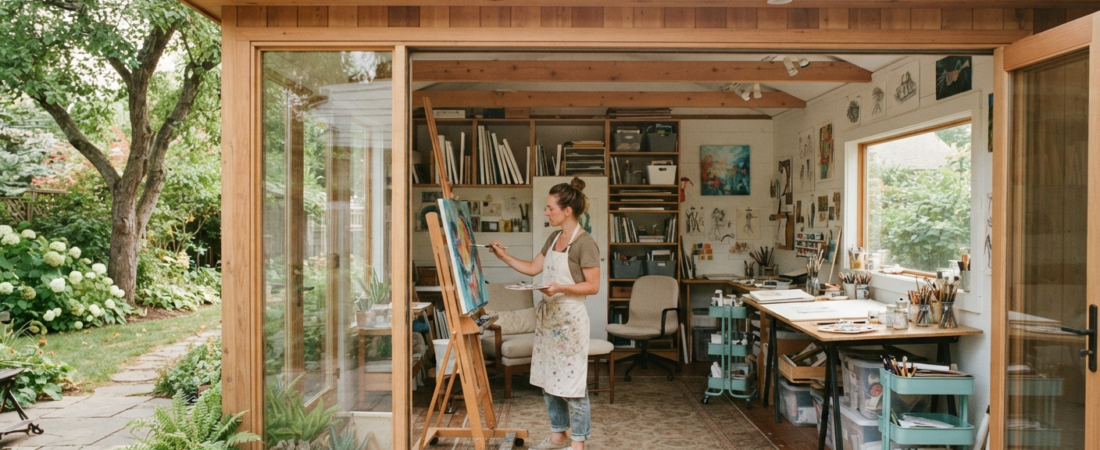
Art studio shed plans focus on a 10×12 to 12×16 footprint with large north-facing windows, a 36-inch workbench, and electrical outlets spaced every 8 feet. A detached studio design with proper insulation and ventilation keeps your painting and crafting space comfortable year-round.
What is the Right Size for Your Creative Workflow?
Most homeowners begin with a 10×12 shed, but that quickly feels cramped once you add a full-size workbench, drying racks, and material storage. A 12×16 layout gives you room for a central worktable, wall-mounted shelving, and enough floor space to move around large canvases without bumping into supplies. If you plan to teach classes or host workshops, a 16×20 footprint provides clear zones for instruction and individual projects.
The key is matching square footage to your actual workflow, not your imagination. Measure the largest piece you intend to work on, add 3 feet of clearance around it, and factor in storage walls. This approach prevents the common mistake of building a studio that feels more like a storage closet than a creative workspace.
Size Comparison for Different Art Forms
| Art Type | Minimum Size | Recommended Size | Key Layout Needs |
|---|---|---|---|
| Painting & Drawing | 10×12 | 12×16 | Large windows, drying space, floor storage |
| Sculpture & 3D Work | 12×16 | 16×20 | High ceilings, heavy-duty flooring, ventilation |
| Ceramics & Pottery | 12×16 | 16×20 | Plumbing, kiln ventilation, wet/dry zones |
| Digital Art & Design | 8×10 | 10×12 | Power outlets, monitor mounts, cable management |
How to Design for Natural Light That Protects Your Work
North-facing light is the gold standard for art studios because it provides consistent, shadow-free illumination throughout the day. South-facing windows offer more brightness but can cause glare and fade sensitive materials like watercolor paper or fabric. East and west exposures create harsh directional light that shifts dramatically from morning to afternoon.
Window placement matters as much as orientation. Position large windows on the north wall at eye level, and consider a clerestory window or skylight to bring overhead light without direct sun. A good rule of thumb is to make window area equal at least 10 percent of your floor space. For a 12×16 studio, that means roughly 192 square feet of glazing, which can be achieved with a combination of tall vertical windows and a transom.
What Are the Best Window Options for Different Budgets and Aesthetics?
| Window Type | Light Quality | Installation Complexity | Best For |
|---|---|---|---|
| Fixed picture window | Consistent, diffused | Medium | Primary north-facing wall |
| Double-hung operable | Adjustable, bright | Easy | Ventilation and cross-light |
| Skylight | Overhead, even | Hard | Central work area illumination |
| Clerestory | High, indirect | Medium | Privacy with ambient light |
Don’t forget shading. Exterior awnings, interior cellular shades, or even strategically placed deciduous vines can block summer sun while allowing winter light to enter. This balance keeps your studio comfortable and protects your artwork from UV damage.
What Are the Layout Essentials for a Functional Painting Shed?
A well-planned art studio shed separates wet and dry zones, places storage within arm’s reach, and keeps your primary work surface free of clutter. Start by positioning your main workbench against the longest wall, ideally under the largest window. This gives you natural light while keeping cables and tools along the perimeter.
Storage should be vertical and modular. Install wall-mounted pegboards above your bench for frequently used tools, and use rolling carts for bulk supplies like paper, canvas, and paint tubes. Leave at least 36 inches of clearance in front of the workbench for movement and large projects. If you work with sculptures or pottery, designate a corner with a heavy-duty table and easy access to a sink or water source.
What is Your Electrical and Climate Control Checklist?
- Install GFCI outlets every 8 feet along walls for lamps, tools, and computers
- Run dedicated 20-amp circuits for high-draw equipment like kilns or heat guns
- Add an HVAC unit sized for your square footage plus 20 percent for insulation quality
- Include exhaust fans in wet zones to manage humidity and fumes
- Plan for LED shop lights with CRI 90+ to render colors accurately
Why Is Foundation and Site Prep Important?
Your studio’s foundation sets the tone for everything else. A gravel pad is the most budget-friendly option and works well on level, well-drained sites. Concrete slabs provide a durable, level surface but require more upfront cost and curing time. Pier foundations are ideal for sloped yards and minimize site disturbance, though they need careful leveling to prevent door and window misalignment.
Situate your shed plans for an art studio where the soil drains away from the structure. Even a slight slope toward the foundation can lead to moisture issues that warp floors and damage artwork. Use a compacted base of crushed stone at least 4 inches deep, and consider a vapor barrier beneath slab pours to block ground moisture.
Foundation Type Comparison
| Foundation Type | Cost per Square Foot | Lifespan | Best Soil Conditions |
|---|---|---|---|
| Gravel pad | $2 to $5 | 10 to 20 years | Well-drained, level sites |
| Concrete slab | $6 to $12 | 25 to 50 years | Stable, compacted subgrade |
| Pier foundation | $4 to $8 | 20 to 40 years | Sloped or uneven terrain |
Permits are often required for detached structures over a certain size, so check local codes before breaking ground. A typical 12×16 studio may need a zoning review for setback distances and height restrictions, but the process is usually straightforward for residential backyard projects.
What Are Your Budget Breakdown and Cost-Saving Strategies?
Building a backyard creative workspace on a budget comes down to smart material choices and phased construction. Standard 2×4 framing with OSB sheathing and asphalt shingles keeps costs low while still allowing for insulation and finishing. Upgrading to plywood sheathing and metal roofing adds durability but increases material costs by roughly 30 percent.
Consider a hybrid approach: build the shell yourself using prefabricated trusses and kit walls, then hire a contractor for electrical and plumbing rough-ins. This saves labor on the most complex tasks while keeping you in control of the timeline. Source used windows, doors, and cabinetry from salvage yards to cut finish costs by up to 50 percent.
Estimated Cost Ranges by Build Level
| Build Level | Cost per Square Foot | Includes | Typical Total for 12×16 |
|---|---|---|---|
| DIY basic | $30 to $50 | Shell, basic electrical, no insulation | $5,760 to $9,600 |
| DIY with upgrades | $50 to $80 | Insulation, finished walls, premium windows | $9,600 to $15,360 |
| Professional build | $80 to $120 | Full finish, HVAC, custom features | $15,360 to $23,040 |
Hidden costs often catch first-time builders. Budget an extra 10 to 15 percent for permits, site preparation, and unexpected foundation repairs. If you plan to use the studio year-round, factor in insulation, vapor barriers, and a mini-split HVAC system, which can add $2,000 to $4,000 to the total.
FAQ: Shed Plans for Art Studio
Do I need a permit to build a shed studio?
Most municipalities require permits for detached structures over 120 square feet, especially if you’re adding electricity or plumbing. Check your local building codes for setback requirements and height limits. A 10×12 studio often falls below the permit threshold, but rules vary by county.
Can I build this myself with basic tools?
Yes, if you follow detailed art studio shed plans and take time to level the foundation and frame squares. Basic tools include a circular saw, drill, level, and tape measure. Hiring a helper for roofing and siding phases makes the project more manageable and safer.
What’s the best orientation for natural light?
North-facing is ideal for consistent, shadow-free light. South-facing works if you add shading devices to control glare. Avoid east or west exposures unless you can install adjustable blinds or exterior awnings to manage low-angle sun.
How do I insulate a studio for four-season use?
Use R-13 batt insulation in 2×4 walls and R-19 in the ceiling. Install a vapor barrier on the warm side, and seal all gaps with spray foam. A mini-split heat pump provides both heating and cooling efficiently, and exhaust fans remove humidity from painting or pottery work.
What’s the difference between a shed and a detached studio?
A shed is primarily for storage, while a detached studio is designed for occupation, with insulation, electrical, and climate control. Art studio shed plans include these upgrades from the start, avoiding costly retrofits later.
What Are Your Next Steps to Start Your Creative Build?
Begin by sketching a rough layout on graph paper, marking window placements, workbench locations, and storage zones. Then, pull local zoning maps to confirm setbacks and height restrictions. Once you have a clear site plan, choose a foundation type that matches your soil and budget, and order materials in phases to avoid storage headaches.
Building a backyard creative workspace is as much about the process as the destination. Take your time with the shell, get the electrical and plumbing right, and finish with touches that inspire you every time you walk in. The right art studio shed plans can transform a simple structure into a lifelong creative sanctuary.