
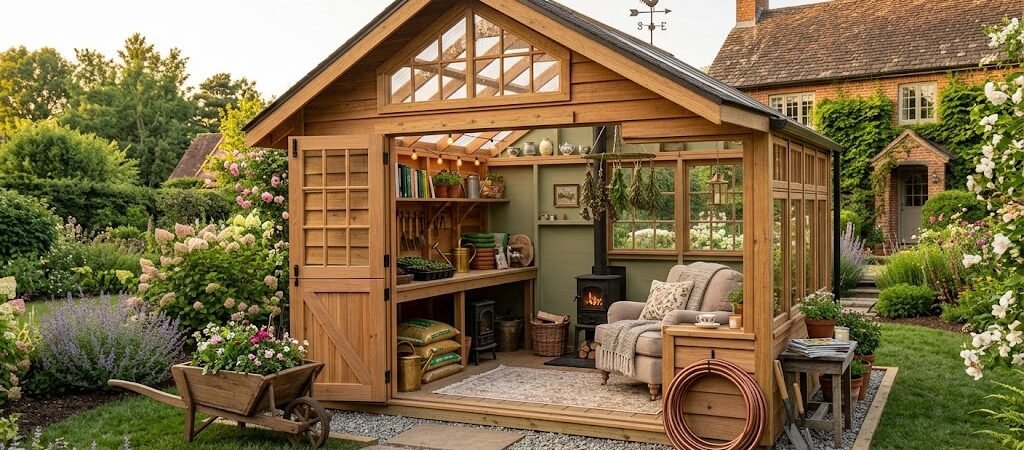
The best she shed plans combine a solid foundation, proper insulation, and a layout that matches your intended use—whether that’s a hobby workspace, garden studio, or quiet retreat. Most homeowners start with a 12×16 foot design at 192 square feet, costing between $8,000 and $18,000 depending on finishes and whether they DIY or hire help.
Why Are She Shed Plans the Smartest Backyard Investment Right Now?
The backyard retreat shed market has exploded. According to the National Association of Home Builders, over 34% of homeowners added a dedicated outdoor structure in the past two years—up from just 12% in 2019. You’re not imagining it. Your neighbors are building them too.
But here’s the problem: most people skip the planning phase. They buy a kit, patch it together, and end up with a space that’s either too cramped or wildly over budget. That’s where solid she shed plans make the difference between a regrettable project and a backyard room you’ll use every single day.
I’m going to walk you through exactly how to choose, customize, and execute the right layout for your situation. No fluff. Just practical steps you can follow.
Step 1: Choose Your Foundation Type (This Changes Everything)
Your foundation determines your cost, your timeline, and whether you’ll need a permit. Get this wrong and every decision after it gets harder.
Prefabricated Concrete Slab — The Quick Start
- A poured concrete slab or precast panels run $4 to $8 per square foot installed.
- For a standard 12×16 shed, that’s roughly $768 to $1,536.
- The pour takes one day. You can frame the walls the next morning.
This option works best when your ground is relatively level and drainage isn’t a concern. If water pools in your yard after rain, skip this and go with piers instead.
Gravel Base with Pressure-Treated Skids — The Budget Pick
- Gravel bases cost about $2 to $4 per square foot.
- A 12×16 space needs around 2.5 cubic yards, which runs $300 to $600 in materials.
- You’ll spend a weekend preparing the site—excavating 4 inches, laying landscape fabric, spreading, and compacting gravel.
The result is a stable, drainable base that won’t crack like concrete.
Concrete Piers or Helical Piles — The Flexible Choice
- Poured piers cost $300 to $600 each; you’ll need six to eight for a 12×16 structure.
- Helical piles run $500 to $1,200 installed but require no curing time.
- This option suits sloped yards or poor soil areas.
Step 2: Pick a Layout That Matches Your Actual Usage
This is where most people go wrong. They design for the life they wish they had instead of the life they actually live. Let’s fix that.
The 12×12 Hobby Shed Design — 144 Square Feet
- This fits a workbench along one wall, a small seating nook, and storage overhead.
- Perfect for painting, sewing, or a compact home office setup.
- Ceiling height should be at least 7 feet to avoid feeling claustrophobic.
The 12×16 Garden Studio Plans — 192 Square Feet
- This accommodates a full workbench, a standing desk, and a sofa.
- Add windows for cross-ventilation, vital for long hours spent inside.
The 16×20 Cozy Backyard Room — 320 Square Feet
- This allows for dividing into a work zone and relaxation corner.
- A loft storage area adds roughly 40 square feet of storage without expanding the footprint.
Step 3: Frame It Right — Wall Construction That Actually Lasts
- The framing choice affects insulation R-values, interior finish options, and long-term durability.
2×4 Walls at 16 Inches On-Center — The Standard Route
- This method fits standard fiberglass batts rated R-13, with total R-values up to R-21 with proper materials.
- It’s the most common approach for hobby shed design.
2×6 Walls at 24 Inches On-Center — The Insulation Play
- This allows R-19 batts or closed-cell spray foam at R-25, critical for winter use.
- You lose about 2 square feet compared to 2×4 construction, but it’s often worth it.
Structural Insulated Panels (SIPs) — The Fast Track
- SIPs offer R-values of R-22 to R-26 before installation, streamlining the building process.
- However, precise measurements are essential to avoid costly errors.
Step 4: Insulation and Climate Control — Don’t Skip This
Fiberglass Batts — The Cost-Effective Option
- Batts cost $0.50 to $1.20 per square foot installed, typically around $300 to $720 for a 192-square-foot shed.
- Leave a 1-inch air gap between batts and drywall to maintain efficiency.
Closed-Cell Spray Foam — The Performance Pick
- This option runs $1.50 to $3.50 per board foot installed, ideal for tech-sensitive environments.
- It effectively seals drafts and reduces energy costs.
Portable Mini-Split HVAC — The Smart Climate Solution
- A 9,000 BTU mini-split costs $800 to $1,500.
- It’s efficient for spaces under 200 square feet, providing stronger temperature control.
Step 5: Electrical and Tech Integration — Power Your Space Properly
The Circuit Layout You Should Follow
- Run at least two 20-amp circuits: one for outlets and one for HVAC.
- Use 12-gauge wire for the HVAC circuit.
- GFCI protection for outlets near exterior walls is essential.
Smart Home Integration Points
- Plan for four smart devices: a thermostat, lighting controls, a security camera, and a door sensor.
- Install quality mesh nodes for strong Wi-Fi coverage.
Step 6: Permits, Zoning, and Legal Considerations
Skipping permits saves time today and costs you thousands tomorrow. Here’s what you need to know:
- Most municipalities require a permit for any structure over 120 square feet.
- Check local zoning ordinances for setback requirements, which typically range from 5 to 15 feet from property lines.
For guidance on building codes, review resources from Energy.gov.
Step 7: Roofing and Exterior Finishes — Weatherproof Your Investment
Asphalt Shingles — The Reliable Standard
- Cost between $1.50 to $4.00 per square foot installed.
- They last 25 to 30 years under most conditions.
Metal Roofing — The Long-Term Play
- Costs between $7 and $14 per square foot installed, lasting 40 to 70 years.
- It also provides energy savings in hot climates.
Exterior Siding Options That Match Your Budget
- Vinyl siding costs $2 to $5 per square foot.
- Fiber cement runs $5 to $10 per square foot; cedar clapboard costs $6 to $12.
Step 8: Interior Finishes — Make It Feel Like a Real Room
Flooring That Handles Real Life
- Luxury vinyl plank costs $3 to $7 per square foot; epoxy flooring runs $3 to $12.
- Each type suits different needs based on usage.
Lighting That Sets the Right Mood
- Install both ambient and task lighting for versatility.
- Dimmer switches improve the atmosphere significantly.
Window Placement for Natural Light and Views
- Position windows based on preferred views, ideally south or east-facing for natural light.
- Invest in quality windows—they greatly enhance space feel.
Cost Breakdown: What She Shed Plans Actually Cost in 2025
Here’s a realistic cost comparison across three common she shed plan sizes:
| Size | Square Feet | DIY Cost Range | Professional Build Range | Typical Timeline |
|---|---|---|---|---|
| 12×12 | 144 | $6,000 – $11,000 | $12,000 – $20,000 | 2 – 4 weeks |
| 12×16 | 192 | $8,000 – $16,000 | $16,000 – $28,000 | 3 – 6 weeks |
| 16×20 | 320 | $14,000 – $26,000 | $28,000 – $45,000 | 6 – 10 weeks |
These ranges assume standard finishes: vinyl siding, asphalt shingles, basic electrical, and luxury vinyl plank flooring.
FAQ: She Shed Plans — Common Questions Answered
Do I need a permit for a she shed?
Yes, most municipalities require a permit for structures over 120 square feet. Smaller structures may qualify for exemptions, but it’s crucial to verify with your local building department.
Can I use my she shed as a home office for tax purposes?
If the space is used exclusively and regularly for business, a backyard shed can qualify for a home office deduction. Keep records of expenses and consult a tax professional.
How long does a she shed last?
A well-built and maintained shed can last between 20 to 40 years. Quality materials contribute significantly to longevity.
What’s the smallest she shed plan that still feels comfortable?
A 12×12 space at 144 square feet serves as the practical minimum while remaining comfortable and usable.
Can I add plumbing to my she shed?
Yes, extending plumbing lines or using a macerator pump system is feasible. Costs for plumbing can vary widely based on complexity.
Next Steps: Turning She Shed Plans Into Reality
You now have a complete roadmap. Start by measuring your available yard space and noting any utilities and property lines. Then, pick a she shed plan size that matches your actual usage and get your local permit requirements sorted.
Budget at least 15% above your material estimate for unexpected costs to finish your project smoothly.
Your cozy backyard room is waiting. Start planning it today.