
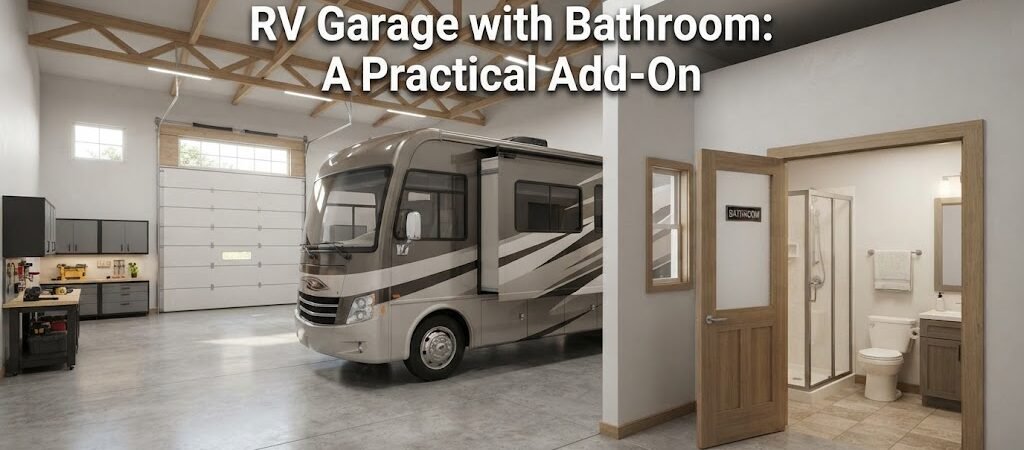
You just pulled into the driveway after a long weekend of camping. The rig is covered in mud. Your boots are caked in dirt. The last thing you want to do is drag all that mess through your clean house. This is exactly why adding a bathroom to an RV garage makes so much sense. It gives you a dedicated spot to wash up, rinse off gear, and use the facilities without hooking up the camper.
Building a space that handles both a massive vehicle and plumbing takes some careful thought. You have to balance the size of the garage with the layout of the bathroom. Here is how to make this project work for your property.

Sizing the Space for Your Rig
The biggest mistake people make is building a garage that is just a few feet wider than their RV. You need room to walk around the vehicle, open doors, and pull out awnings.
Height is usually the main concern. Most Class A motorhomes and fifth wheels need a clear height of at least 13 to 14 feet. You will want to build your roll-up doors at least 14 feet tall, which means the overall wall height needs to be 16 feet or more.
Length is just as important. A 40-foot RV needs a 40-foot bay, plus another 5 to 10 feet of depth so you can walk past the front and have room for a workbench or storage. When you are trying to figure out the exact dimensions, looking at different garage and workshop plans can help you visualize how the available space will actually feel.
Figuring Out the Bathroom Layout
Once you know the footprint of the garage, you need to carve out space for the bathroom. A simple half bath with a toilet and a sink is usually enough for most people. If you want to rinse off muddy boots or wash the dog, adding a small shower stall is a smart move.
Try to tuck the bathroom into a corner near the person-entry door. This keeps it out of the main driving area. You do not want the bathroom taking up space where you need to park the RV or set up a workbench. Make sure the person door is at least 36 inches wide so you can easily carry large items in and out.
If you are also adding a small kitchenette or a loft area, checking out various shed and workshop blueprints can give you great ideas for arranging the interior without wasting square footage.
Plumbing and Utility Considerations
This is where the project gets a bit more complex. You need to bring in fresh water and route waste water out.
If the garage is attached to the house or very close to it, tying into the main sewer line is usually straightforward. If the building is far away, you might need to run a long sewer pipe. Long pipe runs require a specific slope to keep things flowing, which can mean digging a very deep trench. In some cases, a pump system or a separate small septic tank is easier to install.
You also have to think about the local climate. Water lines need to be buried below the frost line so they do not freeze in the winter. Inside the building, any pipes running through exterior walls need extra insulation.
Running these utilities through the walls and floor requires good foresight. Reviewing comprehensive building plan collections before you start construction helps you see where to route pipes and wires without hitting structural supports later.
Heating and Insulation
If you plan to use the RV garage in the winter, the bathroom needs to be heated. Frozen pipes will ruin your day and cost a lot of money to fix.
Insulate the exterior walls and the ceiling just like you would for a house. Pay special attention to the bathroom walls. You can use standard fiberglass batts, but make sure they are covered with a proper vapor barrier to stop condensation from soaking the wood.
For heating, a small mini-split system works really well. It provides both heat and air conditioning, and it does not take up much wall space. A simple electric baseboard heater can also work if you just need to keep the pipes from freezing.
Choosing the Right Materials
A garage bathroom deals with a lot of moisture, dirt, and temperature changes. You need materials that can handle the abuse.
Skip the standard drywall in the wet areas. Use moisture-resistant drywall, often called green board, or go with metal wall panels. Metal panels are incredibly tough, easy to wipe down, and they match the rest of the shop.
For the floor, sealed concrete is the best choice. If you want something a bit warmer on the feet, large porcelain tiles work well. Just make sure the grout is heavily sealed so it does not stain.
Ventilation is critical. Install a good exhaust fan that vents directly to the outside. This pulls out humid air after a shower and keeps the space from smelling like a damp locker room. Make sure all electrical outlets in the bathroom have ground fault circuit interrupters to keep things safe around water.

Bringing It All Together
Adding a bathroom to your RV garage changes the way you use the building. It keeps the main house clean, gives you a place to prep before a trip, and makes cleaning the rig much easier when you get home.
Take your time with the design. Measure your RV carefully, plan the plumbing route early, and pick materials that can handle a shop environment.
Before you start digging footers or pouring concrete, it helps to see how all these pieces fit together on paper. Reviewing a barndominium planning guide can give you excellent ideas for combining utility spaces, plumbing, and storage into one smooth layout.