
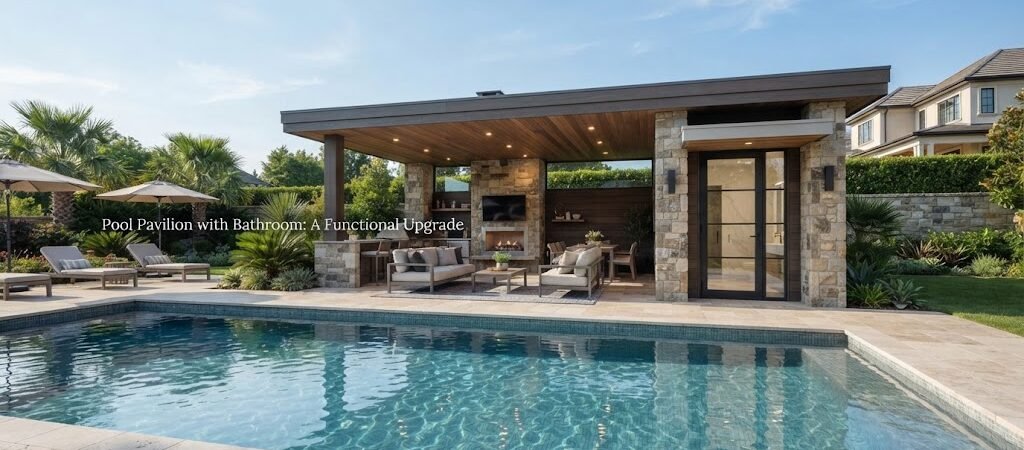
Adding a bathroom to a pool pavilion changes how the whole space works. Instead of tracking wet feet through the house or asking guests to use an inside bathroom, everyone can rinse off, change, and use the toilet without ever leaving the backyard. It’s one of the most requested upgrades for anyone building a serious outdoor living space, and it’s worth understanding what it actually takes before you commit to the idea.
Why a Bathroom Changes Everything
A basic pool pavilion is really just a shaded spot to sit. Once you add plumbing, it becomes a small functional building. That shift matters because it opens up how the structure gets used. Kids can shower off chlorine before heading inside. Guests at a pool party don’t have to interrupt whatever’s happening in the main house. Anyone doing yard work or maintenance has a place to clean up.
This is also where the project starts to overlap with pool house and cabana plans, since a pavilion with a bathroom starts to look and function a lot like a full pool house rather than a simple open-air structure.

What a Pool Pavilion Bathroom Usually Includes
Most bathroom additions in this type of structure fall into one of two categories. The first is a compact half bath, just a toilet and a small sink, meant for quick use during pool parties or yard gatherings. The second is a fuller layout with a shower, sometimes an outdoor shower attached to the exterior wall, plus a toilet and sink inside.
Which one makes sense depends on how the space gets used. A family that swims often and wants to rinse off chlorine before going inside will get more value from a shower setup. A household that mostly uses the pavilion for entertaining might be fine with just a toilet and sink.
Layout Considerations
Plumbing is the biggest factor driving layout decisions. Because water and waste lines need to run somewhere, the bathroom is usually placed along one side of the pavilion, close to where it can connect efficiently to existing lines or a new supply point. This keeps costs more reasonable and avoids running pipe across the entire footprint.
A few practical layout patterns show up often:
- A small enclosed bathroom tucked into one corner, leaving the rest of the pavilion open for seating and lounging
- A center divider with the bathroom on one end and an open living or dining area on the other
- A narrow bathroom wing attached to the back of the structure, keeping the front fully open toward the pool
Each of these works differently depending on the size of the pavilion and how much open space you want to preserve. Looking at different pool house layouts side by side can help you see how other builders balance open lounging space against enclosed functional areas.
Ventilation and Moisture
A bathroom near a pool deals with more humidity than a typical indoor bathroom. Between pool splash, shower steam, and general outdoor moisture, ventilation becomes important. A vent fan, a window, or even a louvered door can help air move through and keep the space from feeling damp or developing mildew over time. Materials matter here too. Tile, moisture-resistant drywall, and sealed flooring tend to hold up better than standard interior finishes.
Plumbing and Utility Planning
Running plumbing to a detached or semi-detached structure is usually the most involved part of this project. It depends on how far the pavilion sits from the house, whether there’s already a water line nearby for the pool equipment, and how the property’s drainage is set up. Because these details vary so much from lot to lot, it’s worth talking with a licensed plumber early in the planning process rather than assuming a standard setup will work.
The same goes for permits. Adding plumbing and a bathroom typically triggers different permitting requirements than a simple open-air pavilion, and those requirements can vary quite a bit depending on where you live. Checking with your local building department before finalizing a design saves a lot of headaches later.
When It Makes Sense to Add Sleeping Space Too
Some homeowners take the bathroom upgrade a step further and add a small sleeping area, turning the pavilion into something closer to a guest suite. This works well for properties that host overnight guests regularly or want a private space for older kids or visiting family. If that’s the direction you’re considering, an ADU and small home blueprint guide can be a useful reference, since it covers how small detached spaces handle both living and sleeping needs in a limited footprint.

Cost Factors to Keep in Mind
There’s no single number that applies to every bathroom addition, since cost depends heavily on plumbing distance, fixture choices, finishes, and local labor rates. What does stay consistent across most projects is which factors drive the price up or down. Running new plumbing lines a long distance costs more than tying into something already nearby. A simple half bath with basic fixtures costs less than a full shower setup with tile work. And higher-end finishes, obviously, add to the total regardless of the layout.
Rather than guessing at a budget, it helps to get quotes based on your specific site conditions once you have a rough layout in mind.
Getting the Layout Right Before You Build
Because plumbing placement affects so much of the design, it’s worth working out the bathroom’s location before finalizing the rest of the pavilion layout. Moving plumbing after construction starts is far more expensive than planning around it from the beginning.
If you’re still deciding on size, features, and overall layout, spending time with pool house and cabana plans before you finalize anything can help you avoid costly changes once the project is underway. Seeing how other layouts handle bathroom placement, storage, and open seating together often makes it easier to figure out what will actually work on your own property.