
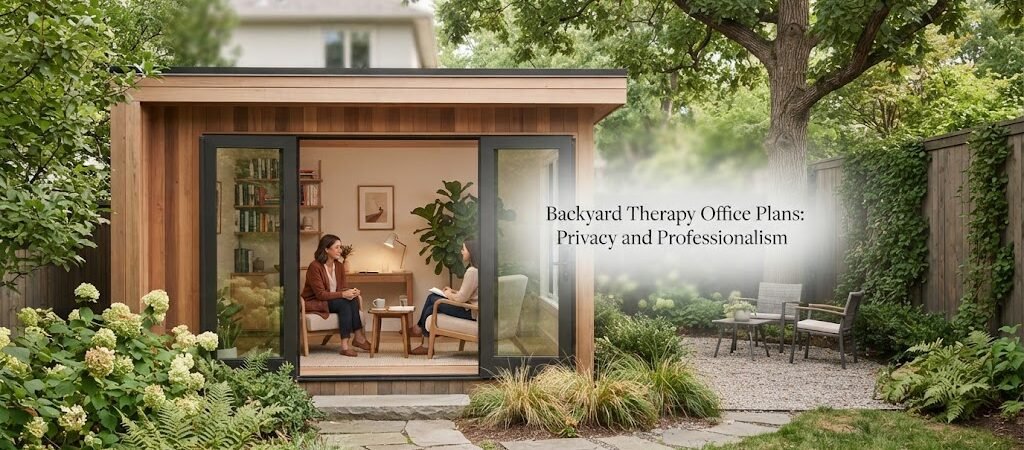
If you’re a therapist, counselor, or coach thinking about seeing clients from a space in your backyard, the two things that matter most are privacy and how professional the space feels. A converted garage corner or a spare bedroom just doesn’t cut it once you’re bringing clients into your home life. A dedicated backyard therapy office solves both problems, but only if it’s planned the right way from the start.
Privacy Comes First
Clients need to feel like what they say in your office stays in your office. That means sound control isn’t optional, it’s the whole point of the building.
Standard shed-grade walls won’t block conversation the way a therapy practice needs. You’ll want double-layer drywall, insulation rated for sound (not just temperature), and solid-core doors instead of hollow ones. Even small details matter, like weatherstripping around the door to stop sound from leaking through gaps. Some therapists also add a white noise machine near the entrance or waiting area as a backup layer, since no wall assembly blocks sound completely.
Window placement matters too. A window facing a shared fence line or a neighbor’s patio can undo a lot of your soundproofing work. Positioning windows toward your own yard, or using higher transom-style windows instead of low ones, keeps sessions private without making the room feel closed off.

A Separate Entrance Changes Everything
One of the biggest differences between a backyard therapy office and a regular home office is the entrance. Clients shouldn’t walk through your kitchen or past your family’s living space to get to their session. A private path from the driveway or street directly to the office door keeps your home life and your practice separate, and it makes clients feel more comfortable too.
If your lot allows it, a short walkway with its own gate creates a clear boundary. This also helps with scheduling back-to-back clients, since one person can leave without walking past someone waiting to come in.
Waiting Space and Flow
Even a small therapy office benefits from a buffer zone before the actual session room. This doesn’t need to be a full waiting room. A covered porch area, a small entry nook with a bench, or even a wider hallway can work. The goal is giving clients a spot to settle in without immediately being face to face with you the second they arrive.
Inside, think about the flow of the space. A good layout usually includes:
- A session room sized for two comfortable chairs and a little breathing room, often 10 by 12 feet or larger
- A small entry area separate from the session room itself
- Storage for files, supplies, or a locked cabinet for records
- A restroom, if your setup allows for the plumbing
That last point is where things get more involved. A restroom means running water lines and drainage out to the backyard, which is a bigger project than a simple wired shed. If you’re already planning plumbing and a slightly larger footprint, it’s worth looking at resources built around fuller backyard living spaces. An ADU and small home blueprint guide can help you think through utility planning if your therapy office is going to include a bathroom or grow into a more complete detached space down the road.
Making It Feel Professional, Not Homemade
Clients pick up on details. A space that feels like a converted tool shed with a desk shoved in doesn’t build the same trust as one that feels intentional. A few things go a long way here:
Good lighting matters more than people expect. Harsh overhead lighting can make a session room feel clinical in the wrong way. A mix of soft ambient lighting and one or two lamps usually reads as calmer and more welcoming.
Flooring should hold up to daily foot traffic but still feel warm. Vinyl plank or engineered wood works well and is easier to keep clean than carpet, which can hold odors over time in a small enclosed room.
Climate control isn’t just about comfort. A mini-split heat pump keeps the space quiet, which matters a lot more here than in a typical backyard office, since a loud window unit can interfere with confidential conversations or just be distracting during a session.
Internet and Basic Tech Needs
Most therapy practices these days run partly on telehealth, so a reliable internet connection matters. Running an ethernet line from your house instead of relying only on WiFi cuts down on dropped video calls. If you’re doing video sessions, think about where the desk or chair sits relative to windows and lighting so video calls don’t end up backlit or washed out.

Zoning and Business Use
This is the part that varies the most depending on where you live. Running a home-based business, even a quiet one like a therapy practice, sometimes triggers different rules than a plain backyard office used only for your own remote work. Some areas require a home occupation permit, others limit the number of clients you can see per day, and some have no restrictions at all. It’s worth checking with your local planning department before finalizing your design, since this can affect things like parking requirements or whether a separate entrance is even allowed under your zoning.
Planning for the Long Run
A well-built therapy office can also flex over time. If your practice grows and you eventually want to bring on another therapist part time, or if you ever want to repurpose the space for something else entirely, building it with good bones now saves you from a bigger renovation later. If you’re weighing a larger, more flexible detached structure on your property rather than a single-purpose office, a broader home plan collection can be a useful starting point for comparing layouts.
Getting privacy and professionalism right in a backyard therapy office isn’t about adding luxury touches. It’s about sound control, a thoughtful entrance, and a layout that respects both your clients and your own home life. Get those basics right, and the rest of the design falls into place a lot more easily.