
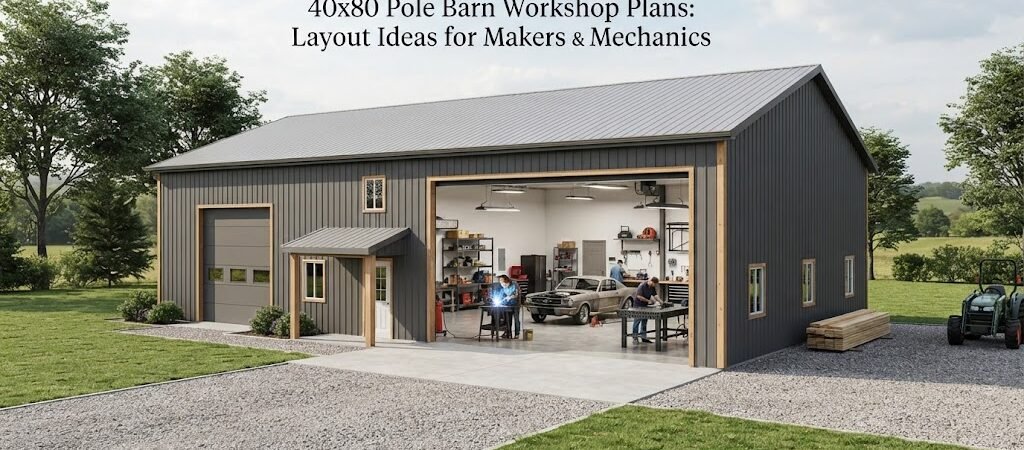
A 40×80 pole barn gives you a lot of room to work with. With 3,200 square feet under one roof, you can build a serious workshop without giving up space for vehicles, equipment, storage, or future projects.
The challenge isn’t finding enough space. It’s deciding how to use it.
A good workshop layout should fit the way you actually work. A mechanic may need wide vehicle bays, a lift area, tool storage, and room to move around a vehicle. A woodworker or metalworker may care more about workbenches, machines, material storage, and clear paths between stations.
The best pole barn plans give you a starting point, but the final layout should match your tools, vehicles, workflow, and plans for the building.
Start With the Work, Not the Walls
Before drawing rooms or placing doors, make a list of what needs to happen inside the building.
Think about your largest equipment first. Will you work on tractors, trucks, trailers, cars, or motorcycles? Do you need room for a welding table, saws, a drill press, a compressor, or woodworking machines?
Then consider the things that take up less floor space but still matter. Shelving, cabinets, lumber racks, parts storage, workbenches, and tool chests can quickly fill a shop.
It also helps to think about what moves through the building. A vehicle may need to enter, turn, back out, and leave without passing through your main work area.
Once you know these needs, dividing the 40×80 footprint becomes much easier.

Layout Idea: Separate the Shop Into Work Zones
One simple approach is to divide the building into several zones rather than creating lots of small rooms.
For example, you might use part of the building for vehicle work, another area for fabrication or woodworking, and the remaining space for storage.
This keeps related tools together while leaving enough open floor area for large projects.
A mechanic-focused layout might include:
- Two or more vehicle work areas
- A dedicated tool and parts wall
- A workbench area
- Compressor and utility space
- Storage for tires, fluids, and parts
- Open floor space for moving vehicles and equipment
A maker-focused shop could instead have separate areas for woodworking, metalworking, assembly, and finishing.
The zones don’t have to be separated by permanent walls. In many workshops, cabinets, shelving, benches, or partial partitions can create useful boundaries without making the building feel cramped.
Layout Idea: Put Vehicles Along One Side
If the building will serve as both a garage and workshop, placing vehicle bays along one side can work well.
The opposite side can become the main work area.
This arrangement creates a simple flow. Vehicles enter the garage side, while tools, benches, machines, and storage stay mostly on the workshop side.
A wide overhead door can make moving vehicles and equipment in and out easier, but door placement should be based on the site and how you plan to approach the building.
Don’t forget the space around each vehicle. A vehicle can technically fit in a bay while still being difficult to work on. You need room for doors to open, tools to move, and people to walk around the vehicle.
For more ideas, comparing garage and workshop blueprints can help you see how vehicle space and shop space can work together.
Layout Idea: Give Makers a Dedicated Production Area
Makers often need a different kind of layout than mechanics.
A woodworking shop, for example, may need space for a table saw, planer, jointer, workbench, assembly table, and lumber storage. Metalworkers may need welding space, a metal-cutting area, fabrication tables, and storage for steel.
Try to arrange machines according to the order you use them.
For woodworking, raw boards might come in through the main door, move to storage, then go through cutting and milling before reaching the assembly area. Finished projects can then move toward a separate storage or loading area.
This sounds simple, but it can save a lot of walking and carrying.
Leave open floor space around machines that require long material to pass through. A machine may have a small footprint but still need a much larger working area.
Layout Idea: Use the Ends for Storage
The 80-foot length of the building creates an opportunity to put storage where it doesn’t interfere with daily work.
One end could hold seasonal equipment, spare materials, lawn equipment, or rarely used tools. Another section could be used for lumber, sheet goods, metal stock, or project storage.
Tall storage can also make good use of wall space.
Instead of covering the middle of the shop with cabinets and bins, use the perimeter where possible. Wall-mounted storage, shelving, and racks can keep the floor clearer.
Just make sure stored materials won’t block doors, electrical panels, equipment access, or required clearances.
Think Carefully About Door Placement
Doors have a major effect on a workshop layout.
For a mechanic, the main overhead door should make it easy to line up a vehicle and get it inside without awkward turns. For a maker, a large door can also be useful for bringing in lumber, machinery, trailers, and finished projects.
Walk doors matter too. You may want a separate entrance near the office, workbench, or main pedestrian path.
Window placement deserves some thought as well. Natural light can make a workshop more pleasant and reduce the need for artificial lighting during the day. But windows should be placed where they won’t interfere with cabinets, shelving, equipment, or future wall storage.
Plan Utilities Before Construction
A workshop needs more than floor space.
Think about electricity, lighting, water, compressed air, heating or cooling, and ventilation before the building is finished. The right setup depends heavily on the tools and equipment you plan to use.
For example, a welding area may need different electrical and ventilation considerations than a simple woodworking bench. A vehicle shop may need utility locations that work with lifts, compressors, chargers, or other equipment.
It’s much easier to plan these systems before construction than to redesign the shop later.
Electrical circuits, equipment connections, ventilation, and other building systems should be designed and installed according to applicable local requirements and by qualified professionals where needed.
Don’t Fill Every Square Foot
A common planning mistake is trying to use every bit of available floor space.
A workshop needs breathing room.
You need space to walk around projects, move materials, open doors, position tools, and occasionally build something much larger than expected. That empty space may look unnecessary on paper, but you’ll appreciate it once the shop is in use.
It’s also worth planning for future equipment. You may not own a large machine today, but adding one later can completely change how the shop works.
A flexible layout is usually more useful than one that looks perfect when it’s empty.
Consider a Small Office or Clean Area
A 40×80 building can potentially include more than one type of space.
If you’ll use the building for a business or serious hobby, a small office, parts room, clean assembly area, or break space may be useful.
Keep cleaner spaces away from grinding, welding, sawdust, and vehicle repair when possible.
You don’t necessarily need a full interior build-out. Even a simple partition can help separate dusty or noisy work from paperwork, electronics, or finished projects.
If your long-term plan includes living space as well as a workshop, explore barndominium planning resources before locking in the building layout. Combining living and shop space requires different planning decisions than a stand-alone workshop.

Check the Site Before Finalizing the Plan
A great floor plan can still be a poor fit for the property.
Look at where the building will sit, how vehicles will approach it, where driveways will go, and how doors will face the site. Consider drainage, slopes, access for construction equipment, and the location of existing utilities.
Local rules can also affect setbacks, permits, foundation details, height, and other parts of the project. Those requirements vary by location, so check with the appropriate local authorities and your building professionals before construction.
The building’s structural design also needs to account for local conditions such as soil, wind, snow, and other loads. A general layout idea isn’t a substitute for site-specific engineering where engineering is required.
Make the Plan Fit Your Future
The best 40×80 workshop isn’t necessarily the one with the most rooms or the most equipment packed inside.
It’s the one that supports the way you’ll use it.
If you’re a mechanic, prioritize vehicle access, working clearance, tools, parts, and equipment. If you’re a maker, focus on workflow, machine placement, material handling, and project space. If the building needs to do both, divide the space into flexible zones and protect a good amount of open floor area.
Before you settle on a layout, compare different pole barn building plans and look at how other footprints handle garages, workshops, storage, and larger work areas.
A few hours spent thinking through the layout can save a lot of frustration after the building is up.
If you’re still working through the design, starting with a collection of pole barn plans and workshop layouts can give you practical ideas to adapt to your property, equipment, and budget.
Would you build yours mainly for mechanic work, woodworking, or a mix of both?