
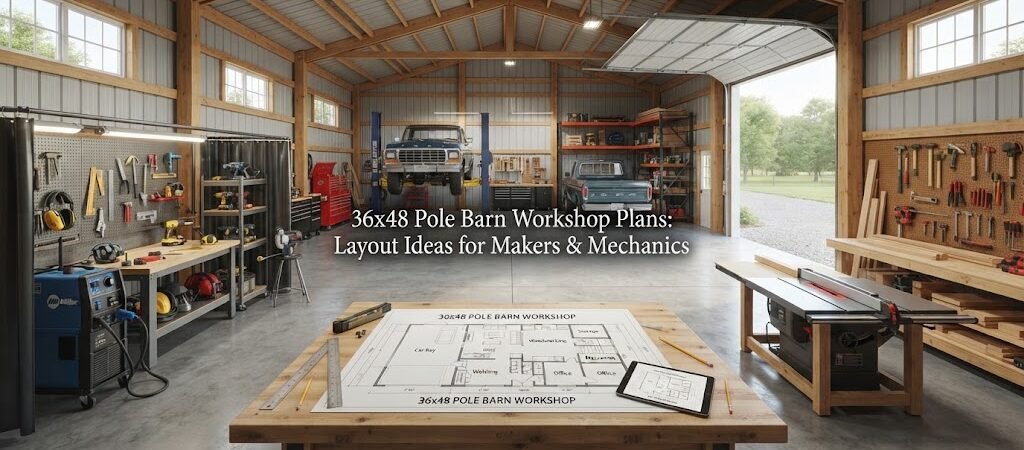
A 36×48 pole barn gives you 1,728 square feet to work with. That’s a substantial workshop, but it can still feel cramped if the layout isn’t planned around the work you actually do.
The extra width and length give you more choices than a smaller shop. You can create separate work zones, keep vehicles indoors, add serious storage, or leave open floor space for large projects. The key is deciding what belongs in the building before you start placing doors, benches, and equipment.
For makers, mechanics, farmers, and property owners, a 36×48 workshop can be a very flexible building. Here’s how to make the most of it.
Start With the Jobs You Need to Do
Don’t start by deciding where the workbench goes. Start with the work.
Think about what you’ll build, repair, store, or maintain inside the shop. Will you work on cars and trucks? Build furniture? Weld? Repair farm equipment? Store a trailer? Maybe the building needs to handle several of these jobs.
Make a list of the largest equipment and materials you’ll bring inside. Include vehicles, tractors, workbenches, machinery, lumber, sheet goods, trailers, and anything else that takes up meaningful floor space.
Then think about movement.
A good shop lets materials move from storage to the work area without crossing through several obstacles. Vehicles should have a clear path to their parking or repair area. Tools you use every day should be easy to reach.
Comparing different pole barn layouts can be useful at this stage because it lets you see how other floor plans divide space between work, storage, and vehicle areas.

An Open 36×48 Workshop Layout
The simplest option is one large open room.
This layout works well when the building has several uses or when you expect your needs to change. Without interior walls, you can move benches, machinery, vehicles, and storage as your projects change.
One approach is to keep the center of the building open and place most permanent storage along the outside walls. Workbenches can sit against one long wall, while another wall handles cabinets, shelving, and material storage.
The open center then becomes flexible space. A vehicle can come in for repairs, a large project can be assembled there, or equipment can be moved around as needed.
The downside is that everything shares the same space. Welding, woodworking, vehicle repair, and clean assembly work may compete for room. Good zoning can help even when there aren’t physical walls.
A Layout for Mechanics and Vehicle Work
A 36×48 building has enough room to make vehicle work a major part of the design.
You might use one portion of the building for vehicle bays and reserve another section for tools, parts, storage, and fabrication. The exact arrangement depends on the vehicles you’ll service and the equipment you plan to use.
Large overhead doors deserve careful attention. Position them so vehicles can enter and leave without difficult turns. If you’ll bring in tractors, trailers, or other large equipment, plan for those items too.
Try drawing the largest vehicle on your floor plan before placing benches or cabinets. Include the space needed to open doors, walk around it, and move tools.
If you plan to install specialized equipment, such as a vehicle lift or heavy machinery, that needs to be considered during the design stage. The building structure, slab or floor system, equipment requirements, and local engineering requirements all need to be evaluated for the specific project.
For more ideas, browse garage and workshop blueprints to compare different ways of combining vehicle space with dedicated shop areas.
A Maker’s Workshop With Dedicated Zones
Makers often need several types of workspace in one building.
A woodworking area might need room for cutting and assembly. A metalworking area may need a welding table and space around it. Electronics or small craft work may need a cleaner bench away from dust and sparks.
You don’t necessarily need walls between these areas.
Instead, use the 36×48 floor plan to create zones. Put similar tasks together and keep a clear route through the building.
For example, a woodworking zone could run along one side wall. A fabrication bench could sit farther away from sawdust-producing equipment. The center could remain open for assembly and larger projects.
This kind of setup gives you some separation without sacrificing the flexibility of an open shop.
Combining Vehicles and Workshop Space
If the building needs to serve both as a garage and a workshop, divide the floor based on traffic.
One end can handle vehicle storage or repair while the opposite end stays available for benches, machinery, and projects. Side-wall storage can act as a natural boundary between the two areas.
Another option is to keep the vehicles toward one side and put the work area along the other. This can work especially well if the building has multiple large doors.
Before settling on the arrangement, draw the vehicles and major equipment to scale. A pickup truck, tractor, trailer, or boat can use more room than expected once you account for doors and walking space.
Using the Extra Width for Storage
The 36-foot width gives you more freedom with storage than a narrow workshop.
Long walls can hold cabinets, shelving, lumber racks, parts storage, and hand tools. But don’t fill every wall with permanent storage.
You’ll need open wall sections for doors, windows, electrical equipment, and possibly future changes.
Think about storage in three groups: items you use constantly, items you use occasionally, and things you simply need to keep on the property.
Daily tools should be close to the main work area. Seasonal equipment can go farther away. Large materials may need a dedicated storage area where they can be loaded and unloaded without blocking the shop.
Vertical storage can also make a big difference, provided it can be accessed safely.
Plan the Doors Around Your Equipment
A workshop this size may have several doors, depending on its intended use.
The main overhead doors should match the equipment entering the building. Don’t choose door locations only because they look balanced on the exterior.
Think about the approach from outside, too. A large trailer needs a different access path than a passenger car.
A regular entry door can be useful for everyday access. Windows can provide natural light and visibility, but their locations should be coordinated with benches, shelving, machinery, and the building’s structural layout.
It’s much easier to make these decisions before construction than after the walls are finished.
Lighting and Electrical Planning
A large workshop needs more than one ceiling light.
Start by thinking about general lighting for the entire building. Then add task lighting where detailed work will happen.
Workbenches, machinery, assembly tables, and inspection areas may each need their own lighting arrangement.
Electrical planning should happen early as well. Mark where you’ll likely need outlets and what equipment will use them. Larger tools and machinery may have different electrical requirements, so those should be reviewed before the electrical system is designed.
If you’ll weld, paint, run engines, or create dust and fumes, plan ventilation around the work areas. The right setup will depend on the work, equipment, climate, and building design.
Should You Add a Small Enclosed Room?
With 1,728 square feet, you have enough room to consider an enclosed office, tool room, bathroom, or clean workspace.
But every wall you add takes away from the open shop.
If you need an office, placing it along an end wall can preserve more of the main floor. A small enclosed tool room can also be useful if you want to keep expensive or delicate equipment away from dust.
Think carefully before dividing the building into too many rooms. The main benefit of a large workshop is the open space, especially if you work on vehicles or large projects.
If the project is growing into a building with living quarters, take a different approach and review a barndominium planning guide before deciding on the floor plan.
Plan for Materials, Not Just Finished Projects
It’s easy to forget how much room raw materials require.
Lumber, plywood, steel, pipe, sheet goods, fasteners, and spare parts all need somewhere to go. Some materials are long and awkward. Others need to stay dry, clean, or protected from damage.
Plan storage around the materials you actually use.
A lumber rack near the woodworking area may save a lot of carrying. Parts cabinets near the mechanic area can keep small items organized. A dedicated corner for sheet goods can prevent them from leaning against random walls.
Good storage isn’t just about having more shelves. It’s about putting things where you’ll naturally use them.
Leave Room for Future Equipment
A common mistake is designing the shop around every piece of equipment you already own.
That can leave little room for anything new.
Instead, try to keep some flexible floor space. You may eventually add a larger workbench, another machine, a different vehicle, or equipment for a new hobby.
Mobile worktables and machines can be especially useful in a multi-purpose shop. Permanent installations make sense for equipment you know you’ll use in the same place for years.
The right balance depends on how stable your needs are.

Draw the Layout Before Construction
You don’t need complicated software to test your ideas.
Draw a rectangle representing the 36×48 building. Mark doors and windows. Then add the largest objects first.
Draw vehicles, tractors, trailers, benches, machines, storage racks, and assembly tables. Leave space around each one for actual use.
Then trace the routes you’ll take through the building.
Can you walk from the main door to the workbench without crossing a vehicle bay? Can you bring a long board from storage to the saw? Can a tractor get inside without hitting storage? Can you move a large project through the building?
If something doesn’t work on paper, it probably won’t work better in the finished shop.
Choosing a 36×48 Pole Barn Plan
The best 36×48 pole barn workshop plan isn’t necessarily the one with the most rooms or the most equipment.
It’s the one that fits your work.
A mechanic may want large vehicle bays and easy equipment access. A woodworker may need better material flow and dedicated machine areas. A farmer may want a mix of equipment storage, repair space, and general workshop space.
Start with your largest needs, then work down to smaller details.
Also remember that structural design, foundation or floor details, insulation, utilities, wind and snow loads, soil conditions, and local requirements can vary by location. A building plan is a starting point, not a substitute for project-specific professional design where it’s required.
Final Thoughts
A 36×48 pole barn gives you plenty of room to build a serious workshop, but space alone doesn’t create a good shop. The layout has to match the way you work.
Keep major traffic paths clear. Put storage where it makes sense. Plan doors around your largest equipment. Give yourself good lighting and enough electrical access. Most of all, leave some room for the projects and equipment you haven’t bought yet.
Before you settle on one layout, compare pole barn building plans and pay attention to how each design handles doors, storage, vehicle access, and open workspace.
A little time spent moving things around on paper can make the finished workshop much easier to use every day.