
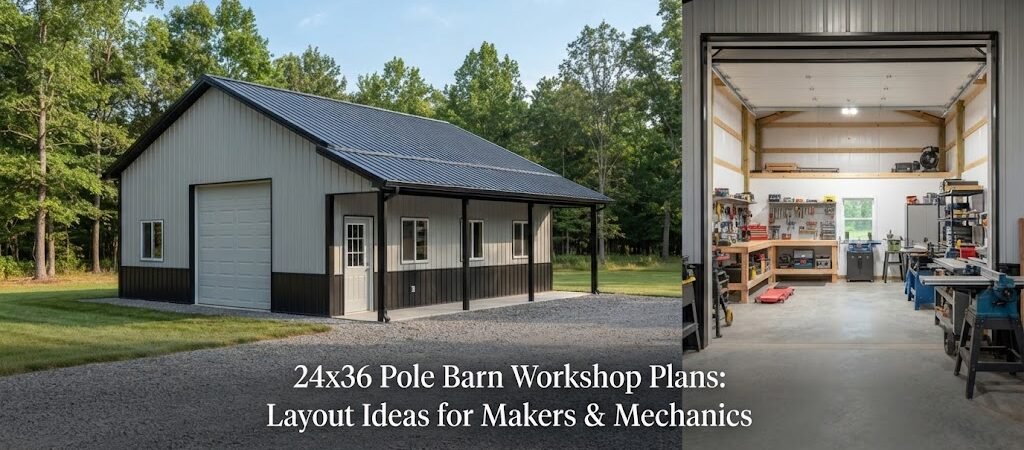
A 24×36 pole barn gives you 864 square feet to work with, which is enough room for a serious workshop without taking up the space or budget of a much larger building. The trick is planning the layout before construction starts.
A good workshop needs more than open floor space. You need room for vehicles, benches, tools, lumber, equipment, doors, and safe walking paths. You also need to think about how you’ll actually use the building on a normal workday.
Whether you’re building a shop for woodworking, auto repair, farm projects, welding, or several hobbies at once, a 24×36 layout can be surprisingly flexible.
Start With How You Work
Before drawing walls or placing doors, make a list of the jobs you’ll do inside the building.
A maker who builds cabinets has different needs from someone restoring cars. A mechanic may need a large open bay and space around a vehicle. A woodworker may care more about long work surfaces, material storage, and dust collection.
Think about the largest things that will enter the shop. This could be a pickup truck, tractor, motorcycle, trailer, or large piece of equipment. Then consider the materials you’ll bring inside.
For example, if you regularly work with 8-foot or longer boards, don’t design a layout that forces those boards through a maze of benches and machinery. Give yourself a clear path from the main door to the storage or cutting area.
Looking at different pole barn plans before settling on a layout can also help you compare door placement, room arrangements, and overall building proportions.

A Simple 24×36 Open Workshop
The easiest layout is one large open room.
With no interior walls, the full 24-foot width and 36-foot length remain available for equipment and projects. This works especially well when the building has several uses.
One end can serve as the main work area, while the other end handles storage. Shelving can run along the long walls without breaking up the center of the shop.
An open layout also makes it easier to move a vehicle or piece of equipment inside. You can rearrange benches and machines as your needs change.
The downside is that everything is visible and exposed. If you want a clean office, bathroom, utility room, or heated finishing area, you’ll need to give up some of that open floor space.
Layout Idea for a Mechanic
For an auto or equipment shop, think about the building as a series of working zones rather than just empty floor space.
A vehicle can sit lengthwise in the building, with workbenches and storage along one or both sides. The large vehicle door should be positioned so the vehicle can enter without awkward turns.
A typical arrangement might put the main overhead door on one 24-foot end wall. The vehicle occupies the center of the shop, while benches, cabinets, compressors, and hand tools stay along the side walls.
Leave enough working room around the vehicle for doors to open and for you to move tools and equipment. The exact clearance you’ll want depends on the vehicles and equipment involved.
If you plan to work on tractors, boats, trailers, or other large equipment, draw those items to scale before finalizing the building. A space that looks large on paper can get tight quickly once equipment is inside.
Layout Idea for a Woodworking Shop
Woodworking calls for a different approach.
Instead of putting everything around the walls, consider how material moves through the shop. A board may need to go from storage to the saw, then to an assembly table, and finally to a finishing or storage area.
A long wall can work well for lumber storage. Smaller tools and supplies can go into cabinets or shelves above a workbench.
Try to keep the center of the shop flexible. A large assembly table can become the heart of the workspace, while mobile tools can be moved when you need extra room.
Dust-producing tools should also be planned with ventilation and dust collection in mind. Electrical outlets, lighting, and equipment locations are much easier to plan before the building is finished.
For smaller woodworking projects, shed and workshop plans can also provide useful ideas for benches, storage, and compact work areas.
A Combination Maker and Mechanic Shop
A 24×36 building doesn’t have to serve just one purpose.
If you work on vehicles but also enjoy woodworking, metalworking, or fabrication, divide the building into zones instead of building permanent rooms.
For example, one side could hold a workbench, tool cabinets, and smaller machines. The other side could stay mostly open for vehicle work. Shelving at the rear can provide general storage.
This approach keeps the main floor flexible. You can pull a vehicle into the shop when needed and still have a dedicated area for smaller projects.
Be careful about placing permanent benches where they could interfere with doors, vehicle movement, or large equipment.
Where Should the Doors Go?
Door placement can make or break a workshop layout.
A large overhead door on the 24-foot end wall is a natural choice when vehicles are entering the building lengthwise. A side door can provide everyday access without opening the large door every time you walk in.
You might also want a second large door if you regularly move equipment through the building. Whether that’s worthwhile depends on the property, equipment, and how the shop will be used.
Windows are worth planning at the same time. Natural light can make a workshop more pleasant during the day, while windows placed above benches can provide useful light without taking up valuable wall space.
Door and window locations should also be coordinated with the framing system, utilities, work surfaces, and any future insulation or interior finish.
Plan Storage Before You Need It
Workshops have a way of filling up.
Tools are only part of the problem. Lumber, sheet goods, fasteners, spare parts, paint, hardware, seasonal equipment, and unfinished projects all need somewhere to go.
Use vertical space where practical. Wall-mounted cabinets and shelving can keep smaller items off the floor. Long materials may need dedicated racks.
Don’t forget overhead storage, but make sure anything stored there can be accessed safely and doesn’t interfere with doors, lights, or equipment.
A simple storage wall at one end of the 36-foot building can be very useful. It keeps the middle open while giving you a clear place for items that don’t need to be within arm’s reach.
Think About Utilities Early
It’s much easier to plan utilities on paper than after the walls are finished.
Mark likely locations for electrical outlets, lights, switches, heating or cooling equipment, compressed air, water, and other services you’ll need. The final design depends on your local conditions and the type of work you do.
Lighting deserves special attention. A workshop usually benefits from even general lighting plus brighter task lighting over benches and machines.
If you’ll weld, paint, run engines, or use products that produce fumes or dust, ventilation should be part of the planning process. The right setup depends on the work being done and the building design.
Should You Add an Interior Room?
Some owners want a small office, bathroom, tool room, or heated workspace inside the pole barn.
That’s possible, but remember that every enclosed room takes space away from the main workshop.
For a 24×36 building, even a modest partition can noticeably change the way the rest of the shop works. If you need a clean room for paperwork or electronics, placing it along one end may make sense. If maximum floor space is the priority, keeping the building open may be better.
If your project is starting to include living space, bedrooms, or a full residential area, it’s worth moving beyond a simple workshop layout and reviewing a barndominium planning guide before committing to the design.
Draw the Layout Before Building
You don’t need fancy software to test a workshop layout.
Start with a simple scaled drawing of the 24×36 floor. Mark every door and window. Then add the largest items first, such as vehicles, tractors, workbenches, machinery, storage racks, and assembly tables.
After that, draw the walking paths.
Ask yourself a few basic questions:
Can you open a vehicle door without hitting a bench? Can you carry a long board from storage to the saw? Can equipment move through the main door? Is there enough room to work safely around machines? Can you reach the tools you use most often without crossing the entire shop?
Move things around until the answers make sense.
This small planning step can save a lot of frustration later.

Don’t Forget Future Changes
Your workshop may not look the same five years from now.
You might buy a larger tractor, add a welding table, start woodworking, or turn part of the shop into a small business workspace. Try not to design every inch around the equipment you own today.
A little open floor space can be more valuable than another permanent cabinet.
It also helps to think about whether you’ll insulate the building, add interior walls, or upgrade utilities later. Your final construction plans should account for the conditions at your property and any local requirements that apply.
Choosing the Right 24×36 Pole Barn Plan
There isn’t one perfect 24×36 workshop layout. The best plan is the one that fits the way you work.
For a mechanic, that may mean a wide-open vehicle bay with storage around the edges. For a woodworker, it may mean a material-to-machine workflow with strong task lighting. For a farmer or property owner, flexibility may matter more than having a highly specialized shop.
Before choosing a final design, compare several garage and workshop blueprints and pay close attention to door locations, storage, work areas, and traffic flow.
A good plan should help you picture the finished building before you spend money on materials.
Final Thoughts
A 24×36 pole barn workshop is large enough to create a useful, comfortable work area, but it’s not so large that you can ignore the layout. The biggest gains usually come from smart zoning, good door placement, practical storage, and leaving enough open space to move around.
Start with your actual projects. Draw the equipment to scale. Plan storage and utilities early. Then build the layout around how you expect to use the shop, not just how it looks on paper.
If you’re still comparing layouts, start with pole barn plan collections and look for designs that match your work style, equipment, and future plans. A little time spent comparing plans now can make the finished workshop much easier to use for years to come.