
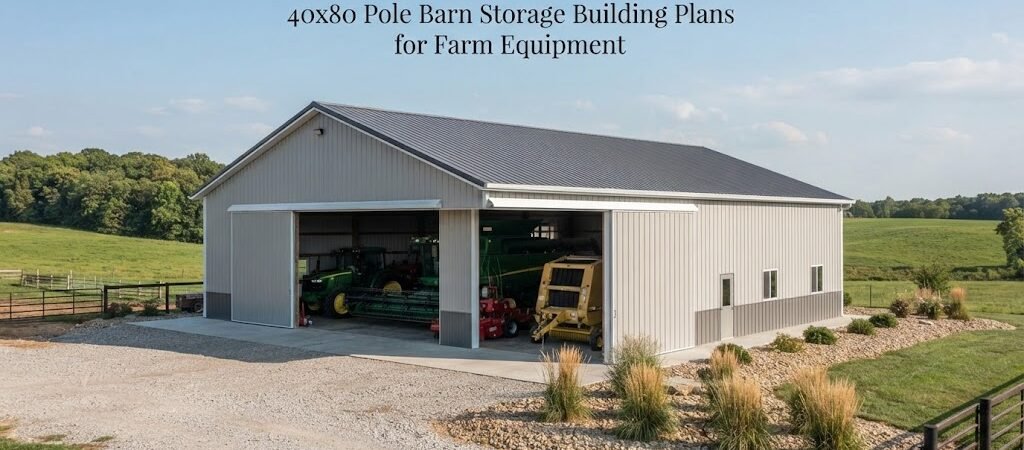
A 40×80 pole barn hits a sweet spot for a lot of farms and rural properties. It’s big enough to store real equipment, wagons, attachments, seed, and tools, but it’s not so huge that it’s hard to build or hard to afford. If you’re looking up 40×80 pole barn storage building plans, you’re probably trying to answer a few practical questions fast:
Will my equipment fit?
Where do the doors go?
Do I want a concrete floor or gravel?
How tall does it need to be?
Let’s walk through the planning pieces that matter most, in plain language.
Start With a Real Plan: pole barn plans
A “40×80” tells you the footprint, not how the building works day to day. The best plans show the boring but important stuff: door locations, post spacing, truss layout, overhangs, and how traffic flows inside.
If you’re still comparing ideas, flipping through pole barn plans helps because you’ll see common layouts that are proven to work, not just a rectangle on paper.

What a 40×80 Storage Building Is Good At
A 40-foot width is popular because you can usually get a clean interior layout without a lot of posts in your way (depending on your design and engineering). An 80-foot length gives you room to separate zones. That’s the part most people forget. You’re not just building a “shed,” you’re building a system.
Common uses for a 40×80 farm equipment building:
- Parking tractors, skid steers, mowers, and implements
- Storing hay or feed (if the building is designed and ventilated for it)
- Keeping wagons and trailers under roof
- Adding a small service bay for oil changes and repairs
- Locking up tools, chemicals, and batteries away from weather
The size is also friendly for future upgrades, like enclosing a heated shop corner later.
Measure Equipment First (Then Pick Door Sizes)
Before you decide anything else, make a simple list of what you want inside. Don’t guess. Measure:
- Overall length (including any hitch, bucket, or header cart)
- Overall width (mirrors, duals, headers, folded booms)
- Overall height (cab roofs, beacon lights, exhaust stacks, A/C units)
Door width: avoid “it barely fits”
If you’ve ever threaded a tractor through a tight door, you know how this goes. Give yourself room for snow stuck to tires, a slightly crooked approach, and a new piece of equipment five years from now.
People often mix door types on a 40×80:
- A couple of big doors for equipment
- One smaller door for daily walk-in access
- Maybe a wide door on the opposite end for drive-through
Door height: think about the tallest thing you own
Height problems show up later, when the building is done and the quote is paid. Door height and eave height need to match your equipment reality, not your best guess. This is also where local snow loads and building design can affect roof shape and interior clearance, so it’s worth slowing down and getting it right.
Layout Ideas That Work Well in a 40×80
A good 40×80 pole barn plan usually falls into one of these practical layouts.
1) Straight storage with a center drive aisle
This is the “easy to live with” layout. You set doors so you can pull in, park, and back out without doing a 12-point turn. A center aisle with storage on both sides keeps things organized.
Good for: mixed equipment and implements, lots of in-and-out during the season.
2) Drive-through from end to end
If you can place big doors on both 40-foot ends, drive-through is hard to beat. It’s especially handy if you’re parking longer trailers or you hate backing up in tight spots.
Good for: trailers, wagons, anything long.
3) Split use: storage plus a shop corner
A 40×80 is big enough to carve out a work area without sacrificing all your parking space. Even a smaller shop corner for a bench, vise, and parts shelves changes how useful the building feels.
If you want that shop corner to function like a real workspace, it can help to look at garage and workshop blueprints for ideas like tool wall space, a service door location, and where to put a compressor.
4) Add a lean-to for “dirty” storage
If the plan allows it, a lean-to off one long side is great for things you don’t mind being more exposed, like gates, bale rings, or a trailer that can handle weather. It also keeps the main interior cleaner.
Lean-tos change the look and the drainage plan, so they’re not an afterthought. They should be part of the plan from the start.
Post-Frame Basics (The Stuff Plans Should Show)
Most 40×80 pole barns are post-frame buildings. The posts carry the load down into the ground (or into a footing system), and the walls and roof frame off that structure. A complete plan should call out:
- Post layout (spacing and locations)
- Truss style and spacing
- Purlins and girts layout
- Bracing and shear details
- How the roof and walls tie together
Exact member sizes and connection details depend on your location, soil, wind, snow load, and the final design. That’s where engineered drawings (or a qualified designer) matter. A plan that ignores those factors can cost you later.
Height, Roof Pitch, and Overhangs (Don’t Skip These)
Eave height drives usability
People focus on width and length, but height decides what you can actually park inside. It also affects how well you can add future things like a hoist point, tall shelves, or even a partial loft.
Roof pitch affects snow, looks, and interior feel
Steeper roof pitches shed snow better in many climates, but they can cost more in materials and labor. Your region and your building supplier will usually have common pitches they recommend.
Overhangs are worth it for a storage building
Overhangs help keep rain off the sidewalls and away from your posts, and they help protect doors. They also help with ventilation if you’re using soffit vents.
Floor Options: Gravel vs Concrete (And a Smart Middle Ground)
There’s no single “right” floor for a farm equipment pole barn.
Compacted gravel
Gravel is common for straight storage. It’s cheaper up front and can be repaired easily. The key is doing the base right: proper fill, proper compaction, and good drainage outside the building so water doesn’t pump up through the floor.
Concrete slab
Concrete is nice if you’re rolling jacks, working on equipment, or storing things that don’t like dust and moisture. The slab design (thickness, reinforcement, thickened edges, vapor barrier) depends on use and local conditions, and it should match your building and soil.
Hybrid approach
A lot of owners do a gravel equipment area and a concrete strip or pad in a work bay. That gives you a clean workspace without paying for concrete everywhere.
Ventilation and Condensation Control (Metal Buildings Sweat)
If you’re doing metal roofing and siding, plan for moisture from day one. Condensation can drip onto equipment, rust tools, and wreck cardboard storage.
Good plans make room for basic ventilation like:
- Ridge vent plus soffit vents
- Gable vents (sometimes used, not always enough alone)
- A vapor barrier under a slab (if you pour concrete)
- A condensation control layer under the roof (options vary by system)
If you’re storing anything sensitive, or if you’ll heat a shop corner, insulation choices matter too. Just remember insulation isn’t just “stuff in the walls.” It’s a whole system with air sealing and ventilation.
Electrical, Lighting, and Security Planning
Even if you’re not wiring it right away, plan for it now so you’re not cutting holes later.
A few practical ideas:
- Put bright lighting down the main parking lane and at the doors
- Add outlets where you’ll actually use them (battery chargers, block heater, pressure washer)
- Consider a few exterior lights for night parking
- Plan a lockable room or cabinet area for chemicals, chainsaws, and small engines
This kind of detail is often shown better in full plan sets than in a quick sketch, which is why browsing a building plan collection can be helpful. You’ll see how other layouts handle real-life use.
Site Prep: Where the Building Sits Matters as Much as the Building
A perfect 40×80 plan won’t save you from a bad site.
Try to pick a spot with:
- Natural drainage away from the building
- A sensible driveway approach (especially for trailers)
- Enough room to turn around without tearing up the yard
- Clearance for future additions or another building
Also think about snow drifting (if that’s a problem where you live), and how wind hits big doors. A door that faces the “wrong” direction can be annoying for years.

Cost Drivers (What Changes the Price the Most)
It’s normal to search for a price, but exact numbers swing a lot by region and by year. Instead, it helps to know what pushes cost up or down:
- Building height and roof design
- Number and size of large doors
- Concrete work and site prep
- Insulation and interior finishes
- Window and personnel door count
- Steel gauge, paint system, trim packages
- Engineering and permit requirements in your area
If you’re budgeting, get clear on your “must-haves” versus “nice-to-haves,” then price those options with a local supplier or builder.
A Simple Next Step Before You Commit
A 40×80 pole barn can be a great farm equipment storage building, but it works best when it’s planned around your equipment and your workflow, not just the footprint.
If you want an easier way to compare door layouts, bay spacing, and storage versus shop setups, spend a little time looking through different pole barn layouts. It’s the fastest way to spot what you like, and what you’d change, before you ever break ground.
Closing Thoughts
A good 40×80 pole barn plan is less about the rectangle and more about the details: door placement, height, floor choice, drainage, and ventilation. If you take the time to measure your equipment and think through how you’ll pull in, park, and work, you’ll end up with a building that feels bigger than it is, and works hard for you for a long time.