
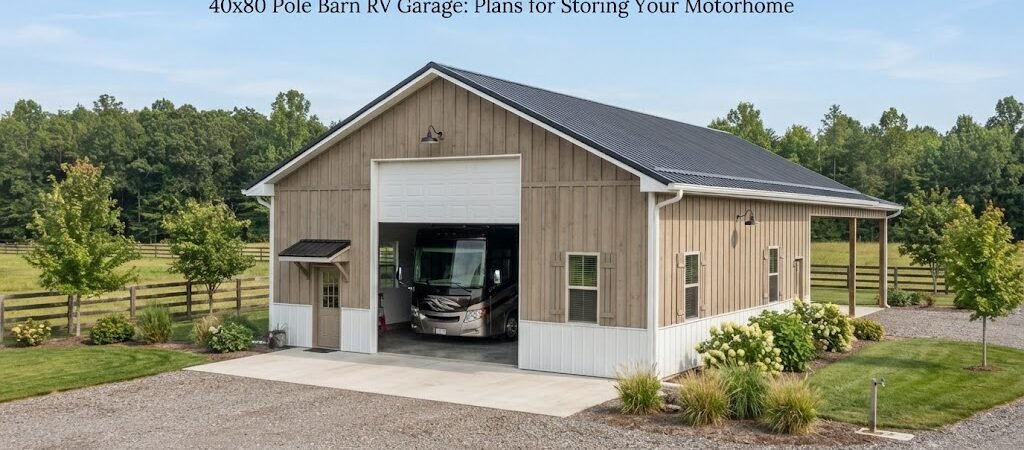
Owning a recreational vehicle changes the way you look at property space. Suddenly, that long toy hauler or Class A motorhome becomes the biggest thing you own, and finding a place to put it is a real headache. Leaving it exposed to the sun, rain, and snow wears out the roof, fades the paint, and can lead to water leaks much faster than you’d think.
Building a dedicated structure is really the only way to protect that investment. While a simple carport helps, a full enclosure offers security and a place to work on your rig when you aren’t traveling. A 40×80 pole barn has become one of the most popular sizes for this exact job. It sounds massive because it is, but when you break down the math of parking a large vehicle while keeping room for storage and workshops, that footprint starts to make a lot of sense.
Why Choose a 40×80 Footprint?
When people start looking at garage and workshop blueprints for an RV, they often underestimate how much room they actually need. A standard motorhome is roughly 8.5 feet wide and anywhere from 30 to 45 feet long. But you cannot just measure the vehicle and build a box that size.
You need clearance to open the slide-outs. You need room to walk around the unit without bruising your hips on the wall studs. You also need space for the steps that extend from the side. If your RV is 8.5 feet wide, you ideally want at least four or five feet of empty space on either side.
A 40-foot width solves the width problem immediately. If you center the RV, you have about 15 feet of usable floor space on both sides. That is enough room for a workbench on one side, deep shelving units for camping gear on the other, and still enough room to walk comfortably between them.
The 80-foot length handles the length requirement easily. Most RVs will fit into half of that length, leaving you with 35 to 40 feet of “leftover” space. This is where the value of a 40×80 building shines. You aren’t just building a garage; you are building a multi-purpose storage facility.

Figuring Out the Layout
Before you order materials or start digging post holes, you have to decide how you want the interior to function. Since this is a post-frame building, you have a lot of flexibility. You don’t always need interior load-bearing walls, which means you can arrange the inside however you like.
The Full Span Approach
Some owners prefer to keep the entire 3,200 square feet completely open. This is great if you have multiple vehicles or if you use the garage for agricultural equipment too. In an open layout, you can park the RV in the back and line the perimeter with tool chests, lawn mowers, kayaks, and seasonal decorations. It creates a massive man-cave or shop environment where you can work on projects with plenty of elbow room.
The Split Design
A very common way to utilize these different pole barn plans is to split the building down the middle or create separate bays. For example, you might designate a 40×50 section specifically for the RV and vehicles, and wall off the remaining 40×30 section.
That back section could become a dedicated woodworking shop, a mechanic’s bay with a car lift, or even a insulated hobby room. Putting up a partition wall is relatively inexpensive during the build phase compared to adding it later, and it allows you to heat or cool just the workspace without trying to climate-control the whole garage where the RV sits.
Planning for Doors and Access
Getting a 13-foot-tall vehicle inside a building requires more thought than driving a sedan into a standard garage. The door configuration is arguably the most critical part of your design.
For a 40×80 structure, you generally have three main options for entry.
The End-Entry Setup
This is the most traditional approach. You put a massive garage door, usually 14 feet wide by 16 feet high (or taller), on one of the 40-foot ends. You drive straight in. The downside here is maneuvering. Backing a 40-foot bus into a narrow opening takes skill. Also, once the RV is parked in that front bay, you might block access to the rest of the building unless you plan your parking angle carefully.
The Drive-Through (Pull-Through) Setup
This is often considered the “gold standard” for RV garages. You place large doors on both 40-foot ends. You drive in one side, park the rig, and when it’s time to leave, you drive out the other end. You never have to back up. This requires a larger lot because you need driveway aprons on both sides of the building, but it makes using the RV significantly less stressful.
The Side-Entry Option
If your lot is long and narrow, you might put the RV door on the 80-foot side wall. This allows you to pull in parallel to the building lengthwise. This can save space on certain property shapes, but it requires careful planning regarding drainage and rain gutters above the door to prevent water from pouring onto your head every time you open the door.
Ceiling Height and Truss Considerations
You cannot build an RV garage with standard 8-foot walls. Even a smaller travel trailer often exceeds 10 or 11 feet in height when you factor in the air conditioning unit sitting on the roof.
Most builders recommend a sidewall height of at least 16 feet for an RV bay. This gives you clearance for the AC unit, vent fans, and sometimes a TV antenna. It also makes the interior feel much bigger.
However, going that high with a 40-foot width affects your roof trusses. A flat standard truss might make the roof too high or create structural issues spanning that distance. Many people opt for scissor trusses in the RV bay. These trusses slope up slightly from the walls to the center, giving you extra height right down the middle where the RV sits, while keeping the overall profile of the building manageable.
If you want a loft for storage above the RV, keep in mind that a 40-foot span is very wide for a loft. You would likely need heavy-duty beams or support posts in the middle, which gets in the way of parking the vehicle. Usually, in a 40×80 building, if there is a loft, it is placed in the non-RV section (the 40×40 workshop part) where you can support the floor without blocking your parking spot.
Concrete and Flooring
Since we are talking about a pole barn, the posts go into the ground, but the floor is poured separately. With a building this size, the concrete pour is a major part of the budget.
You should pour the slab at least 4 to 6 inches thick. If you live in a cold climate where the ground freezes, you must talk to a local contractor about frost depth and whether you need frost footings or insulation under the edge of the slab. The last thing you want is a heaved slab cracking because of ice in winter.
Many RV owners also ask their concrete crew to cut a trench drain across the bay door opening. When you wash your RV or when snow melts off the chassis, you don’t want that water pooling inside the garage. A drain that leads outside keeps the floor dry and safe.
Another tip is to add a “tire pad” or slightly thicker concrete where the dual axles of the RV will sit. Those tires carry thousands of pounds of weight, and while a 4-inch slab usually handles residential loads, a little extra reinforcement there never hurts.
Electrical and Utility Hookups
If you are storing a motorhome, you probably want to keep the batteries charged or run the fridge the day before a trip. Running extension cords from the house is annoying.
When you wire the building, consider installing a dedicated 30-amp or 50-amp RV pedestal inside, or at least rough-in the conduit for one. Even if you don’t install the expensive outlet box immediately, having the wires pulled to the right spot saves money later.
Lighting is another factor. A 3,200-square-foot cave is dark. LED strip lighting or high-bay LED fixtures are the standard now. They cost a bit more upfront than old sodium lights, but they last forever and use very little power. Place switches near the pedestrian entry door so you don’t have to stumble through the dark to find the light switch on the far wall.

Estimating the Investment
It is impossible to give an exact price for a 40×80 building because the costs vary wildly based on where you live. Steel and lumber prices change month to month. Labor rates in rural areas are different than in suburbs.
Generally speaking, a building this size is a significant investment. You are paying for:
- Materials: Steel siding, roofing, lumber, trusses, and concrete.
- Labor: Crews to set posts, raise trusses, and install metal.
- Site Work: Excavation, gravel base preparation, and concrete finishing.
- Features: Insulation, doors (large RV doors are pricey), windows, and electric.
To get a realistic number, you really need to get quotes from local builders. However, looking at planning guides can help you understand what features drive the price up so you can decide what fits your budget.
Making It Yours
One of the best things about post-frame construction is that the exterior doesn’t have to look like a boring metal box. You can add wainscoting (a different color of steel on the bottom few feet), decorative gables, or cupolas on the roof. Some people even add faux shutters to the Windows or choose a brick-red color to match their house.
Since this building is so large, it will be a dominant feature on your property. Taking a little time to pick a good color scheme pays off.
Is This Size Right for You?
If you own a large fifth-wheel or a Class A motorhome and you have the land for it, a 40×80 pole barn is hard to beat. It solves the storage problem permanently. It protects your second-largest asset (assuming your house is the first). And it gives you a weather-proof place to tinker with tools, store the lawn tractor, or just hide from the family for a while.
If you are ready to sketch this out, the best next step is to look at detailed drawings. Seeing a layout on paper helps you visualize where the workbench goes versus where the RV door opens. You can browse our collection of large garage and RV storage plans to find a design that matches exactly what you have in mind.