
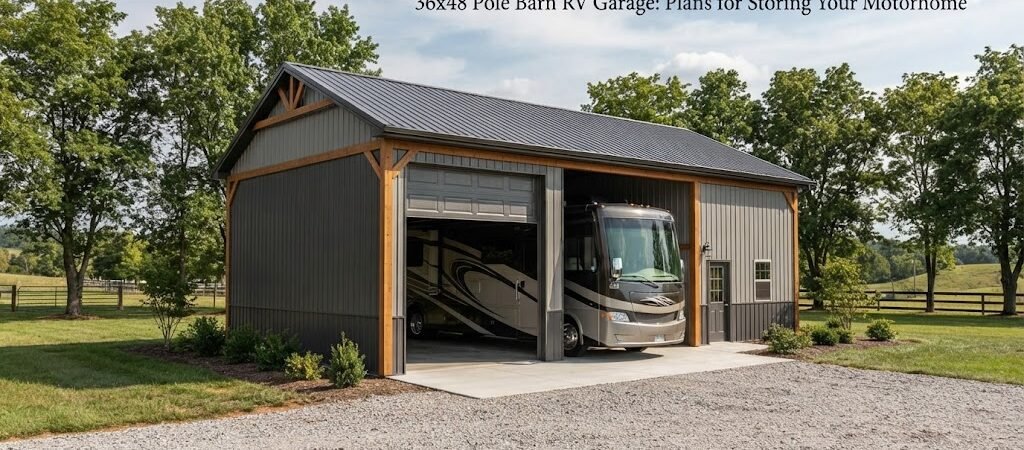
If you own a big motorhome, you know the struggle of finding a place to park it. Leaving it out in the rain, snow, or hot sun will ruin the roof and fade the paint faster than you think. A standard two-car garage is way too small, and carports don’t offer enough protection. That is why many RV owners look at a 36×48 pole barn. This size gives you serious space to store your rig comfortably while often leaving room for a workshop or storage area.
Building a structure this size is a big project, so you want to get the layout right before you start digging. Let’s look at why the 36×48 size works well, how to plan the interior, and what construction details matter most for an RV garage.
Why Choose a 36×48 Size?
There is a reason this specific footprint is so popular for RV garages. It hits a sweet spot between having enough room to breathe and not building a warehouse that takes over your whole yard.
First, let’s talk about width. A typical large Class A motorhome is about eight and a half feet wide. That sounds narrow, but once you add mirrors and slide-out rooms, the vehicle gets much wider. If you have a 36-foot wide building, you have plenty of room on both sides to open your doors without dinging the walls. You can even walk around the sides of the coach comfortably while it is parked inside.
Then there is the length. Many modern travel trailers and fifth-wheels are pushing 40 feet long. If you build a standard 40-foot deep garage, a 40-foot rig fills it end-to-end with zero room to spare. You wouldn’t be able to walk behind it or store a small golf cart or motorcycle in the front. At 48 feet deep, you get that extra breathing room. It allows for an 8-foot workbench or storage shelf at the back end, or just a buffer zone so you don’t have to kiss the wall every time you back in.
This size gives you roughly 1,728 square feet of floor space. For perspective, that is bigger than a lot of houses. Using that space wisely is key, which is why looking at detailed pole barn plans helps you visualize the possibilities before you buy lumber.

Planning for Height and Doors
The biggest mistake people make when building an RV garage is underestimating the height. You cannot just guess this part. You need to measure your actual vehicle.
Most standard garages have walls that are 8 or 10 feet tall and doors that are 7 feet tall. That will not work for a motorhome. Even a smaller class C RV is usually taller than that.
For a full-size Class A rig, you likely need walls that are at least 16 feet tall. This gives you enough clearance for the air conditioning units mounted on the roof. If you plan to use a car lift inside the bay someday, you might even want to go higher, perhaps to 18 feet.
The garage door itself needs special attention. A 12-foot wide by 14-foot tall door is common for these builds. However, 14 feet of width is often better because it gives you a wider approach angle when backing in. It is much easier to drive straight into a big opening than to squeeze through a tight one. Remember to account for the door hardware and tracks, which take up a few inches of interior space. If your RV is 13 feet 6 inches tall, a 14-foot door leaves very little wiggle room. Going to a 16-foot tall door ensures you never scrape the AC unit off the roof.
Layout Ideas: Pure Storage vs. Multi-Use
Once you decide on the outside shell, you have to figure out what goes on the inside. A 36×48 building offers a few distinct ways to organize the floor plan.
Option 1: The Open Bay
The simplest layout is one giant open room. You pull the RV in, park it, and use the remaining space around it for whatever you need. This is great if you want maximum flexibility. You can store your boat, lawn equipment, or seasonal decorations in the corners without worrying about walls getting in the way.
Option 2: The Split Design
Many homeowners prefer to divide the building. You might dedicate a 36×36 section to the RV and use the remaining 12 feet of depth as a separate room. You could frame this off with a partition wall to create a heated workshop, a hobby room, or a garden potting shed. This keeps the dust and fumes from the RV separate from your clean workspace.
If you like the idea of combining vehicle storage with a dedicated workspace, checking out garage and workshop blueprints can show you how to efficiently divvy up the square footage.
Option 3: The Drive-Through
Depending on your property layout, you might put big doors on both ends of the building. This makes it incredibly easy to drive through without backing up. It also provides excellent ventilation when you are working on the engine or running the generator.
Foundation and Floor Considerations
An RV is heavy. A fully loaded Class A motorhome can weigh upwards of 25,000 to 30,000 pounds. All that weight sits on a relatively small footprint of tires. If your concrete slab is too thin, it will crack under the load.
For a standard car garage, a 4-inch slab is usually fine. For an RV garage, you should probably look at a 6-inch slab. You also want to use rebar or fiber mesh reinforcing inside the concrete to hold it together.
Don’t forget the apron. This is the concrete strip on the outside of the garage door. It should be long enough that when the bumper of your RV hangs out (because the rig is longer than the garage depth), the tires are still on concrete and not sitting in the mud or grass.
Another detail is the slab slope. Water needs to drain away from the building, but you don’t want the floor so slanted that your refrigerator in the RV won’t work level, or that your doors won’t close properly. A subtle slope of about 1/8 inch per foot is standard. Talk to your concrete crew about keeping the central parking area as flat as possible while still managing water runoff toward the edges or doors.
Ventilation and Insulation
Storing a motorhome inside a metal building changes how you have to think about the atmosphere inside. Metal buildings heat up fast in the sun. If the building is sealed up tight, it becomes an oven.
If you live in a cold climate, insulating the walls and roof is a smart move. It keeps the temperature stable, which is good for both the building materials and your RV batteries. Insulation also cuts down on condensation. When warm air hits cold metal sheets, water droplets form. That moisture can drip onto your vehicle and cause rust issues over time.
Ventilation is crucial even if you don’t insulate. Running a generator inside the garage (with the door open, of course) or working on the engine produces fumes. Installing ridge vents along the peak of the roof or louvers near the base of the walls lets fresh air circulate. It prevents that stale, musty smell that plagues poorly ventilated sheds.

Truss Style and Interior Space
When you look at building plan collections, you will notice different roof styles. For an RV garage, the type of truss makes a huge difference in usability.
Standard trusses create a flat ceiling across the bottom. This is strong and cheap, but it limits your interior height near the walls. If you have a tall RV, you might find that the trusses hang down low right where you want to walk.
Scissor trusses are a popular upgrade for RV garages. They slope upward from the walls to the center peak, like a vaulted ceiling. This gives you much more clearance in the middle of the building. It costs a bit more, but being able to stand on the roof of your RV to wash it or check the seams without bumping your head is worth the extra cost for most people.
Estimating Costs and Timelines
It is hard to give an exact price for a 36×48 building because material prices change constantly. The cost depends heavily on where you live, who you hire to build it, and what options you choose.
Generally, you can expect to pay more per square foot for a tall building like this because of the extra engineering required for high walls and wide clear spans. The foundation is also a major cost driver. That extra inch of concrete and the steel rebar inside it adds up quickly when you are pouring over 1,700 square feet.
If you are acting as your own general contractor, you can save money on labor, but you need to be organized. You will coordinate the excavation, the concrete pour, the post-frame erection, and the electrical rough-in. It usually takes a professional crew a week or two to get the shell up and dried in. Finishing the interior, wiring, and concrete curing take additional time.
Getting Started with Your Plan
A 36×48 pole barn is a fantastic investment for protecting a major asset like a motorhome. It solves the storage problem once and for all and adds usable space to your property. Whether you want a simple cover or a fully finished man cave attached to your garage, the planning stage is where you win or lose.
Before you order materials, spend some time sketching out where outlets should go, where the lights will hang, and how wide the door really needs to be. If you want to see how professionals arrange these spaces to maximize utility, browsing different pole barn layouts is a great next step. You might find a feature you didn’t know you needed, like a side entry door position that saves you steps every day.
Take your measurements, check your local zoning rules regarding accessory buildings, and pick a plan that fits your land. Your RV deserves a good home, and with the right setup, this garage will serve you well for decades