
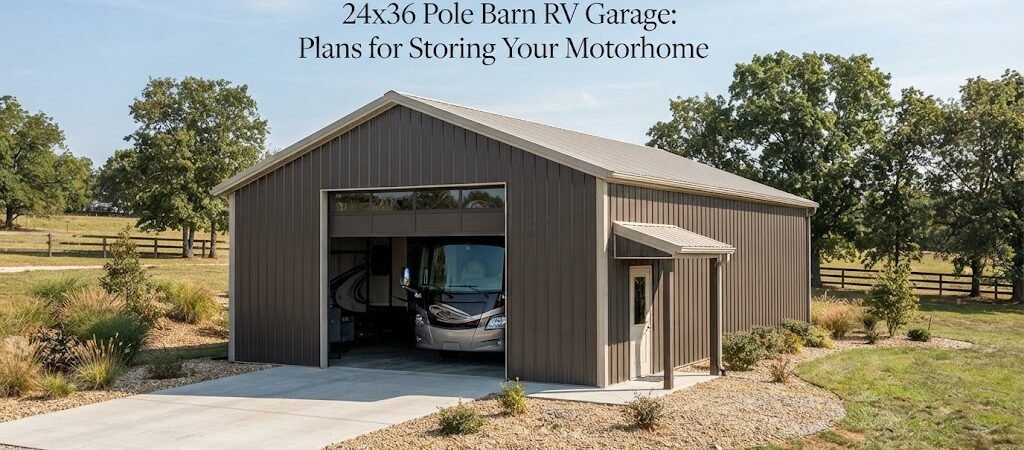
If you own an RV, you know the struggle. It sits outside in the sun, rain, and snow while you pay for indoor storage somewhere else or watch it slowly fade. A 24×36 pole barn garage might be exactly what you need to fix that problem once and for all.
This size gives you 864 square feet of covered space. That’s enough room for most travel trailers, fifth-wheels, and even many Class C motorhomes. Plus, you get leftover space along the sides for shelves, a workbench, or whatever else you want to store.
Let me walk you through what goes into planning one of these buildings so you can decide if it fits your situation.
Why 24×36 Works Well for RV Storage
Not every garage size makes sense for a motorhome. You need enough width to pull in comfortably, enough length so the back end doesn’t stick out, and enough height to clear the air conditioning unit on top.
A 24-foot width gives you some breathing room. Most RVs are between 8 and 8.5 feet wide. That leaves you with about 7.5 feet on each side if you center the vehicle. This extra space means you can open your slide-outs without hitting walls, walk alongside the rig, and actually use the space for more than just parking.
The 36-foot length handles most RVs fine. Travel trailers and fifth-wheels commonly run 30 to 35 feet. Some larger ones push 40 feet, which would be tight. If you have a longer rig or a Class A motorhome, you might want to consider going 40 or 44 feet deep instead. But for average-sized RVs, 36 feet works.
Before you settle on dimensions, measure your actual vehicle. Include any bike racks, ladders, or spare tires that extend past the main body. Measure the height too, with the AC unit and any antennas or vents accounted for. Write these numbers down because they affect everything from door size to truss height.

Figuring Out the Right Height
Height trips up more RV garage builders than anything else. Standard garages have 8-foot walls and maybe 10 or 11 feet at the peak. That won’t cut it for most motorhomes.
You generally want at least 14 feet of interior clearance at the center for RV storage. Some taller rigs need 16 feet. This affects your truss design and overall building cost significantly.
A common approach uses 12-foot sidewalls with a scissor truss or gambrel roof style. This gets you the vertical space without making the building look ridiculously tall from the outside. Flat ceilings won’t work here unless you’re willing to build walls 14 or 16 feet high, which gets expensive fast and can run into zoning height restrictions.
Talk to your truss supplier about what they recommend for your span and snow load requirements. They deal with this all the time and can engineer something that gives you the clearance you need without overbuilding the structure.
Door Size and Placement
Your garage door needs to be bigger than what you’d put on a standard car garage. For RVs, you typically want at least a 12-foot wide by 14-foot tall door. Some people go 14 feet wide for easier entry, especially if your RV has mirrors that stick out.
Door placement matters too. Putting the door on the 24-foot gable end is the most common setup. This lets you drive straight in and back out or pull through if you add a rear door later.
Some builders put the RV door on the 36-foot side wall instead. This works if you have room to approach from that angle and prefer driving in sideways. It can save turning radius space on your driveway, but it usually costs more for the wider structural opening.
Consider adding a separate man-door or regular garage door for everyday access. You don’t want to open that massive RV door just to grab a tool or put something on a shelf. A 9×7 overhead door or a 36-inch entry door on a side wall solves this problem cheaply.
Layout Options for Your Floor Plan
A 24×36 building offers more flexibility than you might expect. The simplest layout is just one big open bay. Park the RV in the middle and use the sides for storage. This keeps your options open and costs the least to build.
Another approach divides the space into a main RV bay plus a narrower utility bay. Maybe you do 18 feet by 36 feet for the vehicle and 6 feet by 36 feet for a workshop area or organized storage. This requires a partition wall but gives you a dedicated space that stays clean and organized.
Some people add a loft area above part of the building. With the high ceilings needed for RV clearance anyway, you might as well use that volume for something. A loft can hold seasonal decorations, camping gear, or whatever else you don’t need often. Just remember that lofts add complexity and cost, and they reduce the open feel inside.
If you’re trying to decide between layouts, browsing different pole barn plans can show you how other people have arranged similar spaces. Seeing actual drawings sometimes sparks ideas you wouldn’t think of on your own.
Foundation and Flooring Choices
What goes under your RV garage depends on your budget, your soil, and how you plan to use the space.
Gravel is the cheapest option. You grade the site, put down compacted crushed stone, and call it done. This works fine if you just need covered storage and don’t mind a rough floor. Gravel drains well and lets any water from melted snow or rain drip right through.
Concrete gives you a real floor you can sweep, park on cleanly, and use for projects. A 4-inch slab with proper base preparation and reinforcement handles passenger vehicles and light equipment. If you plan to store heavy items or work on machinery, talk to a contractor about whether you need thicker concrete or additional reinforcement.
Many RV owners choose something in between. They pour concrete strips where the tires will sit, or they do a partial slab in the work area and gravel where the RV parks. These hybrid approaches can save money while still giving you usable hard surfaces where you need them.
Whatever floor you choose, make sure the building perimeter has good drainage away from the foundation. Water pooling against your poles causes problems over time.
Planning for Utilities
Think about whether you want electricity, water, or compressed air in your RV garage. Adding these during construction costs far less than retrofitting later.
Electricity is almost always worth running. You’ll want lights, outlets for tools or battery chargers, and power for a garage door opener. If you store your RV plugged in to keep batteries charged, you need at least one 20-amp circuit near where the rig parks.
Water is less critical but nice to have if you plan to wash the RV inside the building or if you want a utility sink for cleaning up after projects. Running a water line during construction is straightforward. Adding it later means cutting into your finished floor or running exposed pipes.
Compressed air appeals to anyone who works on their own vehicles or equipment. A permanent air line with drop connections beats dragging hoses everywhere. Even if you don’t see yourself needing it now, putting in the rough plumbing for future use costs little during initial construction.
Don’t forget ventilation. RVs, generators, and some stored items release fumes. Ridge vents, gable vents, or powered exhaust fans keep air moving and prevent moisture buildup that leads to rust and mold.
Estimating Costs Without Guessing
I won’t give you a specific price because too many variables affect the final number. Where you live, who builds it, what materials you choose, and current lumber and steel prices all change the total substantially.
That said, here’s what drives costs on a building this size:
Size and height. A 24×36 with 12-foot walls costs more than the same footprint with 8-foot walls. Taller buildings need longer posts, more bracing, and larger trusses. Every extra foot of height adds material and labor.
Materials. Metal siding and roofing cost less than brick or stone but more than basic plywood sheathing with asphalt shingles. Steel buildings resist fire, rot, and pests better than wood, which matters for long-term value even if the upfront price is higher.
Site work. If your building spot is flat, dry, and easy to reach, site prep costs stay reasonable. If you need grading, fill dirt, retaining walls, or difficult excavation, that adds up fast. Some lots need driven piers instead of conventional post-hole foundations because of poor soil conditions.
Features. Every door, window, insulation package, and electrical circuit adds to the bottom line. Prioritize what you really need versus what would be nice to have.
Get quotes from several local builders. Prices vary widely even in the same region. A builder who specializes in garage and workshop plans might offer better value than a general contractor who treats your project as an afterthought.
Permits and Zoning Considerations
Almost every jurisdiction requires a permit for a building this size. The process checks that your plans meet local codes for structural safety, setbacks from property lines, and sometimes appearance.
Start by calling your local building department or checking their website. Ask about:
- Setback requirements (how far from property lines you must build)
- Maximum building height allowed in your zone
- Whether accessory buildings have size limits
- What plans or drawings they need to see
- How long permitting typically takes
Some areas restrict metal buildings or require specific exterior finishes. Others care about roof color or whether the building matches your house. Finding out these rules before you buy plans or materials prevents expensive surprises.
Homeowners associations add another layer of rules. Even if the city approves your building, your HOA might have architectural guidelines, color restrictions, or outright bans on certain structures. Check those covenants before spending money on design work.

Common Mistakes to Avoid
People who haven’t built an RV garage before tend to make the same mistakes. Learning from their experience can save you headaches.
Underestimating height needs. This is number one. Measure your RV with everything extended and elevated. Then add at least two feet for clearance. Better to have a foot too much than an inch too little.
Forgetting about slide-outs. Many RVs have slide-out sections that extend several feet when parked. If your building width only fits the closed RV, you can’t use slides inside. Decide upfront whether you want that capability and design accordingly.
Skimping on door size. Saving money with a smaller door sounds smart until you scrape your mirrors or AC unit every time you enter. Buy the door your vehicle actually needs.
Ignoring drainage. Water that pools under or around your RV causes rot, rust, and foundation problems. Grade the site properly and consider gutters and downspouts that move water well away from the building.
Building too small for future needs. The RV you own today might not be the RV you own in ten years. Many people upgrade to larger rigs over time. Building a little bigger now costs less than expanding or rebuilding later.
Making Your Decision
A 24×36 pole barn garage gives you serious RV protection and versatile storage space at a manageable size and cost. It fits most residential properties without dominating the yard, and it handles the majority of RVs on the road today.
If you’re ready to move forward, the next step is getting your specifics dialed in. Look at building plan collections that include RV garage designs so you can see detailed layouts, material lists, and construction details. Having actual drawings makes conversations with builders and permit offices much smoother.
Measure your vehicle, check your local requirements, and start sketching out what you want. Your RV deserves better than sitting in the weather, and you deserve a building that serves your needs for years to come.