
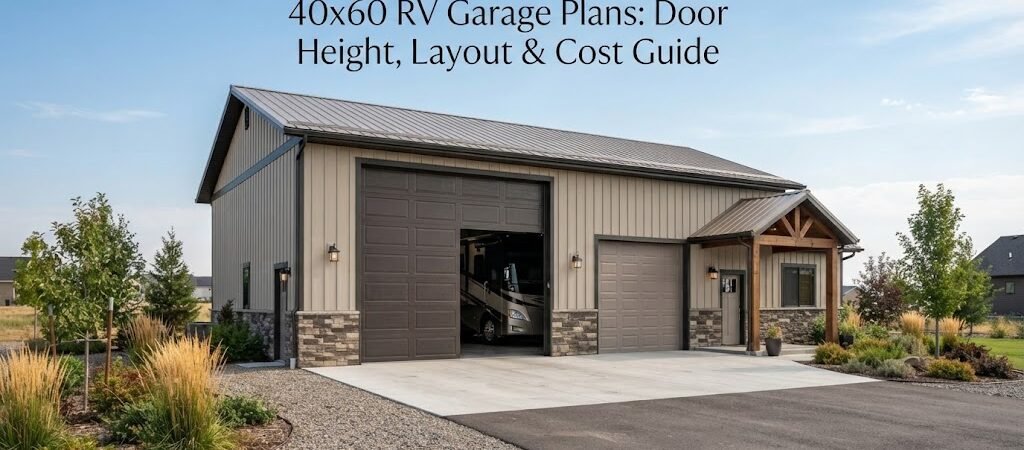
A 40×60 RV garage gives you plenty of room for a motorhome, travel trailer, boats, cars, tools, and a real work area. But a building this size needs more planning than simply choosing a shell and adding a big garage door.
The door height, interior layout, roof design, storage space, electrical needs, and site conditions can all affect the final result. A good plan helps you figure these things out before construction starts, when changes are much easier and cheaper to make.
How Much Space Does a 40×60 RV Garage Have?
A 40×60 building provides 2,400 square feet of floor space.
That sounds like a lot, and it is. The challenge is making that space work for the way you actually use your RV garage.
For example, an RV may take up a large part of the building’s length. You may also want room for:
- A second vehicle
- A boat or trailer
- A workbench
- Lawn and farm equipment
- Shelving and cabinets
- Spare parts and tools
- Outdoor gear
- A small office or utility area
Think about how you’ll use the building five or ten years from now, not just what you need to park inside today.
Before choosing a final layout, comparing different pole barn layouts can help you see how vehicle storage, work areas, and storage zones can fit together.
What Door Height Does an RV Garage Need?
RV door height is one of the first things to settle.
Many RVs are taller than ordinary vehicles, and accessories such as roof-mounted air conditioners, vents, satellite equipment, or storage systems can add to the overall height. A door that’s just barely tall enough can become a problem later.
The correct door height depends on the actual RV or trailer you plan to store. Measure the complete vehicle, including anything permanently mounted on top.
Don’t measure only the main body of the RV.
Don’t Forget Door Width
Height isn’t the only concern. Your RV garage door also needs enough width for comfortable entry.
A wider opening can make parking easier, especially if the driveway approach isn’t perfectly straight. You also need to think about mirrors, awnings, slide-outs, and other parts that may affect clearance.
If you plan to store a second vehicle or trailer, consider whether it needs its own door. Multiple doors can make the building more useful, even though they also affect wall space and construction cost.
A Practical 40×60 RV Garage Layout
There isn’t one perfect layout for every property. A good starting point is to divide the building into zones.
One common approach is to dedicate one end or side of the building to the RV. The remaining space can be used for vehicles, storage, and a workshop.
For example, you might create:
RV parking: Keep a clear lane from the main door to the rear of the building. Leave enough room around the RV for access and maintenance.
Vehicle parking: Use another section for a pickup, car, or trailer.
Workshop: Put benches, tools, and equipment along an outside wall rather than blocking vehicle paths.
Storage: Use wall space for shelving and cabinets. High storage can be useful for items you don’t need every day.
The key is to avoid filling the floor with permanent obstacles. RVs and trailers need room to move, and a building that looks spacious on paper can feel tight once vehicles, equipment, and storage are inside.
Should the RV Door Be on the 40-Foot or 60-Foot Wall?
This depends on your site and how you want to use the building.
A door on the 40-foot wall can give you a shorter path into a long parking bay. A door on the 60-foot wall may give you more flexibility for multiple parking spaces or separate entrances.
Driveway access matters just as much as the building itself. Look at how the RV will approach the building, turn, back in, and leave.
If the property has a narrow driveway or limited turning area, the best door location may be different from what looks best on a floor plan.
It’s also worth checking the slope of the site. A large RV is much easier to maneuver into a building when the approach is reasonably clear and predictable.
What Ceiling Height Should You Plan For?
The building’s overall height and the clear interior height aren’t necessarily the same.
Roof framing, insulation, lighting, door hardware, and other components can reduce the usable clearance inside. That’s why it’s better to work backward from the RV’s required clearance rather than picking a building height first.
If you may buy a taller RV later, leave some reasonable room for future changes. Don’t design the building around a vehicle that barely fits.
A taller building can also provide useful overhead storage, but increasing the height can affect structural design, materials, and local requirements.
For a project with several possible uses, garage and workshop blueprints can be useful for comparing different ways to combine parking, storage, and work space.
Cost of a 40×60 RV Garage
There’s no single reliable price for a 40×60 RV garage.
The total cost can vary widely based on the building system, location, foundation, site preparation, doors, insulation, electrical work, interior finish, labor, and local design requirements.
The basic building is only part of the budget.
Costs That Can Change the Budget
Site preparation may include clearing, grading, drainage, or a driveway suitable for heavy vehicles.
The foundation or floor system is another major part of the project. A concrete slab is common for garages, but the design should be suitable for the loads and soil conditions at your site.
Large RV doors can also cost more than standard garage doors. Insulation, windows, gutters, electrical service, lighting, heating or cooling, and interior walls can add substantially to the finished project.
If you’re comparing quotes, make sure you’re comparing similar scopes of work. One contractor’s price may include a finished slab and electrical work while another quote may cover only the building shell.
Think About the RV Garage Floor
The floor needs to handle the vehicles and equipment you’ll actually store.
RV weights can be substantial, so the slab and supporting ground conditions shouldn’t be treated like a simple residential floor without considering the intended loads.
Drainage matters, too. Water, mud, snow in some climates, and vehicle washing can create problems if the floor and surrounding site don’t drain properly.
Your builder or engineer can help determine the appropriate floor and foundation design for your soil, loads, climate, and local requirements.
Plan Utilities Before Construction
It’s much easier to plan electrical outlets and lighting before the walls are finished.
Consider where you’ll need power for:
- Battery chargers
- Power tools
- Compressors
- Welders
- Refrigerators or freezers
- RV hookups
- Exterior lighting
- Door openers
If you plan to work inside during the evening, don’t rely on a few lights in the middle of the ceiling. Think about task lighting around workbenches and storage areas.
You may also want water, a utility sink, or a floor drain. These decisions can affect the slab and underground work, so they should be considered early.
RV Storage Features Worth Considering
A large garage gives you options that a normal residential garage doesn’t.
Overhead storage can keep seasonal items off the floor. Shelving along the walls can handle tools, spare parts, camping equipment, and maintenance supplies.
If you work on your RV yourself, leave enough room to open compartments and walk around the vehicle. A layout that allows the RV to be parked but leaves no working clearance isn’t very useful.
You might also want a dedicated area for trailer equipment, lawn tools, or farm supplies. Keeping these items in their own zone helps prevent the garage from becoming one large pile of everything.
If you’re looking for a smaller structure for overflow storage or a separate work area, shed and workshop plans can provide ideas for keeping those uses outside the main RV garage.
Plan for the Future
It’s easy to build a 40×60 garage around one RV and regret the layout later.
Maybe you’ll replace the RV with a larger model. Maybe you’ll buy a boat. Maybe you’ll need room for a tractor, second truck, or larger workshop.
Try to keep the main vehicle path open and avoid placing permanent walls where future parking could be useful.
It’s also smart to think about how doors, windows, electrical panels, lights, and storage will affect future changes. A little planning now can give you much more flexibility later.

Is a 40×60 RV Garage Right for You?
A 40×60 building is a strong choice if you want more than simple RV parking. It can provide space for the RV plus vehicles, equipment, storage, and a workshop without immediately feeling cramped.
The best design depends on the RV’s dimensions, the number of vehicles, the property layout, your climate, local requirements, and how much interior space you want finished.
Start with the vehicles and equipment you need to store. Then work out the door locations, clearances, storage, utilities, and work areas around them.
Before settling on a design, spend some time comparing pole barn plans and building plan collections. Seeing complete layouts can make it much easier to decide how you want your 40×60 RV garage to function before you start building.