
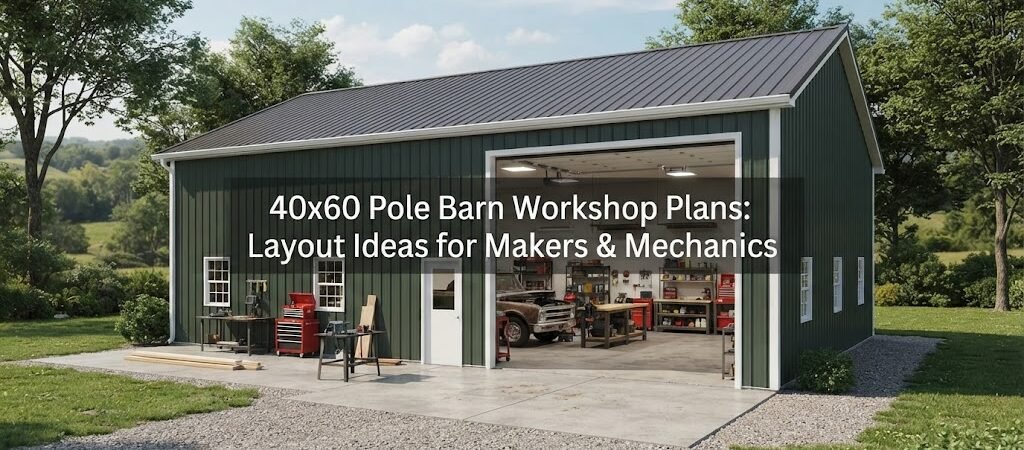
A 40×60 pole barn gives you 2,400 square feet to work with, which is enough room for much more than a basic storage building. With a good layout, it can become a serious workshop for woodworking, welding, auto repair, farm equipment, or a mix of hobbies and daily work.
The trick is planning the inside before the building goes up. A few extra feet in the right place can make a big difference once you have workbenches, tools, vehicles, shelves, and equipment inside.
Start With How You’ll Use the Workshop
Before drawing walls or choosing doors, make a list of what actually needs to happen inside the building.
A mechanic may need room for a vehicle, tool storage, a workbench, compressor, parts shelves, and space to move around the vehicle. A woodworker may care more about long material storage, a table saw, assembly space, dust collection, and a finishing area.
A maker who does several types of projects might need a flexible open area instead of separate rooms.
This is also where different pole barn plans can be useful. Looking at several layouts can help you spot ideas you may not have considered before.
Think about the largest item that will enter the building, too. If you plan to work on a tractor, truck, boat, or large piece of equipment, measure it first. Then allow room for doors to open, tools to move around it, and equipment to be positioned where you need it.

40×60 Pole Barn Layout Ideas
There isn’t one perfect layout for a 40×60 workshop. The best arrangement depends on the work you do.
Here are a few practical approaches.
Open Workshop Layout
An open floor plan is a simple choice for people who want maximum flexibility.
Keep most of the 40×60 interior open and place workbenches, cabinets, and storage along the outside walls. This leaves a large central work area that can change as your projects change.
It’s especially useful for makers who don’t have one fixed type of work.
You could put a woodworking bench along one wall, metalworking tools on another, and leave the center open for assembly or larger projects.
The downside is that noisy, dusty, or messy work isn’t separated from cleaner areas.
Garage and Workshop Combination
If the building needs to serve both vehicles and projects, divide the space by function.
For example, one end can be used for vehicle parking and mechanical work, while the other becomes the main workshop. The exact split can change based on your needs.
A simple arrangement might include vehicle bays near the large overhead doors, with workbenches and storage farther inside.
Looking at garage and workshop blueprints can give you more ideas for combining parking and work areas without making the building feel cramped.
Dedicated Maker Zones
A workshop used by several people or for several hobbies may work better with separate zones.
You might have a woodworking area, metalworking area, assembly bench, tool storage wall, and general-purpose space.
The zones don’t necessarily need full walls. A change in equipment placement, workbench arrangement, or storage can be enough to create a natural division.
Keep frequently used tools close to the area where they’re needed. There’s little benefit in putting a tool across the building if you use it every day.
Think Carefully About Door Placement
Door locations can make or break a workshop layout.
A large overhead door on the end wall may work well for vehicles, but side doors can make the rest of the building easier to use. A smaller walk-through door near a workbench or storage area can also be convenient.
Think about traffic before finalizing the plan.
A tractor shouldn’t have to pass through your main work area just to get outside. Likewise, you don’t want shelves, benches, or permanent equipment blocking the path between a large door and the center of the shop.
If you’re storing long materials, consider how they’ll enter the building and where they’ll be placed afterward.
Plan the Workbench and Tool Areas First
It’s easy to draw a building with plenty of empty floor space and assume everything will fit later. That’s where many layouts start to go wrong.
Instead, place your biggest fixed items on paper first.
Workbenches, vehicle lifts, large machines, welders, compressors, cabinets, and storage racks all take more space than their basic footprint suggests. You also need room to stand, work, open doors, and move materials.
Wall space matters just as much as floor space. A tall storage cabinet or wall-mounted tool system can keep the floor open.
For woodworking, think about the path a board takes through the shop. For auto work, think about how a vehicle enters, where it sits, and how you’ll get around it.
The best layout usually follows the way the work happens.
Leave Room for Future Equipment
You don’t have to fill all 2,400 square feet on day one.
In fact, leaving some open space can be a smart choice. Your workshop may change over time. A hobby can grow, a new machine may get added, or the building may eventually need to handle a different type of work.
Try not to place every cabinet and workbench exactly where it fits today.
A little breathing room can make the building much easier to adapt later.
Storage Should Be Part of the Plan
Workshops collect stuff quickly.
Lumber, sheet goods, fasteners, hand tools, spare parts, hardware, paint supplies, welding materials, seasonal equipment, and unfinished projects all need somewhere to go.
Use the walls and upper portions of the building where practical, but make sure stored items can be accessed safely.
Long materials often need a different storage solution than small parts. A mechanic may want shallow cabinets for tools and deeper shelves for parts. A woodworker may need dedicated racks for boards and sheet goods.
Don’t forget small items, either. Drawers, bins, pegboards, and cabinets can make a large shop much easier to keep organized.
Consider Utilities Before Construction
Electrical outlets, lighting, ventilation, heating, and compressed air are much easier to plan before the building is finished.
Think about where equipment will sit and where power will be needed. A welder or large machine may have different electrical requirements than ordinary hand tools, so have the electrical design reviewed for your specific equipment and local requirements.
Lighting deserves attention, too. General overhead lighting may not be enough over a detailed workbench.
If you’ll weld, paint, run engines, or create dust, ventilation should be considered as part of the workshop design rather than treated as an afterthought.
The same goes for heating and cooling. Your local climate, building design, insulation, and how often you use the shop will all affect the right approach.
Don’t Forget Ceiling and Wall Space
A 40×60 workshop isn’t only about its floor plan.
Vertical space can be valuable for storage, lighting, equipment, and other uses. But anything mounted overhead needs to be planned around the building structure and designed appropriately for the loads involved.
Wall height also affects how the shop feels and what equipment can fit inside.
If you plan to bring in tall equipment, install a vehicle lift, or store equipment overhead, mention those plans early. Structural and engineering needs depend on the building design, loads, local conditions, and applicable requirements.
Build the Layout Around Your Largest Projects
A useful test is to sketch your biggest project on the floor plan.
Maybe it’s a pickup truck with doors open. Maybe it’s a tractor with an implement attached. Maybe it’s a large woodworking assembly.
Draw that object at its actual size, then add the space needed to work around it.
Now add benches, tool cabinets, storage, and equipment.
This exercise often reveals problems that aren’t obvious when looking at an empty rectangle.

Materials and Construction Details Still Matter
The interior layout is only part of the project.
Your pole barn’s foundation or site conditions, framing system, roof design, siding, insulation, doors, windows, electrical work, and interior finishes all need to match the intended use.
Local soil, weather, wind and snow conditions, and building rules can affect the design. Structural members and connections should be sized according to the actual project requirements rather than copied from a generic example.
For that reason, treat a sample 40×60 layout as a planning tool, not a construction drawing for your specific site.
A Simple Way to Sketch Your Plan
You don’t need fancy software to start.
Draw a 40×60 rectangle on graph paper. Mark the large doors first. Then add vehicles and large equipment. After that, place workbenches, storage, and smaller tools.
Leave the main walking and equipment paths clear.
Try two or three versions before settling on one. Moving a workbench on paper takes seconds. Moving one after the building is finished is a different story.
If you’re still exploring the overall building style, browsing shed and workshop plans can also help with smaller work areas, storage ideas, and shop organization.
Final Thoughts
A 40×60 pole barn workshop gives you plenty of room, but size alone doesn’t create a good shop. The layout needs to match how you work.
Start with your largest equipment and projects. Plan door locations around traffic. Give storage a real place. Think about power, lighting, ventilation, and future changes before construction starts.
Most importantly, don’t rush the floor plan. Spend time moving things around on paper until the workflow feels natural.
Before you finalize the design, compare pole barn plans and building plan collections to see how other layouts handle vehicles, storage, workshops, and open work areas. A little planning now can make the finished shop far more useful for years to come.