
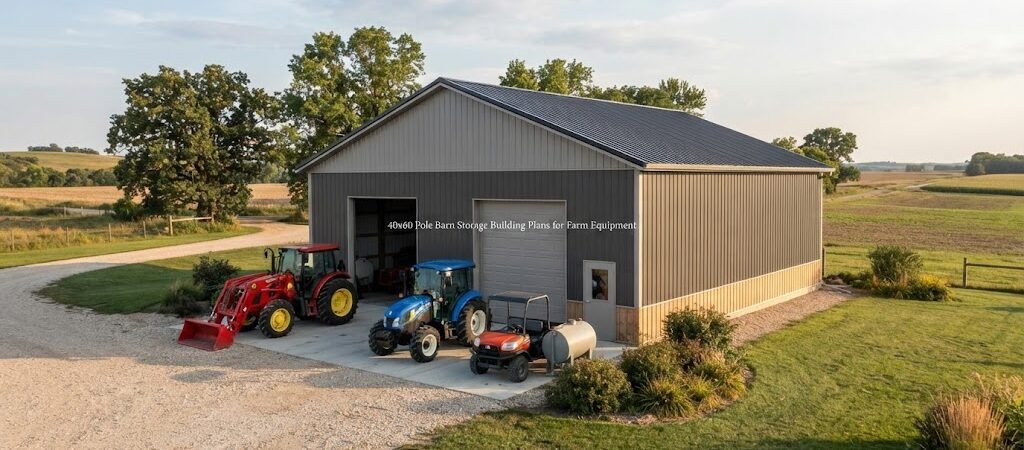
If you’ve ever tried to squeeze a tractor, a few implements, and a hay wagon under one roof, you know how fast space disappears. A 40×60 pole barn gives you 2,400 square feet to work with, which is enough room to store most farm equipment without playing a daily game of building-lot Tetris. This size hits a sweet spot for a lot of farms and rural properties. It’s big enough to be genuinely useful but not so large that it becomes a massive undertaking to build or heat.
This article walks through what to think about when planning a 40×60 pole barn for equipment storage, from layout ideas to door sizing to a few things people often forget until it’s too late.
Why 40×60 Works for Equipment Storage
A lot of farmers start out thinking they need something smaller, then realize how much space equipment actually eats up once you add attachments, trailers, and seasonal gear. A 40×60 footprint gives you enough depth to park larger tractors and combines nose to tail, plus room along the sides for smaller equipment, tools, and parts storage.
Compared to a 30×40 or 30×50 barn, the extra width and length make a real difference. You get room for a center aisle if you want one, or you can line up equipment in rows with just enough clearance to walk between machines. If you’re comparing sizes before committing, looking at different pole barn plans side by side can help you see how the square footage actually translates into usable space.

Basic Layout Options
There’s no single “right” way to lay out a 40×60 building, but a few approaches tend to work well for farm equipment.
Open bay layout. This is the simplest setup. No interior walls, just one big open space. It’s the most flexible option because you can rearrange equipment as your needs change from season to season. The downside is that everything shares the same space, so dust, fumes, and clutter from one area can spread to another.
Split storage and shop layout. Many farmers section off a portion of the building, maybe 12 to 16 feet, for a small workshop area with a workbench and tool storage. The remaining space stays open for equipment. If you’re leaning this direction, it’s worth checking out garage and workshop blueprints for ideas on how to wall off a functional workspace without losing too much storage room.
Lean-to storage. Some 40×60 designs include a lean-to on one side for smaller items like ATVs, mowers, or firewood, keeping the main bay open for bigger machinery.
Door Sizing and Placement
This is where a lot of planning mistakes happen. People size doors for the equipment they own today and forget that a bigger tractor or combine might show up down the road.
For farm equipment storage, sliding doors and overhead doors are the two most common choices. Overhead doors are convenient and seal better against weather, but they need clearance above the opening, which can affect how you frame the trusses. Sliding doors are often cheaper and don’t require as much overhead clearance, which makes them popular for taller equipment.
A good rule of thumb is to measure your tallest and widest piece of equipment, then add extra clearance on top of that. Combines with folded heads, grain carts, and tall sprayers can be surprisingly tall. It’s easier to plan generous door openings now than to modify a building later.
Ceiling Height Considerations
Ceiling height matters just as much as door width. A lot of 40×60 pole barns for equipment storage are built with sidewalls in the 14 to 16 foot range, though this depends heavily on what you’re storing and local snow load requirements for the roof structure. Taller sidewalls give you room for loft storage above equipment bays, which can be handy for seasonal items you don’t need daily access to.
If you’re not sure what height makes sense, it helps to think about your tallest piece of equipment with any attachments raised, plus a few feet of buffer. Nobody wants to find out their new baler doesn’t clear the door by two inches.
Flooring and Foundation
Most equipment storage barns use a concrete slab, though some farmers go with compacted gravel to save on upfront cost, especially in a building that’s purely for dry storage rather than active shop work.
Concrete makes cleanup easier and holds up better under the weight of heavy equipment, especially if you’ll be doing any maintenance work inside. If cost is a concern, some people pour concrete only in the areas where equipment will sit or where a workbench will go, leaving the rest as gravel or compacted dirt.
Foundation depth and slab thickness depend on your soil conditions and the weight of equipment you’re storing, so it’s worth talking to a local contractor or engineer about what your specific site needs rather than assuming a standard slab thickness will work everywhere.
Ventilation and Moisture Control
Equipment storage buildings deal with a lot of moisture, from wet tires and undercarriages tracking in rain or snow to fuel and oil fumes if you’re doing maintenance inside. Ridge vents, soffit vents, or gable vents help keep air moving and reduce condensation on the underside of the roof.
Condensation can be a bigger problem than people expect, especially in metal buildings where temperature swings cause moisture to form on the interior of the roof panels. A vapor barrier or insulated liner panel under the roof can cut down on dripping condensation landing on equipment below.
Electrical and Lighting Needs
Even a basic equipment barn benefits from electrical service. At minimum, most people want overhead lighting and a few outlets for battery chargers, air compressors, or power tools. If you’re planning any welding or heavier shop work inside, you’ll want to plan for higher amperage service from the start rather than trying to retrofit it later.
Placement matters too. Lights mounted too low can get knocked by raised equipment attachments, so give some thought to fixture height when you’re finalizing the building plans.

Additional Storage Features Worth Considering
A few extras can make a big difference in day-to-day usability:
- A small enclosed room for parts, tools, or a home office if you’re managing the farm from the barn
- A mezzanine or loft area for lighter storage, built into one end of the building
- Wide overhangs on the eave side for equipment that just needs weather protection rather than full enclosure
None of these are required, but they’re worth thinking through before construction starts rather than trying to add them afterward.
Planning for Future Growth
Farms change. Equipment gets bigger, operations expand, and storage needs shift over time. When you’re finalizing your 40×60 plans, it doesn’t hurt to think a few years ahead. Could the building be extended later? Are the door openings sized generously enough for equipment you might buy down the road? A little extra planning now can save a lot of headaches later.
Wrapping It Up
A 40×60 pole barn is a practical, popular size for farm equipment storage because it balances space with manageable construction costs and complexity. The right layout, door sizing, and ventilation choices depend on your specific equipment and how you plan to use the building day to day.
If you’re still working out the details, comparing a few pole barn building plan collections can give you a clearer sense of what layout and feature combinations tend to work best before you finalize your own design.