
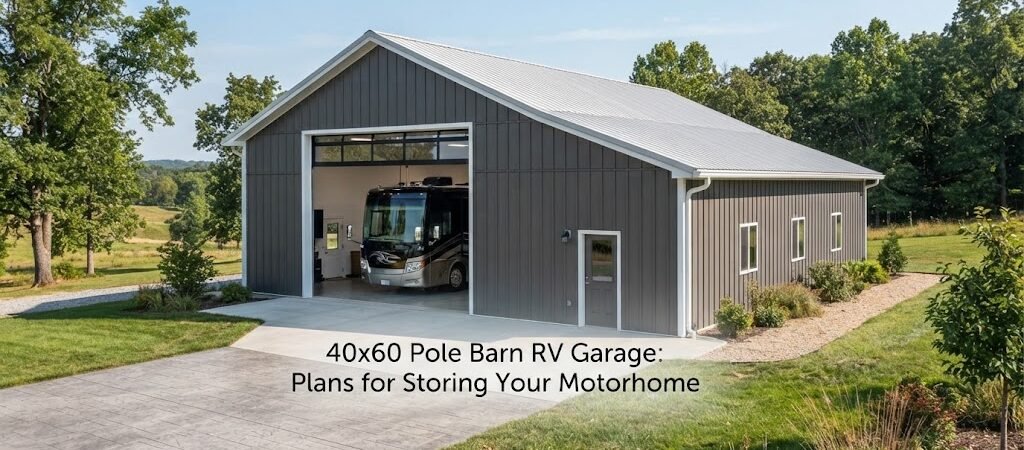
If you own a Class A motorhome or a large fifth-wheel, you know the struggle of finding a place to put it. Leaving a costly investment parked under the sun or snow is a quick way to ruin the roof and fade the paint. That is why so many owners look into building a dedicated shop or shelter. A 40×60 pole barn has become one of the most popular choices for this job. It offers enough square footage to park the rig comfortably while still leaving room for a workshop, storage, or even a small living area.
The size sounds big, but when you factor in the length of modern RVs and the need to open slide-outs or walk around the vehicle, that space fills up fast. Planning this build correctly means understanding how to use those 2,400 square feet effectively.
Why the 40×60 Size Works for RVs
Standard two-car garages are usually around 24×24 or 20×20. Try pulling a 40-foot vehicle into one of those, and you will see the problem immediately. Even a standard 30×50 garage can feel cramped if you have a long-class motorhome with extended mirrors.
The 40-foot width is the real game changer here. Most RVs are about 8.5 feet wide excluding mirrors. If you build a 40-foot wide structure, you have plenty of room on both sides. This allows you to extend your slide-outs without hitting the walls. It also gives you space to install shelving units along the perimeter for your camping gear, tools, and maintenance supplies without blocking the vehicle.
The 60-foot length handles the depth. While many travel trailers are around 35 feet, larger Class A diesels can push 42 to 45 feet. A 60-foot deep building lets you park a long rig and still have 15 feet of “breathing room” at the front or back. That extra space is perfect for a workbench, a lawn mower, or a golf cart.
Before you order materials, it is smart to look at different pole barn layouts to see how others have arranged this specific footprint.

Figuring Out the Right Height
This is where many first-time builders make a mistake. A standard garage wall height of 10 or 12 feet often is not enough for an RV. You have to think about the highest point of the vehicle.
If you have a standard travel trailer, you might clear 12 feet. But if you have a Class A motorhome with a roof-mounted AC unit or a satellite dish, you could be pushing 13 or 14 feet high. You never want to scrape the roof of your camper on the way in.
For a 40×60 RV garage, most experts recommend sidewall heights of at least 16 feet. This gives you clearance for the door track and the trusses. Speaking of trusses, you have a choice to make there. Standard trusses give you a flat ceiling but eat up vertical space. Scissor trusses create a vaulted ceiling, which adds extra height in the center. If you are worried about clearing a tall AC unit, scissor trusses might be worth the extra cost.
Choosing the Right Doors
The door is the mouth of your building. If it is not big enough, the rest of the structure does not matter because you cannot get the rig inside.
For a building this wide, you typically have two main options for the entrance. You can put one massive door in the center, or you can split the front into two smaller doors. Many people like the two-door setup. You can use a standard 9×7 garage door for walking in and out or moving small items, and then use a wider 14 or 16-foot door specifically for the RV.
When selecting the RV door, avoid cheap residential garage door openers. They tend to strain under the weight of a large commercial door. A commercial-grade opener or a high-lift track system is better. High-lift tracks let the door go straight up a foot or two before curving back. This maximizes the opening height, which is critical when you are driving a tall vehicle inside.
Concrete and Floor Considerations
Your floor takes a beating from an RV. These vehicles are heavy. A fully loaded Class A motorhome can weigh over 30,000 pounds, and all that weight sits on just four or six tires. This creates massive “point loading” on the concrete slab.
A standard 4-inch driveway slab will likely crack under that stress. For an RV garage, you generally want to pour a 5 or 6-inch thick slab. You should also plan for rebar or wire mesh reinforcement to hold it together.
Another detail is the approach. You don’t want a steep ramp going into the building if you can help it, because the back end of a long trailer will drag. A long, gradual approach apron helps prevent scraping the hitch or the rear bumper. Also, consider where the water will go. You do not want rainwater following your tires into the building and pooling around your stored belongings. A slight slope toward the outside or a good drainage system on the floor is essential.
Interior Layout Ideas
Once the shell is up, how do you organize 2,400 square feet? There are a few common ways to handle the interior of a garage and workshop designed for motorsports.
The Pure Storage Setup
In this layout, the RV is the king. You position the vehicle so you can easily access the entry door and the engine compartment. You might run electrical outlets along the walls so you can keep the batteries charged or run dehumidifiers during the off-season. This layout focuses purely on protecting the asset.
The Workshop Combo
This is likely the most popular choice. You park the RV on one side and dedicate the remaining space to a hobby shop. Since you have 40 feet of width, you can park the RV and still have a 12 to 14 foot wide bay left over for tool chests, saws, and a workbench. This keeps your expensive toys near your tools so you can perform maintenance easily.
The Toy Box
If you have more than just an RV, this layout is for you. You drive the motorhome in, but you leave room for the boat, the jet skis, or the side-by-side ATV. A 40×60 building is large enough to store a “fleet” of recreational vehicles, keeping them all out of the weather and locked up secure.
Adding Living Space

Some property owners look at a 40×60 footprint and decide they want to do more than just store cars. They add insulation, plumbing, and finishing touches to turn part of it into a barndominium. You could have a 24×60 living quarters in the back or on the side, and use the rest for the RV. If that sounds appealing, checking out barndominium plans can show you how to integrate a home and a garage into one structure.
Cost and Planning Factors
It is hard to give an exact price for a project like this because the cost depends heavily on where you live. Steel prices change, lumber costs vary by region, and labor rates are different in every county.
Generally speaking, a 40×60 building is cheaper per square foot than a small shed because you are buying materials in bulk and the efficiency of the design is better. However, the “extras” add up. Those tall sidewalls, the wide commercial door, and the thick concrete slab will cost more than a standard agricultural barn.
You also need to budget for permits. Most counties require a permit for a structure this size. They will want to see that the building is rated for the snow load and wind speed in your specific area. If you live in northern Minnesota, your roof trusses need to hold much more weight than if you live in Alabama.
Do not skip the engineering. Buying a set of pre-designed pole barn plans ensures that the post spacing and truss sizes are correct for your local weather conditions. Trying to guess these numbers can lead to a roof collapse under a heavy snow load.
Final Thoughts
Building a 40×60 pole barn for your RV is a big project, but it solves a lot of problems. It protects your investment, gives you a dry place to work on your toys, and adds value to your property. The key is in the planning stage. Make sure you measure your RV with the antenna up and the vents open. Measure the height, width, and length, and then add a few feet of buffer in every direction.
If you are ready to move forward, start by looking at detailed drawings. You want to see exactly how the framing comes together before you buy the first board.
To get started on the design, take a look at our collection of garage and workshop blueprints. You can find several variations of the 40×60 layout that might be exactly what you need for your next build.