
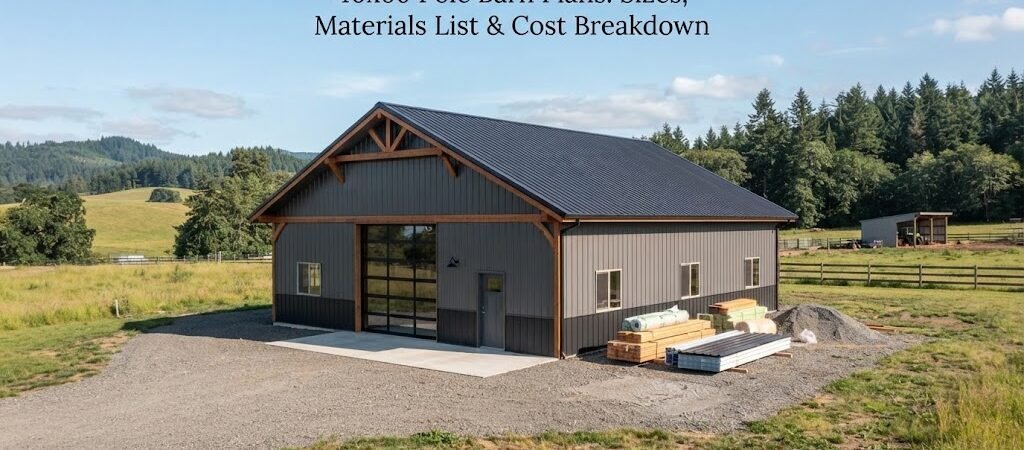
A 40×60 pole barn gives you 2,400 square feet under one roof. That’s enough room for several vehicles, farm equipment, a workshop, storage, or a mix of uses. The hard part isn’t just picking the size. You also need to decide how the space will be divided, what doors you need, how tall the building should be, and what the site and local building requirements call for.
A good set of pole barn plans can help you work through those choices before materials are ordered or construction starts.
How Big Is a 40×60 Pole Barn?
A 40×60 building has a footprint of:
40 feet × 60 feet = 2,400 square feet
That’s the basic floor area. The usable space inside can be different once you account for wall framing, posts, partitions, equipment clearances, and other features.
The 40-foot width is useful because it leaves plenty of room for different layouts. The 60-foot length also makes it easy to divide the building into work areas without creating a cramped floor plan.
For example, you might use the full building as open equipment storage. Another option is to create a 40×40 area for vehicles and equipment, then use the remaining 40×20 section as a workshop or enclosed storage area.
Common 40×60 layouts
The best layout depends on what you’ll actually do inside the building.
A few practical options include:
- Equipment storage: Keep most or all of the interior open for tractors, trailers, boats, or other large equipment.
- Garage and workshop: Put overhead doors along one side and reserve part of the building for benches, tools, and storage.
- Farm building: Use wide access doors and open floor space for machinery, supplies, or seasonal equipment.
- Mixed-use building: Divide the space into storage, vehicle parking, and a dedicated work area.
Before settling on one arrangement, compare different pole barn layouts [insert link here] so you can see how doors, work areas, and storage affect the space.

Choosing the Right Building Height
The 40×60 footprint tells you how much floor space you have, but it doesn’t tell you how tall the building should be.
Height should be based on what needs to enter and operate inside the building. A compact garage doesn’t have the same needs as a farm building storing tall equipment.
Think about:
- The height of your vehicles or equipment
- Overhead door size
- Whether you’ll use lifts or other shop equipment
- Storage racks or a loft
- Future equipment you may buy
- Roof framing and ventilation needs
It’s usually easier to plan for the equipment you expect to own later rather than designing the building around only what you have today.
If you’re unsure about the best proportions, looking through garage and workshop blueprints can give you useful ideas for arranging doors, work areas, and storage.
40×60 Pole Barn Materials List
A materials list for a pole barn is more involved than simply counting boards and sheets of metal. The exact quantities and structural sizes depend on the building design, site conditions, roof design, local loads, openings, and the structural system being used.
Still, you can use the following as a planning checklist.
Posts and foundation materials
Post-frame buildings typically use large vertical posts or columns as part of the main structural system.
Your materials may include:
- Structural posts or columns
- Concrete for post foundations or other foundation details
- Gravel or drainage material
- Bracing and connection hardware
- Fasteners and structural connectors
The required post size, spacing, embedment, and foundation details should come from the building design rather than a generic online materials list.
Soil conditions matter, too. A site with poor soil or unusual conditions may require a different foundation approach than a straightforward site.
Roof framing
The roof system can include:
- Trusses or rafters
- Roof purlins
- Bracing
- Structural connectors
- Metal roofing
- Roofing screws and trim
- Ridge or ventilation components, where specified
Don’t assume that one truss size or spacing works for every 40×60 building. Roof loads and the selected framing system can change the requirements.
Wall framing
Wall materials commonly include:
- Wall girts
- Bracing
- Structural connectors
- Exterior metal siding
- Corner and base trim
- Door framing
- Window framing, if included
The number of wall panels will depend on wall height, panel width, openings, and the manufacturer’s installation requirements.
Doors and openings
Doors can have a surprisingly large effect on both the design and budget.
A 40×60 pole barn might have one large overhead door, several smaller overhead doors, sliding doors, or a combination. You may also need a walk-in door and windows.
Plan door locations early. A large opening can affect framing and structural requirements, and equipment needs enough room to approach and clear the door safely.
What Does a 40×60 Pole Barn Cost?
There isn’t one reliable price for every 40×60 pole barn.
Two buildings with the same footprint can have very different project costs. A simple open-sided structure isn’t comparable with a fully enclosed building that has insulation, electrical work, concrete flooring, multiple large doors, and finished interior walls.
The biggest cost categories usually include the building shell, site work, foundation or concrete work, doors, labor, utilities, and interior finishes.
The building shell
This generally includes the primary structural framing, roof system, wall framing, exterior metal, trim, and related hardware.
The type and quality of materials can change the price considerably.
Concrete and site work
Don’t look only at the price of the pole barn kit or framing package.
You may also have costs for:
- Site clearing
- Grading
- Gravel
- Drainage
- Concrete floors
- Aprons or approaches
- Foundation-related work
Site preparation can vary widely from one property to another.
Doors and windows
Large equipment doors can add a significant amount to the project compared with a basic walk-in door.
Think about every opening before estimating the total. Adding doors later can also create extra structural and finishing work.
Labor
Labor costs depend heavily on location, crew availability, building complexity, and how much work you plan to do yourself.
If you’re comparing a kit price with a contractor’s quote, make sure you’re comparing the same scope of work. One price may cover only the building materials while another includes erection, concrete, doors, and other work.
Interior improvements
A basic storage barn and a finished workshop are very different projects.
If you plan to add insulation, interior walls, electrical service, lighting, plumbing, heating, or finished ceilings, treat those as separate parts of the budget.
For a realistic estimate, get local quotes based on your actual plans and site rather than relying on a single national price per square foot.
A Simple Way to Build Your Budget
Instead of starting with one total number, break the project into categories.
| Cost category | What to include |
|---|---|
| Site work | Clearing, grading, drainage, gravel |
| Structure | Posts, framing, trusses, purlins, girts |
| Exterior | Roofing, siding, trim, fasteners |
| Foundation/floor | Footings, concrete, floor slab where applicable |
| Openings | Overhead doors, sliding doors, walk doors, windows |
| Labor | Construction and specialty work |
| Utilities | Electrical, plumbing, heating, lighting |
| Interior | Insulation, walls, ceiling, storage, finishes |
This makes it much easier to see where the money is going and where a design change could affect the total.
Plan the Interior Before Buying Materials
A common mistake is to focus on the outside dimensions and leave the interior for later.
Draw the building from above and mark the things that must fit. Include vehicles, trailers, tractors, workbenches, shelving, storage racks, and anything else that needs floor space.
Leave enough room to open doors, move equipment, and work safely.
If you’re building a shop, think about where power tools and workbenches will go. If it’s mainly storage, consider how equipment will be moved in and out. If you expect the building to change over time, avoid filling every corner with permanent partitions.
For a building that may eventually include living space, it’s worth looking at a barndominium planning guide before locking in the layout. Living areas introduce different planning needs than a basic storage or workshop building.

What to Check Before Construction
Before ordering materials, confirm the project requirements for your property.
Local rules can affect setbacks, permits, foundation details, structural design, snow and wind loads, drainage, and other parts of the project. These requirements vary by location, so don’t rely on a plan from another area without checking whether it fits your site.
Your soil and site conditions also matter. A qualified local builder, engineer, or other appropriate professional can help determine what the building needs for your specific location.
It’s also smart to confirm utility locations before digging. Mark the building footprint, access areas, door locations, and finished floor elevation before construction begins.
Is a 40×60 Pole Barn Right for You?
A 40×60 pole barn is a useful middle ground for owners who need more than a typical garage but don’t want an extremely large building.
The 2,400-square-foot footprint can work well for equipment storage, a large garage, a workshop, or a combination of uses. The key is matching the building to what you need inside it.
Start with the floor plan. Then work through height, doors, site conditions, structural requirements, materials, and the full project budget. That order can save you from making expensive changes after construction has already started.
If you’re still comparing layouts, start with pole barn plan collections and compare the floor plans, door arrangements, and building proportions before choosing a design. A little planning on paper can make the actual building process much easier.