
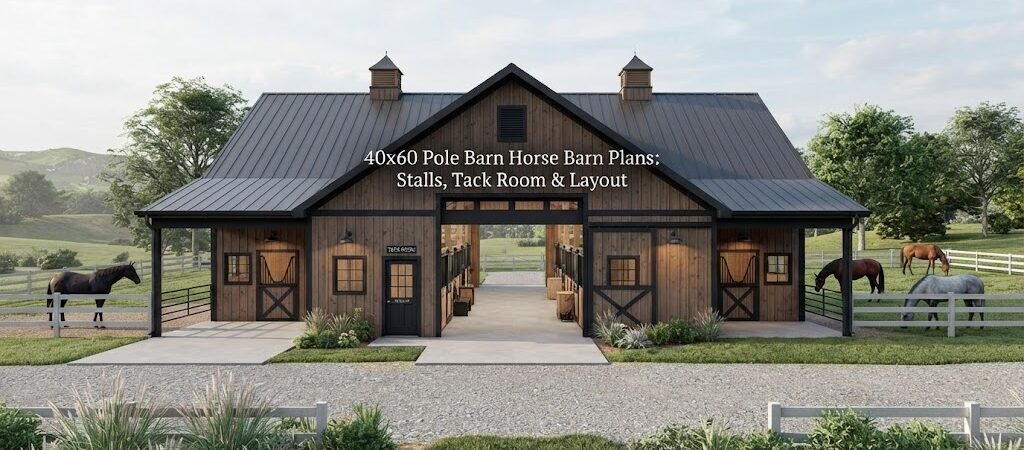
A 40×60 pole barn gives you 2,400 square feet of space to work with, and that opens up some real possibilities for a horse barn setup. You have enough room for a proper aisle, multiple stalls, a tack room, and still have space left over for feed storage, a wash area, or even a few extra bays that could serve as equipment storage or vehicle parking.
The tricky part isn’t whether everything will fit. It’s figuring out the layout that actually works for how you use your horses day to day. A bad layout means you’re walking farther than necessary, scraping mud off your boots in the house, or rearranging things two years later because something about the flow just doesn’t work.
Let’s talk through the options so you can plan something you won’t regret.
Why 40×60 Works Well for Horse Barns
This size hits a sweet spot for a lot of horse owners. It’s big enough to feel like a real barn without being so massive that it becomes unreasonable to build, heat, or maintain.
At 40 feet wide and 60 feet long, you can run a center aisle that feels comfortable. Twelve-foot aisles are nice if you have the room, and ten feet is workable. With 40 feet of width, a ten or twelve-foot aisle leaves you roughly 14 or 15 feet on each side for stalls and other spaces. That works out well because a standard horse stall runs 12×12 feet, though some people go larger for bigger horses or foaling stalls.
Sixty feet of length gives you room to string together several stalls along each side while still having space at one or both ends for a tack room, feed storage, or other uses.
If you’ve looked at different pole barn plans, you’ve probably noticed that this is one of the more popular sizes for agricultural buildings. There’s a reason for that. It fits a lot of needs without getting into custom-engineering territory on every detail.

Center Aisle Layouts
Most people building a horse barn go with a center aisle design, and for good reason. You can access any stall without walking through another one first. You can drive a tractor or truck down the middle for cleaning or moving hay. Horses can see each other across the aisle, which keeps them calmer. And air moves through better than it would in a single-row setup.
Here’s how the math typically shakes out for a 40×60 with center aisle:
A 12-foot center aisle takes up your middle space. That leaves 14 feet on each side. You can fit one 12-foot stall with 2 feet leftover, or you can run slightly narrower stalls if you want more of them.
Some common arrangements include:
Four stalls per side (eight total) with a 10-foot aisle. Each stall would be roughly 12×12 or slightly less depending on wall thickness and post placement. This uses up about 48 or 50 feet of your 60-foot length, leaving space at one end for a tack room and maybe a small feed area.
Three large stalls per side (six total) with wider stalls, say 14×14 or larger, plus a 12-foot aisle. This gives you fewer horses but more room per animal. Good if you have draft horses or just prefer giving them space to move around inside the stall.
Mixed configuration with some standard stalls and one or two larger ones for mares with foals or horses that need more room. You might do four stalls on one side and three on the other, using the extra width somewhere for a wash rack or grooming area.
The end walls are where things get interesting. That’s usually where your tack room goes, along with whatever else you need to squeeze in.
Placing the Tack Room
The tack room location matters more than you might think until you’ve lugged a saddle through rain or snow a few dozen times.
Putting the tack room at one end of the aisle, near where you enter the barn, is pretty common. You walk in, drop off or pick up gear, and head to the stall. If the main entry is at that same end, your tack stays close to the door you actually use.
Some people put the tack room in a corner so it shares two exterior walls. This can help with temperature control since saddle leather doesn’t love extreme heat or humidity. An exterior corner location also lets you add windows on two sides for natural light and ventilation.
A typical tack room in a barn this size runs 10×10 to 12×12 feet. That’s enough room for saddles on racks, bridles hung on the walls, a small bench or counter, and some storage cabinets or shelves. If you keep a lot of equipment or want a small fridge and coffee maker in there, lean toward the larger end.
One thing to consider: do you want a separate entrance to the tack room from outside, or should it only open into the aisle? An exterior door is convenient when you’re coming and going with gear and don’t need to go down the aisle. But it also means another door to seal up against weather and rodents.
Adding a Feed Room
Feed storage often gets grouped with the tack room, but they serve different purposes and sometimes work better separated.
Hay generates dust and can attract bugs and rodents. Saddles and leather tack don’t appreciate either one. So some builders create a dedicated feed room that’s adjacent to but separate from the tack area.
A feed room might be 8×10 or 10×12 feet, positioned next to the tack room at one end of the barn. You can store hay, grain, supplements, and cleaning supplies there. A small window helps with ventilation, and keeping it close to the stalls means less walking when you’re feeding.
If you don’t want a separate room, at least consider sealed containers for grain and a well-ventilated hay storage area that’s not sharing air space directly with your expensive tack.
Wash Rack Options
Not every horse barn includes a wash rack, but once you’ve used one, it’s hard to go back to washing horses with a hose in the driveway or pasture.
A wash rack can fit into your 40×60 layout in a few ways:
Replace one stall position with a wash area. You lose a stall but gain serious convenience. Size it similarly to a stall, perhaps 10×10 or 12×12 feet, with concrete floors that slope to a drain, hot and cold water, and cross-ties or bars to secure the horse.
Put the wash area at the end of the aisle opposite the tack room. This keeps wet messy stuff away from your gear and gives you a dedicated zone for bathing and grooming.
Build a wash stall that opens to the outside. Some designs have a wash area with doors on both the aisle side and the exterior wall. You can bring a horse in from the aisle to wash, or from outside if you’re dealing with a particularly muddy situation and don’t want that mess in your aisle.
Plumbing adds cost and complexity, so this is something to decide early before you start ordering materials or pouring concrete.
Lofts and Overhead Storage
With a 40-foot width, you have enough span to consider a loft for hay storage above the stalls or at one end of the barn. Not every pole barn design includes a loft, and adding one affects your truss selection and overall height, but it can nearly double your usable storage space.
Loft hay storage keeps hay off the floor, away from ground moisture, and up where air circulates better. You’ll need a way to get hay up there, either through a regular stairway, a steep ladder-style access, or a large enough opening to pitch bales up from below (though that gets old fast).
If you go with a loft, factor in the headroom below. Stalls under a loft can feel cramped if you don’t account for the dropped ceiling or bottom of the loft joists. Most people want at least 10 to 12 feet of clear height in the aisle and stalls, which means your overall building height needs to accommodate that plus whatever structure sits overhead.
Ventilation and Light
Horse barns deal with moisture, ammonia from urine, and dust from hay and bedding. Good ventilation makes a huge difference in air quality and the health of the animals inside.
Your 40×60 barn should include:
Ridge vent running the length of the roof peak. This lets hot air escape from the highest point. Couple it with soffit vents low on the eaves so cooler air can draw in from below.
Windows in each stall if possible. Horses benefit from natural light, and being able to look outside reduces stress. Sliding barn-style windows work well because they don’t swing into the aisle.
Doors at each end of the aisle that can be opened fully on nice days to create cross-ventilation. Even better if one end has a full-width overhead door that you can crack open or raise all the way.
Cupolas look traditional and can aid ventilation, though they’re secondary to having proper ridge and soffit vents.

Sample Floor Plan Idea
Here’s one way a 40×60 might lay out, just to give you a starting point for your own planning:
Enter at one gable end into a 12-foot-wide by 16-foot-deep combination tack and feed room on the left, with a smaller 8-foot-wide wash rack on the right. The wash rack could have its own exterior door.
Moving down the 12-foot center aisle, you find four 12×12 stalls on the left and four on the right. The last 8 or 10 feet at the far end could be open storage, a grooming area, or space for a small round pen or turnout attached to the barn.
That arrangement gives you eight stalls, tack and feed storage, washing capability, and room to maneuver, all within 2,400 square feet.
Cost Considerations
It’s hard to give exact numbers because so much depends on your location, the finish level you want, who does the labor, and current material prices. A basic pole barn shell might fall in one price range, while a fully finished interior with plumbing, insulation, stall fronts, and electrical throughout costs considerably more.
Stall fronts and hardware alone can add up quickly if you’re buying premade systems. Some people build their own from lumber and hardware store materials to save money. Both approaches work; it comes down to your budget, skills, and how nice you want the final result to look.
Concrete work is another major variable. A full concrete slab under the whole building costs more than concrete just in the aisle and stalls, with dirt or gravel elsewhere. But concrete everywhere cleans up easier and lasts longer.
Getting Your Plans Together
Once you have a rough idea of what you want, it’s worth spending time with actual drawings rather than guessing as you go. Looking at building plan collections designed for horse barns can show you arrangements you might not have considered, and help you spot problems before they become expensive mistakes during construction.
If you’re also thinking about living space on the property, maybe now or down the road, some folks look at barndominium plans to see how horse areas and residential space can coexist in one building. Even if that’s not your immediate plan, understanding how others have combined these uses might influence how you lay out the barn portion today.
A 40×60 pole barn configured for horses is a real asset to any property. Take the time to think through the layout, imagine your daily routines, and plan for how your needs might change over the years you’ll own the building. The effort you put into planning shows up every day in how well the barn works for you and your animals.