
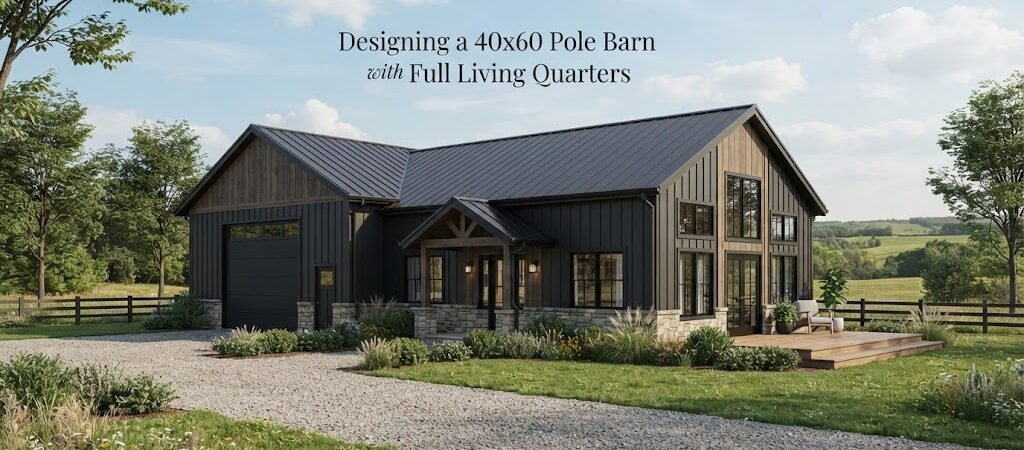
A 40×60 pole barn gives you a lot of room to work with. At 2,400 square feet, it can house vehicles, equipment, a shop, storage, and a comfortable living area under one roof. The challenge is making all those uses work together without making the building feel cramped or difficult to build.
A good design starts by deciding how much space should be dedicated to living and how much should remain open for the barn or shop. From there, you can plan doors, windows, plumbing, electrical runs, insulation, and interior walls around the way you actually expect to use the building.
Start With the Purpose of the Building
Before drawing walls on a plan, make a list of everything the building needs to do.
Will the barn store tractors or other equipment? Do you need a garage for several vehicles? Will the shop need a workbench, tools, or large machinery? Is the living area meant to be a full-time home, a guest space, or occasional quarters?
These answers can change the layout quite a bit.
For example, a property owner who needs a large equipment bay may want most of the 40×60 footprint left open, with living quarters along one end. Someone building a shop house may prefer a larger living area and a smaller workshop.
Looking through different pole barn plans before settling on a layout can help you compare how other buildings divide similar spaces.
How to Divide a 40×60 Building
There isn’t one correct floor plan for a 40×60 pole barn with living quarters. A simple approach is to place the living area at one end and leave the remaining space open for the barn, garage, or workshop.
For example, a 40-foot-wide by 60-foot-long building could be divided into a living area that runs across the full 40-foot width at one end. The remaining portion could stay mostly open.
Another option is to place the living quarters along one side. This can leave a long, open equipment bay on the other side. It may work well when large vehicles need to enter and exit without passing through the living area.
The best arrangement depends on the use of the building, not just the total square footage.
A Simple End-Wall Layout
Putting the living quarters across one end has a few practical advantages. Plumbing can be grouped together, and the living area can have its own entrance.
A basic layout might include:
- Kitchen and dining area
- Living room
- One or two bedrooms
- Bathroom
- Laundry or utility room
- Mechanical or storage space
The rest of the building can be used for parking, equipment, storage, or a workshop.
This arrangement also makes it easier to separate the noisy or dusty parts of the building from the living space.
A Side-by-Side Layout
With living quarters along one long side, the other side can become a large open shop or equipment area.
This can be useful if you want a wide work area but still want the convenience of having a kitchen and bathroom nearby. Interior doors can connect the two sections while keeping the main living area separate.
Before choosing this setup, think about where plumbing, electrical panels, heating equipment, and exterior doors will go. A layout that looks good on paper can become less practical if utilities have to cross the entire building.
Plan the Living Area Like a Small Home
Full living quarters shouldn’t be treated as an afterthought.
The living portion needs the same basic planning as any other home. Consider natural light, furniture placement, storage, bathroom access, kitchen work space, and privacy.


A large open room can make the space feel bigger, but you still need enough wall space for cabinets, appliances, closets, and furniture. Windows should provide useful daylight without interfering with shelving, work areas, or large equipment outside.
If the living area is fairly compact, an open kitchen, dining, and living space can make better use of the available room.
For more ideas on combining a shop or barn with a home, a barndominium planning guide can be a useful reference.
Think Carefully About Ceiling Heights
One advantage of a pole barn is the ability to create tall, open spaces. But the living area doesn’t necessarily need the same ceiling height as the equipment area.
A taller barn section may be useful for vehicle lifts, tall equipment, storage, or overhead doors. The living area can be designed around normal residential room proportions.
If you want a loft or storage area above the living quarters, that needs to be considered during the original structural design. Don’t assume the roof system can simply support a future floor.
The structural design should account for the intended use from the beginning.
Choose Door Locations Before Finalizing the Floor Plan
Doors have a major effect on how useful a 40×60 building will be.
Think about where vehicles will approach the building and how much room they’ll need to maneuver. A large overhead door may be useful on the shop side, while a standard entry door can serve the living quarters.
If you plan to store trailers, tractors, trucks, or recreational vehicles inside, check the actual dimensions before choosing door locations. Don’t design around a vehicle’s current size if you expect to replace it with something larger later.
Also consider whether the main equipment doors should face the driveway, road, or another convenient approach.
Keep Dust and Noise Out of the Living Quarters
A combined barn and home needs a clear separation between the two uses.
Workshops can create sawdust, fumes, noise, and temperature changes. Equipment bays may bring in mud, dirt, fuel odors, and exhaust.
A properly planned wall between the living area and work space can make the building much more comfortable. Depending on the design and local requirements, that separation may also need specific fire, insulation, ventilation, and other construction details.
It’s worth deciding early where people will move between the two sections. A door from the shop into a mudroom or utility area may be more practical than having shop traffic open directly into the kitchen.
Plan Plumbing and Electrical Early
Living quarters add plumbing, electrical, heating, cooling, and other systems that an ordinary storage barn may not need.
Try to group bathrooms, kitchens, laundry areas, and utility spaces where practical. Keeping plumbing runs reasonably compact can simplify the design, but the actual system should be planned based on the site and applicable requirements.
Electrical planning matters too. The shop may need circuits for tools and equipment, while the living area will have its own household loads.
Make a list of major equipment before construction starts. A welder, air compressor, water heater, electric range, HVAC system, freezer, or other high-demand equipment can affect the electrical design.
Insulation and Interior Finishes Matter
A pole barn intended only for equipment storage can have very different insulation needs than one containing a home.
For full living quarters, the insulated portion needs to be designed as living space from the start. Walls, ceilings, doors, windows, and air sealing all affect comfort and energy use.
The shop side may have different needs. You might want to heat it occasionally without maintaining the same indoor temperature as the living area.
This is another reason to divide the building into zones rather than treating the entire 40×60 footprint as one room.
Interior finishes should also match the use. Durable surfaces may make more sense in a mudroom or shop entry than delicate residential finishes.
Don’t Forget Storage
It’s easy to use every available square foot for rooms and still run out of places to put things.
The living area needs closets and cabinets. The barn side may need room for tools, seasonal equipment, lawn equipment, spare materials, and maintenance supplies.
Consider adding dedicated storage to the plan rather than relying on leftover corners.
If a separate small structure would make more sense for yard equipment or seasonal storage, comparing shed and workshop plans can give you additional options.
Consider the Site Before the Building
A great floor plan can still be a poor building design if it doesn’t fit the property.
Think about driveway access, drainage, slopes, utility connections, septic or sewer arrangements, well locations, and the direction of the building.
Sun exposure can affect window placement and indoor comfort. Prevailing weather may influence which sides get doors and openings. You’ll also want enough room around the building for construction, maintenance, vehicles, and future changes.
Local zoning, permits, setbacks, utility requirements, and building rules vary by location. Before construction, have the proposed design reviewed against the requirements that apply to your property.

Budget for More Than the Shell
The cost of a building with living quarters isn’t simply the cost of the pole barn shell.
A finished living area can require insulation, interior walls, flooring, cabinets, plumbing, electrical work, heating and cooling, fixtures, windows, doors, and other residential finishes.
Site work and utilities can also have a major effect on the total project cost. Labor and material prices vary by location and over time, so a local estimate is much more useful than relying on a single general price per square foot.
If your budget is limited, deciding which spaces need to be finished immediately can help. Some owners may choose to complete the living quarters first while leaving part of the shop unfinished for later.
Use a Plan Before You Build
A 40×60 pole barn gives you enough room to create a very useful combination of home, garage, shop, and storage. But the size alone doesn’t guarantee a good building.
The best plans start with how you’ll use the space every day. Decide where vehicles go, where people enter, how the living area is separated from the shop, and where utilities need to run before construction begins.
It’s also smart to compare several layouts rather than committing to the first design that looks good. Browse a pole barn plans collection and look for layouts that match the way you want to use your building.
A well-planned 40×60 building can serve several purposes without making the living space feel like it’s inside a garage. Spend time on the layout now, and you’ll have fewer compromises to deal with once the walls are up.
If you’re still working out the room arrangement, start with barndominium and home plans and compare a few layouts before turning your ideas into a final building plan.