
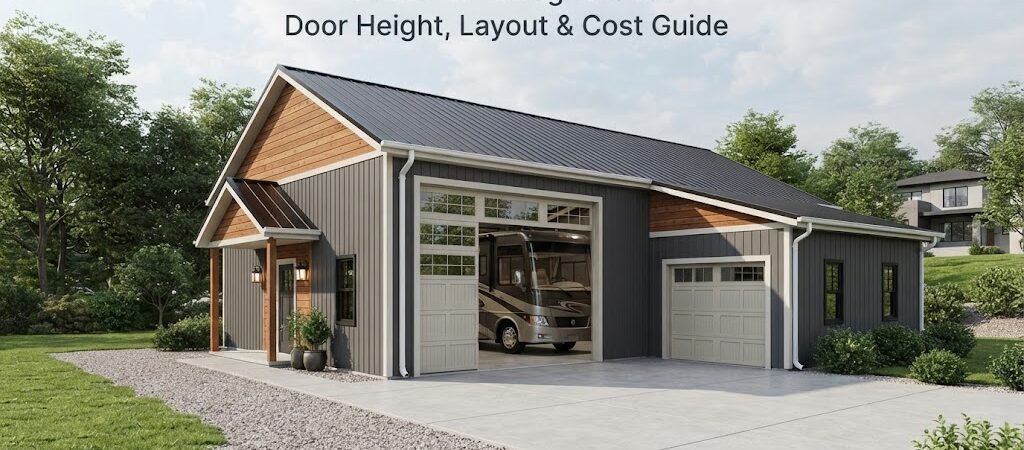
A 40×50 RV garage gives you 2,000 square feet under one roof, which is enough room for a large RV plus storage, tools, vehicles, or a workshop. But the size alone doesn’t guarantee a good building.
The door height, interior layout, roof design, slab, utilities, and local site conditions all need to work together. A little planning before construction can prevent some very expensive changes later.
How Much Space Does a 40×50 RV Garage Have?
A 40×50 building has 2,000 square feet of floor area. The 40-foot width gives you plenty of side-to-side room, while the 50-foot length can provide useful depth for parking and storage.
The key is deciding how you want to use that space.

If the garage is mainly for one RV, you don’t need to fill the entire building with parking. You could use part of the space for a workbench, lawn equipment, motorcycle parking, shelving, or a small workshop.
Another option is to park the RV along one side and reserve the other side for a pickup, boat, tractor, or shop area. The right arrangement depends on the size of your RV and what else you expect to store.
Before choosing from different pole barn layouts, measure the largest equipment you plan to keep inside and think about how you’ll move it in and out.
RV Garage Door Height Matters
Door height is one of the first things to settle in your RV garage plans.
Many RVs are much taller than ordinary cars and trucks. Roof-mounted air conditioners, vents, satellite equipment, and other accessories can add to the overall height. You need to consider the actual height of your RV, not just the manufacturer’s basic body dimensions.
Measure the RV, Not Just the Brochure
Park the RV on level ground and measure from the ground to the highest fixed point. Include anything that stays on the roof during normal use.
Then allow enough clearance for comfortable entry and exit. You don’t want a door opening that’s technically tall enough but leaves only a small amount of room.
The same idea applies to door width. Check the width of the RV at its widest point, including mirrors or other equipment that affects how you drive into the building.
Think About the Approach
The garage door isn’t the only part of the entry that matters.
A steep driveway, uneven approach, sharp turn, or nearby fence can make a large RV harder to maneuver. Look at the entire path from the road to the parking position.
A taller door also means the building’s wall and roof design need to accommodate it. The final opening should be coordinated with the framing and structural design rather than treated as an afterthought.
Popular 40×50 RV Garage Layouts
There isn’t one perfect floor plan for a 40×50 RV garage. The best layout depends on whether the building is primarily an RV shelter or a combination garage and shop.
Layout 1: RV Parking With Storage
The simplest plan is to dedicate most of the building to the RV.
You might park the RV lengthwise through the 50-foot dimension, leaving space along the sides for shelving and equipment. This works well if the main goal is keeping the RV protected while still having room for basic storage.
It’s a straightforward layout and can leave plenty of open floor area for maneuvering.
Layout 2: RV Plus Workshop
If you want a place to work on projects, divide the building into parking and shop areas.
For example, the RV can occupy one portion of the building while the remaining space becomes a workshop. You could add workbenches, cabinets, tool storage, and equipment along the walls.
Keep the shop area arranged so tools and stored materials don’t interfere with the RV door or walking paths.
Garage and workshop blueprintscan also help when you’re trying to combine vehicle parking with dedicated work space.
Layout 3: RV Plus Extra Vehicle
A 40-foot-wide building may also allow room for another vehicle, depending on the RV’s size and the amount of clearance you want.
This can be useful if the RV is stored for part of the year and you want the building to serve as a regular garage the rest of the time.
Don’t plan the layout using vehicle dimensions alone. Doors, posts, walls, storage cabinets, and space for opening doors all take up usable room.
Where Should the RV Door Go?
The main RV door location affects nearly everything inside the garage.
A centered door on the end wall can make the building easy to enter if the site allows a straight approach. A side-wall door may work better if the driveway comes alongside the building.
Think about where the RV will sit once it’s inside. If the RV needs to be moved frequently, a layout that requires tight turns can become frustrating.
You should also consider pedestrian doors. A separate walk-in door is convenient when you’re entering the building without moving the RV. Depending on your plans, windows and service doors may also be useful.
Ceiling Height and Roof Design
The outside dimensions of a 40×50 building don’t tell you the interior clearance.
A tall RV needs adequate vertical clearance inside the garage, including room around roof-mounted equipment. The roof pitch, framing system, door opening, and desired storage can all affect usable height.
If you plan to add a loft or overhead storage, make sure it doesn’t interfere with the RV. A tall building can provide useful storage space, but that space needs to be planned around the equipment that will actually enter the garage.
For this reason, it’s smart to settle the RV dimensions and door opening before finalizing the roof and framing design.
Concrete Slab and Floor Planning
The RV’s weight makes the floor another important planning point.
Don’t assume that a typical garage slab specification is suitable for every RV garage. Slab design can depend on the vehicle loads, soil, site conditions, local requirements, and the structural design of the building.
Your builder or qualified local professional can determine what the project requires.
It’s also worth deciding where you want drains, electrical outlets, water connections, or other utilities before the slab is poured. Moving utilities later can be much harder than planning them during construction.
What Does a 40×50 RV Garage Cost?
There’s no reliable single price for a 40×50 RV garage.
The final cost can vary widely based on location, site preparation, foundation and slab work, framing system, siding, roofing, insulation, doors, electrical work, plumbing, interior finishes, labor, and local requirements.
Site work alone can change the budget considerably if the property needs grading, drainage improvements, driveway work, or other preparation.
The RV door can also affect the price. A large specialty door isn’t the same as a standard residential garage door, and the opening may require a different structural approach.
For budgeting, it’s better to build a project-specific estimate than rely on a simple price-per-square-foot number.
Plan for Future Use
Your RV might be the main reason for building the garage today, but think about how the building could be used years from now.
Will you eventually buy a larger RV? Do you want room for a tractor or boat? Could part of the garage become a workshop? Would you ever add insulation, heating, cooling, or finished walls?
You don’t have to build every feature immediately. But leaving room for future needs can make the building much more useful.
This is especially important with door openings. Changing a large RV door later can involve structural work, siding changes, and other modifications. It’s usually better to think ahead before construction begins.
Start With a Realistic Floor Plan
A good 40×50 RV garage plan should show more than four outside walls and a door.
Before construction, sketch the RV at its actual size and place every major item you expect to keep inside. Add vehicles, workbenches, shelving, toolboxes, lawn equipment, and other large objects.
Then check the walking paths and turning space.
If you’re considering a building that may include living space later, a barndominium planning guide can help you think through how garages, storage, and other areas may fit together.
For a smaller secondary building, shed and workshop plans may also be useful if some tools or storage can be moved out of the main RV garage.

Final Thoughts
A 40×50 RV garage offers a lot of flexibility, but the best results come from planning around the RV first. Confirm its true height and width, choose the door location carefully, allow enough maneuvering space, and decide how much room you want for vehicles, storage, or a workshop.
Then work with your builder or design professional on the structural, foundation, electrical, drainage, and code-related details for your property.
Before settling on a layout, comparing pole barn plans for garages and storage can give you practical ideas for making the most of the 2,000 square feet you have available.