
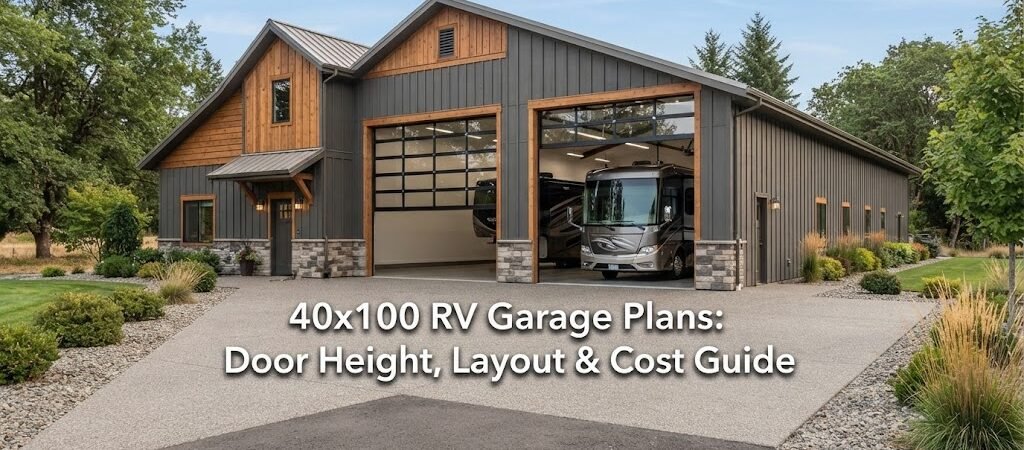
A 40×100 RV garage gives you a lot of room to work with. At 4,000 square feet, it can hold a large RV, several vehicles, trailers, tools, equipment, and a dedicated workshop without everything being packed together.
But a building this large needs more planning than simply choosing a 40-by-100 footprint. Door height, parking layout, turning space, ceiling height, storage, utilities, and future needs can all affect the design. Cost can also vary widely depending on the site, materials, finishes, labor, and local requirements.
This guide covers the main things to think about before building or ordering plans for a 40×100 RV garage.
How Big Is a 40×100 RV Garage?

A 40×100 building has 4,000 square feet of floor area.
The 40-foot width is especially useful for an RV garage because it allows you to create wider parking bays and still leave room along the sides for storage or a work area. The 100-foot length gives you plenty of flexibility.
For example, you could use part of the building for RV parking, another section for cars or trucks, and the remaining space as a workshop. You could also divide the building into separate bays.
The key is to plan the interior around the equipment that will actually go inside. A drawing that looks spacious on paper can feel much tighter once you add vehicles, cabinets, workbenches, shelves, and doors.
If you’re still comparing building sizes, reviewing different pole barn layouts can help you see how the same square footage can be divided in different ways.
Choosing the Right RV Garage Door Height
Door height is one of the first things to settle because it affects both the building design and how easily you can use the garage.
A typical RV can be much taller than a pickup truck or standard car. Depending on the RV, roof equipment such as air conditioners can add more height. You also need clearance above the vehicle, not just enough room for it to physically fit through the opening.
Measure the RV, Not Just the Manufacturer’s Size
Before choosing an overhead door, measure the actual RV if possible.
Check:
- Overall vehicle height
- Overall vehicle width
- Mirrors and other side projections
- Roof-mounted equipment
- Clearance needed for the door system
- Any future vehicle you may store there
Don’t plan the opening based only on the RV’s advertised body height. A few extra inches on paper can disappear quickly when roof equipment and door hardware are considered.
Many RV owners choose a taller and wider door than they strictly need today because replacing or enlarging an opening later can be difficult and expensive.
Think About the Building’s Eave Height
The door opening and the building’s overall height need to work together.
A tall RV door needs enough wall height above and around it for the door system, framing, roof structure, lighting, and other components. The exact requirements depend on the type of door and the building design.
For a 40×100 RV garage, it’s often worth planning the wall height around the tallest vehicle you expect to own rather than designing only for today’s RV.
Your local building department, builder, and structural designer can confirm the required dimensions for your particular design.
40×100 RV Garage Layout Ideas
The long 100-foot dimension gives you several ways to organize the building.
One simple approach is to dedicate a large portion of the building to RV and vehicle storage while putting the workshop toward one end. Another option is to create multiple vehicle bays along the long walls.
For example, a layout might include a large RV bay near the front, several vehicle or trailer spaces farther back, and a workshop at the opposite end. The exact arrangement depends on your vehicles and how much workspace you need.
Plan for Vehicle Movement
Don’t only draw the parking spaces. Think about how vehicles will enter, turn, back up, and leave.
This matters especially if you have:
- A large motorhome
- A fifth-wheel trailer
- A travel trailer
- Boats
- Equipment trailers
- Farm equipment
- Long trucks
You may need more open floor area than the parking dimensions suggest. A vehicle can fit into a bay but still be difficult to maneuver into position.
It can help to sketch the vehicle footprints on the floor plan and draw the path they need to take through the doors.
Adding a Workshop to the RV Garage
A 40×100 building can make a great combination RV garage and workshop.
Instead of filling the entire building with parked vehicles, you can reserve a section for tools, workbenches, storage cabinets, and equipment.
If you expect to spend a lot of time working inside, consider where you’ll put electrical outlets, lighting, compressed air lines, heating or cooling equipment, and large tools. These decisions are easier to make before construction than after the walls are finished.
For ideas on combining vehicle storage and work areas, garage and workshop blueprintscan provide useful layout inspiration.
A workshop also benefits from a clear path between the main garage door and the work area. You don’t want parked vehicles, storage racks, or workbenches blocking the route for moving equipment.
Storage Is Easy to Underestimate
A large garage can fill up surprisingly fast.
RVs often come with outdoor furniture, hoses, leveling equipment, spare parts, tools, camping gear, and other items. If you also store vehicles and equipment inside, floor space can disappear quickly.
Consider using wall space and, where practical, overhead storage. You might also reserve a dedicated storage room or enclosed section at one end of the building.
Planning storage into the original design is usually better than trying to find space for it after the building is complete.
What About RV Garage Ceiling Height?
Ceiling height is closely tied to door height.
A taller interior can make it easier to install a tall RV door and may also provide room for lighting, storage, ventilation equipment, or a vehicle lift if the structure is designed for one.
However, don’t assume that a taller building automatically solves every problem. The roof structure, door system, framing, insulation, and other components all have to work together.
If you plan to use a lift, overhead crane, tall storage system, or other large equipment, tell the designer before the plans are finalized. Those uses can affect the structure and clearances.
40×100 RV Garage Cost Factors
There isn’t one reliable price for a 40×100 RV garage.
A project of this size can have a very different cost from one property to another. Local labor rates, material prices, site conditions, foundation requirements, utilities, insulation, doors, interior finishes, and structural requirements can all change the final number.
The building itself is only part of the project.
You may also need to account for site preparation, excavation, drainage, concrete work, electrical service, plumbing, insulation, lighting, heating or cooling, and interior finishing.
The Doors Can Make a Big Difference
Large RV doors aren’t the same as standard residential garage doors. Their size and type can affect both the building design and the project budget.
If you need several tall doors, include them early in the planning process rather than treating them as an afterthought.
The same applies to windows, man doors, insulation, and interior partitions. Adding these features later may require changes that would’ve been easier to handle during the original design.
Get a Site-Specific Estimate
Use any online cost figure only as a rough starting point.
Before committing to construction, get estimates based on your location and your actual plans. Your builder can also help identify site or material choices that could have a large effect on the total project.
Should You Use a 40×100 Pole Barn or Metal Building?
Both approaches can work for an RV garage, but the best choice depends on your goals, site, budget, appearance preferences, and local construction requirements.
A pole barn style building can be a practical option for large storage and equipment spaces. A steel-framed or metal building can also be designed for large clear-span areas and tall vehicle doors.
The important part is choosing a structure that is properly designed for your location and intended use. Snow, wind, soil, foundation conditions, and other factors can affect the design.
Don’t assume that a plan suitable for one location will automatically work everywhere.
Start With the Floor Plan, Not the Exterior
It’s easy to get focused on siding colors, roof styles, and exterior appearance. For an RV garage, the interior layout deserves attention first.
Start by drawing the vehicles and equipment you actually own. Then add the work areas, storage, doors, and walking paths.
Ask yourself how you’ll use the building five or ten years from now. If you expect to buy a larger RV, another truck, or additional equipment, leave some room for that possibility.
If the building may eventually include living space, take that into account before construction. A barndominium planning guide can help if you’re considering a future combination of garage, workshop, and living space.
Check Local Requirements Before Building
Building requirements vary by location. Your local rules may affect setbacks, permits, foundation design, structural requirements, electrical work, drainage, and other parts of the project.
Your plans may also need to account for local wind, snow, soil, or other site-specific conditions.
For that reason, treat any general plan or online dimension as a starting point. Have the final design reviewed for your specific property and intended use before construction.
Choosing 40×100 RV Garage Plans
A good set of plans should do more than show a rectangle with a few doors.
Look for a plan that gives you enough information to understand the overall layout, door locations, dimensions, roof design, and intended use of the space. If your project has special requirements, such as a tall RV door, workshop, storage area, or future living space, make sure those needs are reflected in the design.
You can also compare pole barn plans to see different ways large buildings can be arranged before settling on a layout.
The goal isn’t simply to build a 40×100 structure. It’s to build one that works well for the way you actually use your property.
Final Thoughts
A 40×100 RV garage offers a lot of flexibility, but the extra space only helps if it’s planned well. Start with the size of your RV and other vehicles, choose door openings with plenty of practical clearance, and think carefully about turning space, storage, workshop areas, and future needs.
Cost should be estimated for your specific property rather than based on a single price per square foot. And before construction begins, have the design checked against your local requirements and site conditions.
If you’re still working out the best arrangement, comparing large garage and pole barn plans is a practical next step. Seeing real floor plans can make it much easier to decide where the RV bay, workshop, storage, and other spaces should go.