
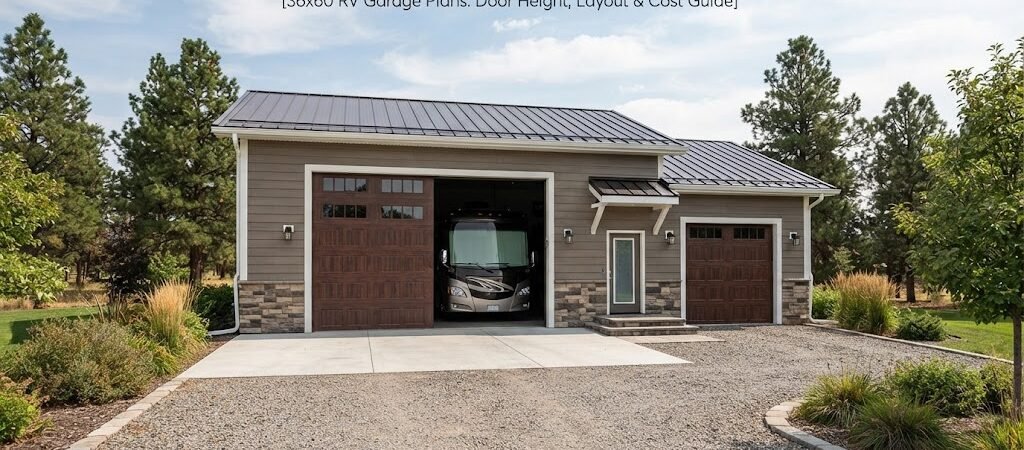
A 36×60 RV garage gives you a lot more than a place to park a motorhome. With 2,160 square feet inside, it can hold an RV, extra vehicles, tools, equipment, and a work area without feeling cramped. The key is planning the building around the RV first.
Door height, turning space, storage, and interior layout all matter. A good plan can make the same 36×60 building work much better than a poorly arranged one.
How Big Is a 36×60 RV Garage?
A 36×60 building is 36 feet wide and 60 feet long, giving you 2,160 square feet of floor area.
That sounds like plenty of room, and it usually is for a dedicated RV building. But the usable space depends on how you divide it up.
For example, the 60-foot length could give you a long parking bay for the motorhome with room at the front or rear for storage. The 36-foot width may also allow space beside the RV for a pickup, workbench, shelves, or other equipment.
Before choosing a plan, measure your RV with its mirrors, ladders, roof equipment, and any other parts that add to its overall size. Don’t plan around the manufacturer’s basic body length alone.

For more ideas on how to use a building footprint efficiently, comparing different pole barn layouts can be helpful.
RV Garage Door Height Is a Major Planning Detail
The garage door is one of the first things to settle on. A motorhome may be much taller than a normal pickup truck or car, especially if it has roof-mounted air conditioners, vents, antennas, or other equipment.
A door that’s too low can make an otherwise perfect building useless for the RV.
Measure the Full RV Height
Measure from the ground to the highest fixed point on the RV. If the RV has rooftop equipment, include it.
It’s also smart to leave some practical clearance above that measurement. The exact amount depends on the door design, the building, and how the RV approaches the opening.
Don’t assume a door labeled as a certain height gives you that much clear opening in every situation. Track systems, framing, door hardware, and the building design can affect usable clearance.
Think About the Approach
Door height isn’t the only issue. The RV needs enough room to approach the door without hitting posts, corners, or other obstructions.
If the driveway slopes toward the building, check how that changes the RV’s angle as it enters. A large motorhome can behave very differently from a pickup on a sloped driveway.
The same applies to the inside. Make sure rooftop equipment won’t come close to lights, rafters, garage door tracks, or other items once the RV is parked.
36×60 RV Storage Building Plans: Layout Ideas
There isn’t one perfect layout for a 36×60 garage. The right arrangement depends on what else you want to keep inside.
Layout 1: Dedicated RV Bay
The simplest approach is to make most of the building one large RV parking area.
This works well if the main goal is indoor storage and easy access around the motorhome. You can use wall space for shelves, cabinets, tires, tools, and seasonal equipment.
The advantage is simplicity. There’s less interior framing, and you have plenty of room to maneuver the RV.
Layout 2: RV Plus Vehicle Storage
Another option is to use the building for the RV and another vehicle.
The 36-foot width gives you flexibility for side-by-side parking or a dedicated storage area, depending on the vehicle sizes and the door locations.
Before committing to this layout, draw the vehicles to scale. Include doors and walking space. A plan that looks roomy on paper can feel tight once both vehicles are inside.
Layout 3: RV Garage With a Workshop
If you spend time repairing equipment, woodworking, or working on vehicles, reserve part of the building for a shop.
A workshop doesn’t have to be large to be useful. Even a defined work area along one side can provide space for a bench, tools, storage cabinets, and equipment.
Keep the main RV travel path open. You don’t want stored materials or a workbench interfering with the path used to bring the motorhome inside.
For more ways to combine parking and workspace, garage and workshop blueprints can give you additional layout ideas.
36×60 Motorhome Garage Blueprints: What to Look For
When comparing 36×60 motorhome garage blueprints, don’t focus only on the outside dimensions.
Look closely at the location of doors, windows, interior walls, storage areas, and vehicle bays.
A good plan should make it easy to answer a few basic questions:
Where does the RV enter?
Where will it sit when parked?
Can you walk around it?
Where will tools and spare parts go?
Can another vehicle enter without blocking the RV?
Is there enough wall space for storage?
Will the electrical, lighting, and other utilities be convenient for how you’ll use the building?
Door placement can make a big difference. A large RV door centered on one wall may work well for some properties, while an offset door may create better parking or storage space.
Think about the property outside the garage, too. The driveway, gates, trees, fences, and nearby buildings all affect how easily the RV can enter and leave.
Don’t Forget the Interior Clearance
Floor space gets most of the attention, but overhead and side clearance are just as important.
A motorhome needs room around its body for comfortable access. If you’re storing it for long periods, you may also want space to inspect it, clean it, perform basic maintenance, or load and unload gear.
Wall-mounted storage can help keep the floor clear. Shelving, cabinets, and hooks are often more useful than filling the building with freestanding storage units.
If you plan to use the garage as a workshop, think about where dust, noise, and work equipment will go. Separating the work area from the RV parking area can make the building easier to keep organized.
What About the 36×60 RV Garage Cost?
The cost of a 36×60 RV garage can vary widely, so it’s better to think of it as a project with several cost categories rather than one fixed price.
The building itself is only part of the budget.
Your total cost may be affected by:
- Site preparation and grading
- Foundation or slab work
- Framing and structural materials
- Roof and wall materials
- RV garage doors and other doors
- Windows
- Electrical work
- Lighting
- Insulation and interior finishing
- Plumbing, if needed
- Heating or cooling
- Labor
- Local engineering or design requirements
- Driveway and access work
Material and labor prices also vary by location and can change over time. Soil conditions, site access, building design, and local weather requirements can affect the final project.
Because of that, be cautious with online cost estimates that give one exact number for every 36×60 building.
A better approach is to start with a plan, get the major project requirements defined, and then request local quotes based on the actual design.
Foundation and Site Planning Matter
An RV is a large, heavy vehicle, so the foundation needs to be designed for the building and its intended use.
The right foundation depends on factors such as soil, drainage, climate, local requirements, and the structural design.
Site drainage deserves attention, too. Water should not be allowed to collect around the building or at the RV entrance.
Think about the driveway early. You need enough width and turning room for the motorhome to approach the garage without making a difficult multi-point turn.
A few minutes spent drawing the RV’s approach on a site plan can prevent major headaches later.
Plan for Future Storage
It’s easy to design a garage around what you own today and forget what you’ll need five years from now.
RV owners often accumulate accessories, spare parts, outdoor furniture, tools, ladders, hoses, generators, and other gear. A little planned storage can keep those items from taking over the parking area.
If you may add another vehicle or piece of equipment later, leave some flexibility in the layout.
The same principle applies if you’re considering a shop. Adding a few feet of useful workspace on paper can be much easier than trying to create it after the building is finished.
For smaller equipment and overflow storage, shed and workshop plans may also be worth reviewing as part of the overall property plan.
Should You Use a Standard Plan or Custom Design?
A standard 36×60 plan can be a good starting point if its dimensions and layout are close to what you need.
It can help you visualize the building, parking arrangement, doors, storage, and work areas before construction begins.
A custom design may make more sense when the property has unusual access, steep terrain, special equipment, or a very specific RV and vehicle arrangement.
Either way, the plan should be checked against your actual site and local requirements. A stock plan may need changes before it can be used for construction.
If you’re considering living space as part of the project, a barndominium planning guide can help you think through the extra design issues that come with combining a shop or garage and living area.

A Simple Way to Start Planning
Before pricing the building, sketch the layout from above.
Draw the 36×60 footprint and mark the RV’s actual dimensions. Add the garage door, driveway approach, walking areas, other vehicles, storage, and workshop space.
Then check the plan from several angles.
Can the RV enter easily?
Can you open its doors?
Can you reach the storage areas?
Is there enough clearance around the vehicle?
Will the garage still work if you add another vehicle or piece of equipment?
This simple exercise often reveals layout problems before they become construction problems.
Final Thoughts
A 36×60 RV garage offers plenty of room for a motorhome, vehicles, storage, and even a workshop, but the size alone doesn’t guarantee a good building.
Start with the RV’s real dimensions and height. Plan the garage door around those measurements. Then work outward to parking, turning space, storage, and workspace.
Keep local site conditions, structural requirements, and project costs in mind before construction begins. Most importantly, choose a layout that matches how you’ll actually use the building.
If you’re still working out the best arrangement, comparing pole barn plans and building plan collections is a practical next step. Seeing different layouts can make it much easier to decide what belongs inside your 36×60 RV garage before you start getting quotes.