
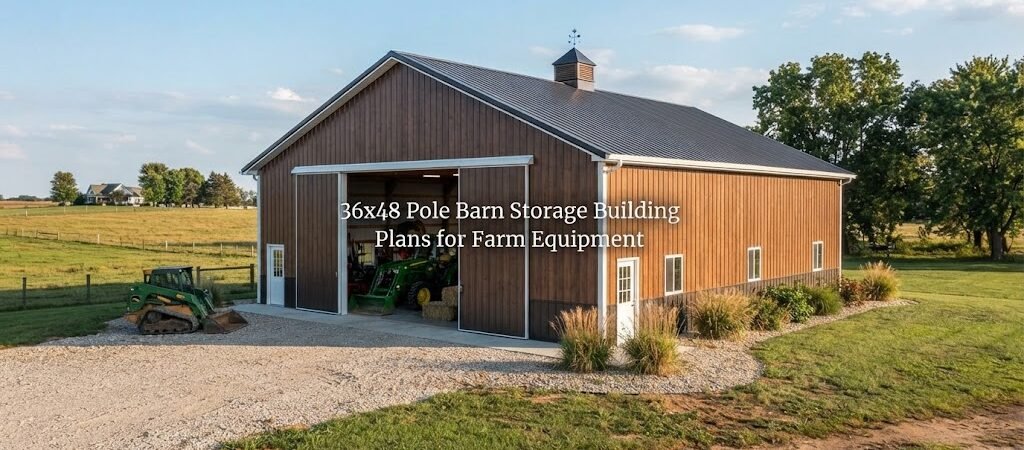
A 36×48 pole barn hits a sweet spot for a lot of farms and rural properties. It’s big enough to get tractors and implements under a roof, but not so huge that it turns into a never-ending build. If you’re looking at 36×48 pole barn storage building plans for farm equipment, you’re probably trying to answer a few simple questions:
Will my stuff fit?
Can I get in and out without a 14-point turn?
And how do I build it once, the right way?
Let’s walk through the planning choices that matter before you order materials or set posts.

What a 36×48 storage barn really gives you
A 36×48 building is 1,728 square feet. On paper that sounds massive. In real life, equipment eats space fast, especially if you want room to park, walk around, and hook things up.
This size usually works well for:
- One or two tractors (even with loaders)
- A mix of implements like a mower, tiller, disc, box blade, or sprayer
- A small skid steer or UTV
- Pallets of feed, seed, parts, and tools along the walls
It can also work as a “now” building that you can add onto later. Many people start with storage, then add a workbench wall, a small shop bay, or a lean-to for extra covered parking.
Start with the right plan: pole barn plans
The best 36×48 pole barn plans don’t just show the footprint. They help you think through door locations, traffic flow, wall height, and where you’ll want power and lighting later.
Before you pick a layout, do one quick thing: list your biggest equipment and measure it. Not brochure specs. Real measurements with any attachments you actually leave on.
At minimum, write down:
- Overall height (ROPS, cab, beacon light, exhaust cap, etc.)
- Overall width (especially if you have duals)
- Turning needs (long implements change everything)
Those numbers will tell you what sidewall height and door sizes you should be looking at.
Picking a layout that’s easy to use
A 36×48 rectangle is flexible. The “right” layout mostly comes down to how you want to drive through, where your driveway comes in, and what you hate doing in the winter.
Drive-through vs. single-entry
Drive-through (big door on each 36′ end) is hard to beat for equipment. You pull in, drop an implement, and pull out. No backing around other stuff. This is especially nice if you store a trailer, hay wagon, or anything long.
Single-entry (doors on one end only) can work if your site is tight or you’re trying to save on door cost. But it usually turns into more jockeying later, once the building fills up.
If you can swing it on your site, drive-through is one of those choices you won’t regret.
Common door setups that work
Door size depends on your equipment, but there are a few patterns that fit a lot of farms:
- One large door for the tractor/loader, centered on the end wall
- A second wide door (or sliding door) for a mower, UTV, or small trailer
- A service door near the corner so you’re not opening a big door just to grab a wrench
If you plan to park multiple pieces side-by-side, two big doors on the same end can be better than one huge opening. It gives you more options for framing and it can reduce drafts inside in windy areas.
Interior space planning (so it doesn’t turn into a junk cave)
Here’s a simple way to divide a 36×48 without building full rooms:
- Keep a “drive lane” straight in and out (even if it’s just an open strip)
- Park equipment on one side
- Use the other side for pallets, a tool wall, and a workbench
If you want shop space too, look at garage and workshop blueprints to steal ideas like a back workbench zone, a welding corner, or a parts shelving wall that doesn’t block parking.
Wall height, roof style, and other choices that change everything
A 36×48 pole barn can feel either roomy or cramped depending on two things: sidewall height and roof shape.
Sidewall height: don’t guess on this
If you store tractors with cabs or plan to add a lift, height matters. Even without a lift, extra height makes it easier to back in with attachments and it gives you better overhead door options.
Instead of picking a height because “everyone does,” match it to:
- Your tallest machine (with margin)
- The door type you want (overhead doors need headroom)
- Whether you’ll add a ceiling liner or insulation later
Also remember: more height can mean more wind load and different bracing needs. Your final design should match your local conditions and any permit requirements.
Roof style: gable vs. gambrel vs. a simple slope
Most equipment barns are simple gable roofs because they’re straightforward to frame and finish. A gambrel can add usable loft space, but it can complicate the build and may not be worth it unless you know you’ll use the upper area.
If you’re thinking about storage overhead, it’s worth browsing a building plan collection to compare roof shapes and see how different plans handle headroom and truss layouts.
Overhangs and gutters: small cost, big payoff
A little overhang helps keep water off the posts and away from the base of your siding. Gutters and downspouts also matter more than people think, especially if you’re trying to keep the entry dry and reduce mud.
If your site tends to hold water, good roof drainage is not optional.
Post spacing, slabs, and floors (the part nobody wants to redo)
This is where a lot of “simple storage barn” projects get expensive later, mainly because it’s hard to change once it’s built.
Site prep and drainage
Before anything else, plan how water will move around the building. You want grade sloping away from the barn, and you want downspouts that don’t dump water right where you drive.
If you’re building on clay or a wet spot, talk to a local excavator. A little extra work up front can save you from ruts, ice, and soft spots at the doors.
What floor should you use?
You’ll usually see three common approaches:
1) Compacted gravel floor
Good for basic equipment storage, especially if you don’t mind a little dust. It’s also easier on the budget and easy to repair.
2) Concrete apron at the doors + gravel inside
A nice middle ground. The apron keeps the entrance clean and solid where traffic is heavy.
3) Full concrete slab
Best for jacks, dollies, rolling toolboxes, and keeping things clean. If you think you’ll ever turn part of the barn into a workshop, concrete is hard to beat.
Concrete details (thickness, rebar, thickened edges, control joints) should match how you’ll use it and what your local frost conditions are. That’s the kind of thing to confirm locally instead of copying a random detail online.
Post-frame details that affect storage use
Your engineer or plan set will handle the real structural sizing, but as a user, here’s what to think about:
- Wide door openings need proper headers and bracing
- If you want interior walls later, tell your designer now so framing is planned
- If you want to hang heavy shelves, plan backing or girts to catch fasteners
A “storage-only” build can still be set up for future upgrades if you plan for it early.
Lighting, ventilation, and security (so the building stays useful)
Even if it’s just storage, a few simple additions make the building easier to live with.
Ventilation matters, even without animals
Equipment barns trap moisture. A cold tractor parked after snow work will melt and drip. A mower put away wet will steam and rust.
Basic options include:
- Ridge vent + soffit vents (common on metal roofs)
- Gable vents
- A couple of wall fans if you have power and want quicker drying
Electrical: cheap to rough-in, annoying to add later
If you think you’ll ever want:
- Bright LED lights
- Battery tender outlets
- A freezer
- A pressure washer
- A small air compressor
…then at least plan conduit routes and a spot for a panel now. Even if you don’t wire it right away, having a plan keeps you from running cords everywhere later.
Doors and security
Big doors are convenient, but don’t forget the basics:
- A real walk door with a deadbolt
- Motion lights
- Locking hardware that doesn’t feel like an afterthought
If the barn is visible from the road, think about door placement so you’re not advertising what’s inside every time you open it.

Budget realities: what drives the cost on a 36×48 pole barn
Prices swing a lot by region and by year, so it’s smarter to focus on cost drivers than numbers.
Big cost factors include:
- Door count and door type (large overhead doors usually cost more than sliders)
- Concrete (full slab vs. gravel)
- Wall height and roof complexity
- Upgrades like overhangs, gutters, insulation, liner panels, and interior framing
- Site work (grading, driveway, bringing in gravel)
If you’re comparing quotes, make sure you’re comparing the same features. Two “36×48 pole barns” can be totally different builds once doors, concrete, and height are spelled out.
A simple way to choose the right 36×48 plan
If you’re stuck between a few layouts, answer these:
- Do I want drive-through?
- What’s my tallest and widest machine?
- Will I want a shop corner later?
- Gravel, apron, or full slab?
- Where will snow and mud be the worst?
Once those are nailed down, the “right plan” usually becomes pretty obvious.
Closing thoughts and a helpful next step
A 36×48 pole barn can be a perfect farm equipment storage building if you plan around real use, not just square footage. Door placement and wall height do most of the heavy lifting. Drainage and floor choice keep it from becoming a muddy headache.
If you want to compare layouts side-by-side before you commit, look through our pole barn plan collection . It’s an easy way to spot the small design differences that make a big difference once you start parking equipment inside.