
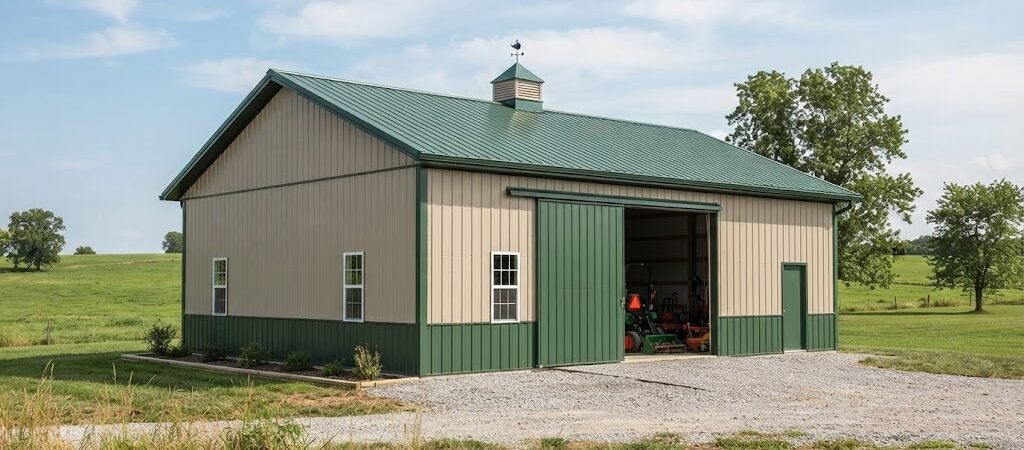
A 24×36 pole barn hits a sweet spot for a lot of farms and rural properties. It’s big enough to get equipment out of the weather, but not so big that it takes over the yard or the budget. If you’ve got a tractor, mower, attachments, maybe a small skid steer, and a pile of “I’ll put it away later” stuff, this size can work really well.
The trick is planning it around what you actually own, how you move around inside, and what you might buy later. A good plan saves you from building a nice barn that’s annoying to use.

Why 24×36 works for equipment storage
A 24×36 building gives you 864 square feet. In real life, that space goes fast once you add tool benches, a parts shelf, a freezer, or a corner for feed.
This footprint works well when you want:
- A clear open interior without a bunch of interior posts
- One main drive-in door, plus a walk door
- Room to park equipment with a little space to move around it
- A basic, affordable roofline (gable is common) without fancy shapes
If you’re mainly storing one larger piece of equipment and a trailer, you may want more width or length. But if you’re storing a mix of mid-size farm equipment and attachments, 24×36 is often a solid starting point.
Start with pole barn plans that match your equipment
Before you pick doors or decide where the “shop corner” goes, grab a tape measure and write down a few real numbers:
- The widest equipment you own (including mirrors, duals, or a loader bucket)
- The tallest piece (ROPS up, cab height, exhaust stack, etc.)
- Your longest setup (tractor plus implement, or trailer length)
- How much “turning room” you want inside
Plans are helpful because they force decisions: post spacing, door placement, truss layout, and how everything ties together. Even if you customize later, starting from a proven layout keeps you from missing basic stuff.
If you like looking at options, browsing pole barn plan collections can help you compare roof styles, door setups, and simple add-ons like lean-tos.
Layout ideas that make a 24×36 feel bigger
A 24-foot width is workable, but the building will feel tight if the layout fights you. These are a few layouts that tend to function well:
Simple open storage (most common)
This is the “park and store” layout. You keep the inside mostly open, and you use wall space for shelves and hangers.
A practical approach is to park the largest piece first, then fit the smaller stuff around it:
- Tractor goes in first, near the centerline
- Implements and attachments go along one wall
- Hand tools and fluids go near the walk door
Storage plus a small work zone
If you do your own maintenance, even a small work area helps. You don’t need a full shop. A basic bench, a vise, and some shelves can live along one end wall.
If you’re thinking you’ll do more than light maintenance, it’s worth looking at garage and workshop plans for ideas like bench placement, tool storage, and lighting. A workshop layout is mostly about workflow, not just square footage.
Add a lean-to for “dirty” storage
A lean-to can keep your main interior cleaner. It’s great for things like:
- Firewood
- Gates and panels
- Fuel cans (stored safely and per local guidance)
- A small trailer or mower that doesn’t need to be inside
Lean-tos also help if you’re short on width inside. Even a narrow roofed area can take pressure off the main bay.
Doors: don’t guess, measure twice
Door choices can make or break this building. It’s not just “will it fit,” it’s “can I get in without a 12-point turn.”
Big equipment door
Most owners go with a wide overhead door or a sliding door for the main opening. Overhead doors are convenient, but they cost more and need headroom and framing. Sliding doors are simple and handle big widths well, but they need clear wall space to slide.
A few practical tips:
- Make the main door wider than you think you need. Mirrors, buckets, and uneven approaches eat up space fast.
- Height matters just as much as width. If you might ever park a cab tractor inside, plan for that now.
- Think about where snow piles up, where wind blows rain, and how you approach the door with a trailer.
Second door or opposite-end access
If you can swing it, a second large door or a wide end door can turn your barn into a “drive-through.” That’s a big quality-of-life upgrade when you’re moving equipment often.
Even if you skip a second big door, at least add:
- One good walk door in a spot you’ll actually use
- A service door near your workbench area (nice for quick access)
Height, roof style, and trusses: plan for the tall stuff
Many people focus on floor space and forget height. Eave height affects what fits, how easy it is to open an overhead door, and whether the building feels cramped.
A few common-sense points:
- If you’re storing equipment with a raised loader or a tall cab, give yourself extra height.
- A steeper roof pitch can add overhead room, but it also changes material needs and looks.
- Truss design and spacing should match your local wind and snow conditions. This is where engineered components matter.
Your local building office or an engineer can tell you what’s typical in your area. Don’t copy a roof setup from a different region and assume it’ll be fine.
Floor and foundation options (and what people regret later)
Pole barns are flexible here. The “right” floor depends on how you’ll use it.
Gravel floor
Gravel is common for basic storage. It’s cheaper up front and drains well. It can be dusty, and jacks or creepers don’t love it.
If you go gravel, it helps to think about:
- A good base that won’t rut
- Drainage around the building so water doesn’t run in
- A plan to control dust (fabric, fines, or stabilizers, depending on your site)
Concrete slab
Concrete costs more, but it’s hard to beat for long-term use. If you’ll be wrenching on equipment, using a floor jack, or rolling heavy toolboxes, it’s worth considering.
If you pour concrete, plan ahead for things you can’t easily change later:
- Where you want a floor drain (if allowed where you live)
- Thicker edges or thickened pads under heavy wheel paths (design varies)
- Conduit paths for power
A common regret is pouring a slab first, then realizing you wanted power on the opposite wall, or you needed a wider door.
Wall framing, posts, and siding: keep it simple and strong
A 24×36 pole barn is usually built with treated posts, girts, trusses, and metal siding and roofing. The details change based on your region and supplier, but a few planning ideas stay the same:
- Post spacing affects cost and how easy it is to line up doors and windows.
- If you want to insulate later, ask about bookshelf girts or interior framing options now.
- Pick siding and roof colors that won’t show every dust streak if you’re near gravel roads or fields.
Also think about where you’ll hang stuff. If you want shelves, hose reels, or lumber racks, plan backing or framing so you’re not hunting for structure later.
Power, lighting, and ventilation: the stuff that makes it usable
A storage building can be “just a shell,” but a few upgrades make it nicer to live with.
Lighting
Good lighting is a safety thing. It also makes maintenance easier. Many people do a mix of:
- Bright overhead LEDs
- A couple exterior lights over doors
- Task lighting over a bench area
Power
Even if you don’t wire it right away, plan for it. Decide where the panel could go, where you’ll want outlets, and whether you’ll need power for:
- Battery chargers
- A small welder
- An air compressor
- A door opener (if you choose overhead doors)
Ventilation
Condensation can be a problem in metal buildings, especially when weather swings. Ventilation, ridge vents, and proper underlayment choices can help. If you plan to insulate, that changes the conversation, so it’s smart to decide early.
What it might cost (and what really drives the price)
Pricing for a 24×36 pole barn storage building varies a lot by region and by what you include. Labor rates, site work, concrete, door type, height, insulation, and snow or wind requirements all move the number.
Big cost drivers usually include:
- Concrete slab versus gravel
- Door count and door type
- Eave height and heavier structural requirements
- Electrical, insulation, and interior finishing
- Site prep and drainage work
If you’re trying to keep it affordable, build the right shell now (good height, good doors, solid structure), then add interior upgrades as you go.
A few common mistakes to avoid
These show up all the time:
- Building the door too small for the next tractor you buy
- Forgetting about approach space outside the door (turning radius matters)
- Skipping gutters and grading, then fighting water at the entry
- Not planning a spot for shelves, parts bins, and fluids
- Putting the walk door where it gets blocked by parked equipment
A little planning on paper is cheaper than fixing it with a saw later.
Closing thoughts and a good next step
A 24×36 pole barn can be a really handy equipment storage building if you plan it around access, door size, and the way you actually work. Think about your biggest equipment first, then build the layout around it. After that, worry about the extras.
If you want to compare a few layouts before you commit, take a look through our pole barn plans. Seeing door placements, roof options, and interior ideas on real drawings makes the whole project feel a lot clearer