
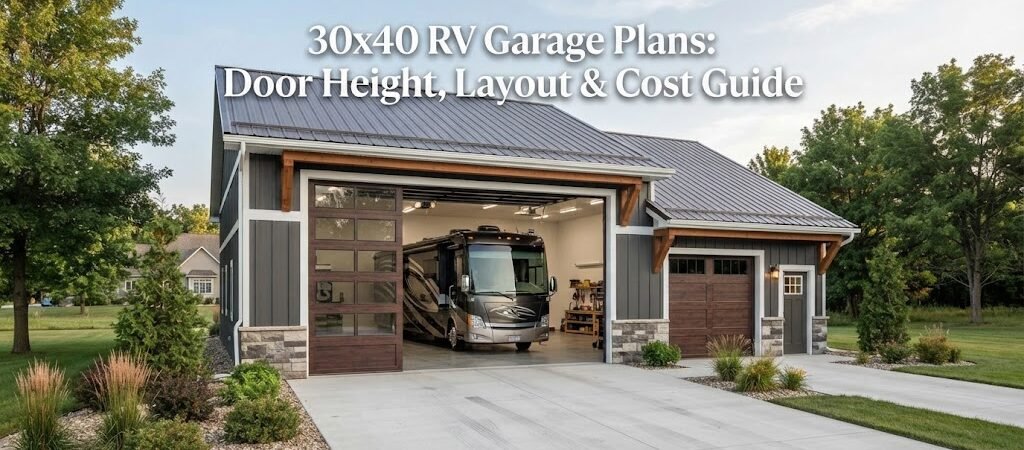
A 30×40 RV garage gives you 1,200 square feet to work with, which is a pretty useful size for an RV, truck, tools, and some storage. The tricky part is getting the door height and inside layout right before you build.
How Big Is a 30×40 RV Garage?
A 30×40 building is 30 feet wide and 40 feet long. That sounds simple, but the way you use those 1,200 square feet matters a lot.
If you’re parking a motorhome inside, you need room for more than just the RV itself. You’ll want some space around it so you can open doors, walk around, and get to storage areas without squeezing through a tiny gap.
The 40-foot length can work well for many RVs, but measure your rig first. Don’t just go by the model name or the size listed in a brochure. Check the actual length, including anything that sticks out when parked.
You’ll also want to think about the height. An RV garage that’s plenty long can still be a headache if the door or roof is too low.
That’s why a good 30×40 RV garage plan starts with the RV, not the building.
Choosing the Right RV Garage Door Height
Door height is one of the biggest things to get right. A standard garage door that works fine for a car may not work for an RV.
Many RVs need a taller opening than a normal residential garage. Depending on your RV, a door in the 12-foot range may be needed, while taller rigs can require even more clearance. But don’t use a general number and hope for the best.
Measure the height of your RV from the ground to its highest fixed point. Then think about roof accessories, air conditioners, satellite gear, vents, and anything else mounted on top. Give yourself some extra clearance too.
You don’t want to pull into your new building and discover that the roof vent has about an inch to spare. That’s the kind of mistake that gets expensive real quick.
The rough opening and the actual door size aren’t always the same thing, either. Your door supplier or builder can tell you the opening needed for the specific door system you’re using.
For a 30×40 metal RV garage, I’d plan the door early. The wall height, roof design, framing, and door all need to work together.
What Wall Height Should You Use?
The wall height is different from the door height. This gets confusing when you’re first looking at building plans.
Say you need a tall RV door. You still need enough wall above the door for the framing and roof structure. If the wall is barely taller than the door, you may not have much room to work with.
A taller wall can also make the building more useful later. You might add a taller storage area, hang lights from the ceiling, or switch to a different RV someday.
For many RV garage designs, a wall height somewhere around 14 feet can be a starting point, but the right height depends on your RV, door, roof pitch, framing system, and local building requirements.
Don’t treat that number as a rule. It’s better to work backward from your actual RV and door.
A Simple 30×40 RV Garage Layout
A basic layout can be surprisingly practical.
You could put the RV door on the 30-foot end and park the RV lengthwise into the 40-foot building. This gives you a straight shot inside and leaves some room at the front or rear, depending on the RV’s length.
Another option is to put the large garage door on the long side of the building. That can make sense if your driveway comes in from the side, but you’ll want to think about how easily the RV can turn into the opening.
Inside, don’t forget about walking space. A 30-foot width gives you a decent amount of room, but an RV can eat up a big chunk of it.
You might use one side for shelves, cabinets, a workbench, or a small tool area. Keep those items shallow enough that they don’t make parking harder. I’ve seen people plan every inch of storage and then realize there isn’t a good place to open a compartment door.
If you also want to park a pickup or smaller vehicle, draw that into the plan before building. A 30×40 building can fit a lot, but it can’t fit everything without some planning.
Think About RV Slide-Outs
Slide-outs are easy to forget when you’re looking at a simple floor plan.
Your RV may fit with the slides pulled in, but you’ll probably want to extend them once you’re parked. That means you need extra space along the sides.
Measure the slide-out depth and add it to your layout. Then leave enough room for you to walk around it safely.
The same goes for awnings and exterior storage compartments. You may not need clearance for every part while driving into the garage, but you do need room to use the RV once it’s parked.
This is one reason a slightly open layout usually works better than trying to fill every corner with storage.
RV Garage Storage Ideas
A 30×40 pole barn or metal building can be used for much more than parking.
The back wall is a good place for shelves and seasonal storage. You can also add cabinets along one side, although I’d keep the main parking lane open.
Overhead storage can be useful too, especially if the roof structure allows for it. Just be careful around the RV. You don’t want a ladder, shelf, or storage box hanging down where it could hit the roof.
If you’re building from scratch, think about outlets and lighting at the same time. Adding electrical work later can be more of a pain than you expect.
A small workbench in one corner can also be handy. Even if you don’t do major repairs, it’s nice to have a place for tools, hoses, cords, and all the other stuff that seems to collect around an RV.
What Does a 30×40 RV Garage Cost?
The cost of a 30×40 RV garage can vary a whole lot.
The building itself is only part of the total. You’ll also need to think about the foundation or slab, site work, doors, insulation, electrical work, permits, and interior finishing. Local labor and material costs can make a big difference too.
A basic metal building or pole barn will usually cost less than a heavily finished garage with insulation, drywall, plumbing, and lots of electrical work. A taller RV door can also add to the cost compared with a standard garage door.
Site conditions matter as well. If your building site needs a lot of grading or drainage work, that can change the budget before the building even goes up.
So instead of looking for one exact price, I’d make a list of everything you want in the building and get a few local estimates. A simple shell and a finished RV garage are two very different projects.
Pole Barn or Metal Building?
Both can make sense for a 30×40 RV garage.
A pole barn uses posts set into the ground and can be a good fit if you want a straightforward building with a practical layout. A steel or metal building uses a different framing system and can offer a clean look with strong, open interior space.
The better choice depends on your site, local rules, budget, and how finished you want the garage to be.
Either way, don’t forget about the slab. Your RV is heavy, so the foundation needs to be designed for the loads and soil conditions at your site. This isn’t a place where I’d guess based on what the neighbor did.

Plan for the Future
Your RV today might not be your RV five years from now.
Maybe you’ll buy a longer motorhome. Maybe you’ll trade it for a fifth wheel and truck. Or maybe the garage eventually becomes a workshop or storage building.
That’s why I like leaving a little breathing room in a 30×40 RV garage plan. A few extra feet of useful clearance can be worth more than squeezing in another cabinet.
Also check local building rules before you order materials. Setbacks, permits, snow or wind loads, electrical work, and other requirements can vary by location.
It doesn’t take much time to check, and it can save a lot of trouble later.
Final Thoughts
A 30×40 RV garage is a nice middle ground for many RV owners. You get enough space for an RV plus storage and a small work area without building a huge shop.
The biggest things to focus on are the actual RV measurements, door height, wall height, slide-out clearance, and how you’ll use the space when the RV is parked.
Take your time with the layout before the first post or piece of steel goes in the ground. If you’re still sorting out sizes, doors, storage, and the overall building plan, a good planning guide can be worth looking through before you start ordering materials. It can help you catch the little stuff that’s easy to miss on paper.