
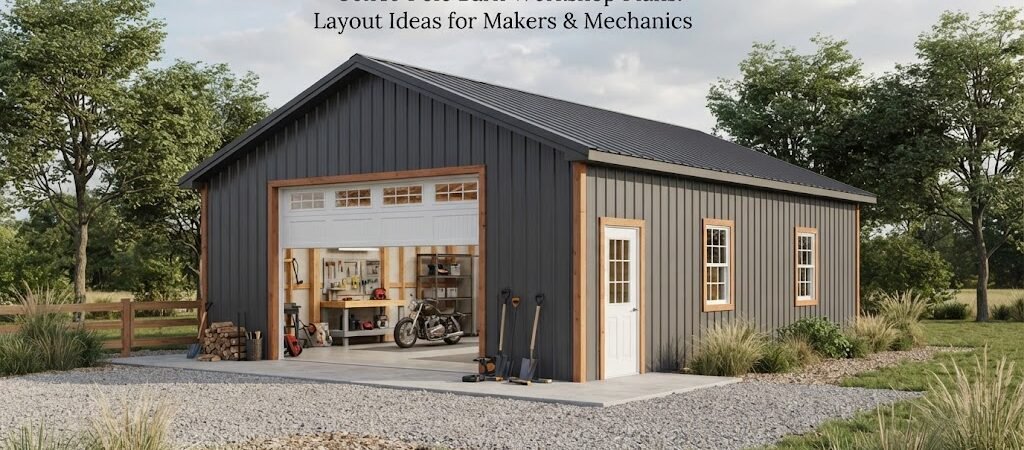
A 30×40 pole barn gives you 1,200 square feet to work with, which is enough room for a serious workshop without making the building hard to manage. The challenge is deciding how to use that space.
A mechanic may need room for vehicles, tools, parts, and a workbench. A woodworker may care more about long workpieces, dust collection, and open floor space. A maker might need a mix of benches, storage, assembly space, and room for larger equipment.
The best 30×40 pole barn workshop plans start with how you actually work. Think about what comes through the doors, where it gets used, and where it will live when you’re done for the day.
Start With the Work You Plan to Do
Before drawing walls or buying materials, make a list of the jobs the building needs to handle.
If you’re building a mechanic’s shop, you might need space for a vehicle, tool cabinets, a compressor, parts storage, and a sturdy workbench. If you’re a woodworker, you may need room for a table saw, planer, jointer, lumber racks, and an assembly table.
You don’t need to fill every square foot on paper. Open space is useful in a workshop. It gives you room to move materials, work around a vehicle, or build something larger than you expected.
It can also help to look through different pole barn plans before settling on your layout. Comparing several arrangements can reveal ideas you may not have considered.

A Simple 30×40 Open Workshop
The simplest layout is one large open room.
This works well if the building will have changing uses over time. Instead of dividing the interior into small rooms, you can place benches and storage along the walls and keep the middle open.
For example, one long wall could hold a continuous workbench. Another could have cabinets, shelves, and lumber or material storage. Larger equipment can sit toward the back or along a side wall.
The open center can then serve several purposes. You might pull in a vehicle, assemble a large project, or move equipment around as your needs change.
This layout is also a good choice if you aren’t sure exactly how the workshop will evolve.
Why an Open Layout Works
Workshops tend to accumulate equipment. A small machine today may become a larger machine next year. A hobby that starts at a bench may eventually need floor space.
An open layout gives you some flexibility.
The downside is that everything is visible and exposed. If you want a clean separation between vehicles, tools, storage, and other activities, a more defined layout may work better.
30×40 Mechanic’s Workshop Layout
For automotive work, vehicle access should be one of the first things you plan.
A 30-foot width gives you a useful working area, but the exact door placement matters. You need enough clearance to get vehicles in and out comfortably and enough space around them to open doors, use tools, and move equipment.
One practical approach is to place the main overhead door on the 40-foot wall. This can create a deeper work area inside the building. Another option is to place doors on a shorter wall, depending on the driveway and approach to the property.
Inside, consider putting the main workbench and tool storage along a side wall. Keep frequently used tools close to the vehicle work area. Parts storage can go farther toward the back.
If you use large equipment, plan its location before installing permanent cabinets. A tool chest can move. A large machine or vehicle lift may have more specific placement requirements.
For more examples, garage and workshop blueprints can be useful when you’re deciding how to combine vehicle space with a dedicated work area.
A Woodworking Layout for Makers
Woodworking shops need a different kind of floor plan.
Long boards need a clear path. Machines need working clearance around them. Finished pieces need somewhere to go without getting damaged.
A common approach is to put stationary tools along the walls while leaving a larger open area in the middle. The workbench can sit near the center or along one side, depending on how much assembly space you need.
Think about the direction of material movement. If lumber comes through one door, it shouldn’t have to weave around three machines before reaching the saw.
A simple flow might be:
Storage → cutting → milling → assembly → finishing
You don’t have to follow that exact sequence, but thinking about the work in stages can prevent a frustrating layout.
Dust collection, electrical outlets, lighting, and material storage should also be considered early. It’s much easier to plan these things before the walls and equipment are in place.
Split the Building Into Work Zones
You don’t necessarily need framed interior rooms to create separate areas.
A 30×40 workshop can be divided into zones for different tasks. One end might be the mechanical area, while another holds woodworking tools. A corner could become a welding or fabrication station, with storage nearby.
This approach gives you some separation without sacrificing the flexibility of one large building.
You can use workbenches, cabinets, shelving, or even equipment placement to define the zones. Just remember to keep enough clearance around tools and doors.
If your projects change often, avoid creating too many permanent divisions.
Add a Small Office or Storage Room
Some owners want more than an open workshop. A small enclosed room can be useful for paperwork, tool storage, parts, or a clean space away from dust.
You might place a modest room along one end of the building and leave the remaining area open. This can work well if you need somewhere to store small parts or plans without taking up valuable bench space.
Before framing an interior room, think about whether you really need the separation. Every wall takes away some flexibility from the main workshop.
For a building that may eventually include living space, it’s better to approach the design differently. In that case, reviewing a barndominium planning guide can help you think through the larger building layout before committing to a workshop-only plan.
Plan the Doors Around Your Property
Door placement has a big effect on how useful a workshop feels.
Start outside. Look at the driveway, parking area, approach to the building, and the direction vehicles or trailers will travel.
Then look inside.
A large door isn’t useful if a vehicle can’t approach it easily. Likewise, a side door can be handy for everyday entry, even when the main overhead door stays closed.
Think about people, equipment, and materials separately. You may want a regular entry door for daily use and a larger opening for vehicles, machinery, or bulky projects.
Door size and placement should also be checked against the final building design and local requirements.
Don’t Forget Storage
Storage is easy to underestimate.
Tools, fasteners, lumber, spare parts, finishes, seasonal equipment, and half-finished projects all need somewhere to go. If you don’t plan storage, the floor usually becomes the storage area.
Use the walls whenever practical. Shelving and cabinets can keep smaller items organized while leaving the main floor open.
For a woodworking shop, consider where long boards will be stored. For a mechanic’s shop, think about tires, fluids, parts, jacks, and bulky equipment. A maker may need bins for many small components.
Good storage isn’t just about having more shelves. It’s about keeping frequently used items within easy reach while putting less-used items out of the way.
Think About Lighting and Electrical Needs Early
A workshop needs more than a few ceiling lights.
Workbenches and machines may need focused lighting. Areas around vehicles or large equipment can also benefit from good task lighting.
Electrical planning deserves the same attention. Think about where machines, chargers, compressors, welders, heaters, and other equipment will be located.
Your actual electrical requirements depend on the equipment you plan to use and the applicable electrical rules, so this is an area where a qualified professional can help with the final design.
It’s much easier to plan outlet locations and circuits before construction than to wish you had put an outlet on the other side of the building later.

Consider Future Changes
You may know what you want today, but a workshop can change quickly.
Maybe you’ll add a larger machine. Maybe the tractor starts spending more time inside. Maybe a hobby becomes a small business. Maybe you simply need more storage.
Try not to design every inch around one piece of equipment.
A little unused floor space can be valuable. So can an extra door location, open wall space, or a layout that lets you move equipment later.
This is one reason simple shed and workshop plans can also be worth reviewing. Smaller structures can provide separate storage and keep the main pole barn focused on actual work.
Materials and Construction Planning
The layout is only part of the project.
A pole barn workshop may use a post-frame structure with metal siding and roofing, but the exact foundation, framing, insulation, doors, interior finishes, and other details vary by design and location.
If you plan to heat or cool the shop, insulation and air sealing become more important. If the building will house vehicles or machinery, ventilation and moisture control may also matter.
Local soil, weather, building requirements, and the final use of the structure can affect the design. Structural sizes, connections, foundations, and other load-related details should come from an appropriate building plan or qualified professional rather than being guessed from a general layout.
Make the Plan Work for You
A good 30×40 workshop doesn’t have to be complicated.
Start with the largest things first: vehicles, machines, workbenches, doors, and storage. Then work out the smaller details around them. Leave enough open floor space to move safely and handle projects.
Most importantly, design the shop around the work you actually do. A mechanic’s ideal layout won’t necessarily suit a woodworker, and a maker who needs flexible assembly space may prefer a completely different arrangement.
Before you start construction, compare a few pole barn plan collections and look at how different layouts handle doors, storage, work areas, and open space. A good plan can give you a much clearer starting point and make it easier to turn your 30×40 building into a workshop you’ll enjoy using.