Studio ADU Plans: Optimal Open Layouts for Small Spaces
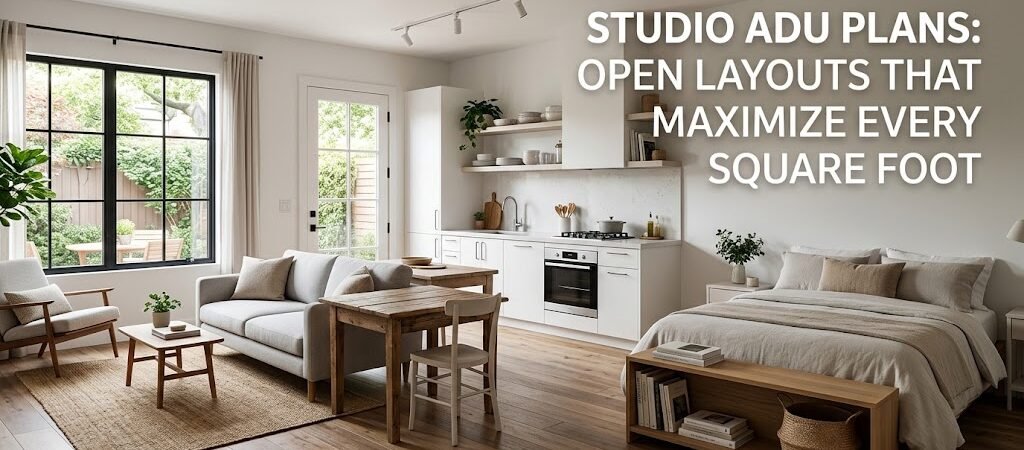
Studio ADU plans with open concept layouts typically range from 300 to 600 square feet, costing between $80,000 and $200,000 depending on location and finishes. The most efficient designs use a single open room combining living, sleeping, and kitchen areas, with a separate bathroom and clever storage solutions to maximize every square foot of your compact backyard home.
“`
What Could Fit in an Empty Corner of Your Property?
Maybe it’s the overgrown patch behind your garage. Or that awkward triangular space between your house and the fence line. You’ve been staring at it for months, knowing it could generate income or house family, but the plans feel overwhelming.
Here’s the thing about studio ADU plans: the best ones aren’t complicated. They strip away everything unnecessary and focus on what actually matters — a functional kitchen, a proper bathroom, comfortable sleeping space, and enough room to breathe without feeling cramped.
Over the next several minutes, I’m going to walk you through exactly how to approach this. We’ll look at real numbers, real layouts, and the design decisions that separate a studio guest house that works from one that feels like a walk-in closet.
The Real Cost of Studio ADU Plans in 2025
Infographic: The Real Cost of Studio ADU Plans in 2025
Before you fall in love with any particular layout, you need to understand what these projects actually cost. The numbers vary wildly depending on where you live, what materials you choose, and how complex your site conditions are.
According to data from the National Association of Home Builders, the national average cost to build an ADU in 2025 sits at approximately $180 per square foot for a mid-range finish. That means a 400-square-foot studio runs about $72,000 before permits, fees, and soft costs. Add those in and you’re looking at $85,000 to $95,000 for a turnkey unit in most markets.
High-cost markets like San Francisco or Seattle push that number to $250 to $350 per square foot. A 400-square-foot unit there could cost $100,000 to $140,000 or more. Lower-cost markets in the Midwest or South might bring you down to $120 to $150 per square foot.
Studio Size
Low-Cost Market
National Average
High-Cost Market
300 sq ft
$45,000 – $55,000
$65,000 – $80,000
$90,000 – $120,000
400 sq ft
$60,000 – $75,000
$85,000 – $105,000
$120,000 – $160,000
500 sq ft
$75,000 – $95,000
$110,000 – $135,000
$150,000 – $200,000
600 sq ft
$90,000 – $115,000
$135,000 – $170,000
$180,000 – $250,000
These figures cover construction only. You’ll need to budget separately for permits, which can range from $3,000 to $15,000 depending on your city. Impact fees in some California cities add another $10,000 to $30,000. Utility connections — bringing water, sewer, and electrical to a new structure — can run $5,000 to $20,000 if your existing services need upgrading.
What Factors Affect the Cost of Studio ADU Plans?
Foundation type is the first major variable. A slab-on-grade foundation costs $4 to $8 per square foot. A crawlspace runs $8 to $15 per square foot. If your site has significant slope or requires a pier-and-beam foundation, expect $15 to $30 per square foot.
Roofing material matters too. Asphalt shingles are the budget option at $3 to $7 per square foot installed. Metal roofing costs $9 to $18 per square foot but lasts 40 to 70 years compared to 15 to 25 for asphalt. For a 400-square-foot studio, that’s a $2,400 to $5,600 difference upfront and potentially $8,000 to $12,000 in replacement costs you won’t face with metal.
Windows and doors represent another significant cost center. A single double-hung window runs $300 to $800 installed. A quality entry door costs $1,000 to $3,000. In a compact space, every window counts for natural light and perceived size, so don’t cheap out here.
How to Design Efficient Open Concept Layouts for Small Spaces
The open concept ADU isn’t just a design trend — it’s a functional necessity when you’re working with 300 to 500 square feet. Walls eat space. They create dark corners. They make a small unit feel smaller.
But open concept doesn’t mean open to interpretation. The best studio ADU plans use deliberate zoning within the open floor plan to create distinct functional areas without physical barriers.
The Classic L-Shaped Efficiency
This layout places the kitchen and bathroom along one wall, creating an L-shaped service zone. The remaining open space becomes a combined living and sleeping area. A 400-square-foot unit using this approach might measure 20 feet by 20 feet, with the kitchen occupying the first 8 feet along one wall and the bathroom tucked into the corner.
The sleeping area sits at the far end, often separated by a low bookshelf, a partial-height partition, or even just a change in flooring material. This creates visual definition without sacrificing the open feel that makes the space work.
The Galley Kitchen With Island
A galley kitchen — two parallel counters along opposite walls — is the most efficient kitchen layout for any compact space. It typically requires only 8 to 10 feet of width between counters, leaving the rest of the floor plan free.
Add a 2-foot by 4-foot island or peninsular counter extension and you gain prep space, casual dining, and additional storage without consuming meaningful floor area. The island also serves as a natural room divider between the kitchen zone and the living area.
The Murphy Bed Solution
If your studio guest house needs to feel like a real bedroom at night and a living room by day, a Murphy bed transforms the space entirely. Modern wall beds from companies like California Closets or Murphy Bed Warehouse start around $1,500 for a basic model and go up to $4,000 or more for custom units with integrated desks or shelving.
A queen-size Murphy bed requires approximately 4 feet of clearance in front when fully open. Factor that into your floor plan. Position it so the bed opens away from high-traffic areas and doesn’t block doorways or windows.
Kitchen Strategies That Save Space in Studio ADUs
The kitchen is where most small ADU plans go wrong. Homeowners want full-size appliances and generous counter space, but those demands collide with the reality of a 300 to 400-square-foot footprint.
The solution is strategic downsizing, not compromise. A 24-inch wide dishwasher, a 30-inch range, and an undercounter refrigerator can handle daily cooking for one or two people without dominating the floor plan.
The 4-2-1 Rule for Compact Kitchens
Here’s a practical framework I’ve found useful when evaluating kitchen layouts for studio ADU plans: four feet of counter space minimum, two feet of sink space, and one foot of appliance clearance. This isn’t a rigid formula, but it prevents the most common mistakes.
Four feet of counter space means you can prep a meal without clearing the entire surface. Two feet of sink space accommodates a standard double-bowl or a large single-bowl sink. One foot of appliance clearance ensures you can open oven doors and dishwasher drawers without blocking the walkway.
Combined, that’s roughly 7 to 8 linear feet of kitchen cabinetry. In a well-designed open concept ADU, that fits comfortably along one wall while leaving the rest of the unit open and functional.
Design Decisions That Prevent Regret in Your Studio ADU Plans
After reviewing hundreds of studio ADU plans across different markets, a few patterns emerge consistently. The units that work well share specific design decisions. The ones that don’t tend to share the same mistakes.
Design Decision
What Works
What Doesn’t
Ceiling Height
9 to 10 feet
Standard 8-foot ceilings
Window Placement
Large windows on two walls
Single small window
Storage
Vertical cabinets to ceiling
Freestanding furniture
Door Type
Sliding or bi-fold closet doors
Swinging doors in tight spaces
Flooring
Continuous material throughout
Multiple flooring transitions
Lighting
Layered: ambient, task, accent
Single overhead fixture
Here’s something most people don’t consider when reviewing studio ADU plans: the psychological impact of ceiling height. A 9-foot ceiling makes a 400-square-foot space feel closer to 500 square feet. A 10-foot ceiling pushes that perception even further. The cost difference between 8-foot and 10-foot ceilings is minimal — maybe $500 to $1,000 extra for materials and framing — but the daily livability difference is substantial.
What Size Studio ADU Plans Should You Consider?
One of the most common mistakes I see homeowners make is building too large. They assume a bigger studio guest house will serve more purposes and generate more income. But every additional square foot adds cost, complexity, and potentially zoning complications.
The 400-square-foot studio occupies a sweet spot in most markets. It’s large enough to feel comfortable for long-term occupancy. It’s small enough to qualify as an accessory structure in many jurisdictions, which can streamline the permitting process. And it delivers the best cost-per-square-foot ratio for most builders.
Here’s a breakdown of what each common size actually provides:
300 square feet (15 x 20): Tight but workable. Best for occasional guest use or a dedicated rental to a single person. Kitchen will be compact. Storage requires creative solutions.
400 square feet (20 x 20): The sweet spot. Comfortable for a couple or long-term single occupant. Full kitchen with island possible. Murphy bed or dedicated sleeping nook works well.
500 square feet (20 x 25): Adds genuine living room feel. Allows for a separate dining area. Better for hosting guests overnight regularly. Still qualifies as a studio in most jurisdictions.
600 square feet (20 x 30): Borderline between studio and one-bedroom. Some cities may classify this differently for zoning or fee purposes. Worth checking local definitions before committing.
Before you finalize your studio ADU plans, check your local jurisdiction’s maximum ADU size limits. The Department of Housing and Urban Development maintains resources on ADU regulations that vary significantly by locality. You can explore HUD’s ADU resource page for guidance on understanding local housing regulations and how accessory units fit into broader housing strategy.
The Hidden Costs of Studio ADU Plans
Most people budget for construction. Fewer people budget for the things that come after the walls go up. These hidden costs can add $10,000 to $30,000 to your project if you’re not prepared for them.
Landscaping restoration is a common surprise. If your contractor needs to park equipment on your lawn or dig a trench for utility connections across your yard, someone needs to repair that landscape. Budget $2,000 to $8,000 for sod, irrigation repair, and planting replacement depending on your yard’s size and complexity.
Driveway or walkway modifications are another frequent cost. If the ADU location requires a new concrete pad, a modified driveway entrance, or a new pathway from the street, expect $1,500 to $5,000. Some jurisdictions require ADA-compliant access to ADUs, which could mean a ramp or widened pathway adding $2,000 to $6,000.
Utility upgrades round out the hidden costs. If your existing electrical panel can’t handle the additional load from a full kitchen and HVAC in the ADU, a panel upgrade runs $1,500 to $3,000. A sewer line inspection might reveal the need for a line repair or replacement, costing $3,000 to $10,000 depending on the issue.
Practical Checklist for Planning Your Studio ADU Plans
Before you commit to any particular layout or contractor, run through this checklist. It covers the decisions that actually matter, not the decorative choices that come later.
Confirm zoning eligibility: Check your local zoning code for ADU allowances, minimum lot size requirements, setback rules, and maximum unit size. Some neighborhoods have historic district restrictions that could block your project entirely.
Identify the optimal location: The best spot for your compact backyard home balances proximity to existing utilities, minimal landscape disruption, adequate sunlight, and reasonable distance from neighbor property lines to avoid privacy complaints.
Determine your primary use case: Will this studio guest house house family members long-term? Generate rental income? Serve as a home office with occasional guest capability? Your answer shapes every design decision that follows.
Research contractor options: Get at least three bids from contractors who have built ADUs in your area. Ask to visit a completed project and speak with the homeowner. Check references specifically for timeline adherence and change order communication.
Secure financing pre-approval: ADU construction loans, home equity lines, or cash-out refinances each have different terms and timelines. Know your budget before you fall in love with a particular plan.
Review utility capacity: Have a professional assess your existing water, sewer, electrical, and gas service capacity. Upgrades discovered after permit approval can delay your project by weeks and add thousands to your budget.
Plan for parking and access: Some jurisdictions require you to maintain a certain number of parking spaces or provide alternative parking. Make sure your site plan accounts for this before you finalize your studio ADU plans.
What Makes Studio ADU Plans Feel Expansive?
The difference between a 400-square-foot unit that feels like a box and one that feels like a home often comes down to a handful of specific design choices. These aren’t expensive upgrades — they’re intelligent decisions about how you arrange and treat the space.
Continuous flooring is the single most effective trick. Running the same material — whether hardwood, luxury vinyl plank, or polished concrete — from wall to wall without transitions creates an unbroken visual field. Carpet in the sleeping area and tile in the kitchen breaks that flow and makes each zone feel smaller than it is.
Consistent color palette matters equally. Light, neutral walls with slightly darker trim create depth. A single accent wall in a contrasting color can actually shrink a space if it’s placed wrong. In a compact backyard home, stick to a three-color maximum: wall color, trim color, and one accent used sparingly.
Reflection and light amplify space. Large mirrors positioned opposite windows bounce natural light deeper into the unit. Glass interior doors between the bathroom and main space maintain visual continuity. Sliding barn doors or pocket doors eliminate the swing radius that eating into your floor plan.
Frequently Asked Questions About Studio ADU Plans
How much do studio ADU plans typically cost to build?
Most studio ADUs range from 300 to 600 square feet and cost between $80,000 and $200,000 all-in, including permits, fees, and utility connections. The national average sits around $180 per square foot for mid-range finishes in 2025. High-cost markets can exceed $300 per square foot.
What is the smallest viable size for a studio ADU?
Many jurisdictions allow studio ADUs as small as 150 to 200 square feet, but the practical minimum for comfortable long-term living is around 300 square feet. Below that, you’re working with severe constraints on kitchen size, storage, and circulation space.
Do open concept ADU layouts work for rental income?
Yes. Open concept layouts are actually preferred by most studio renters, particularly young professionals and retirees. They create a sense of space that closed-off rooms can’t match in a compact footprint. The key is ensuring the kitchen is visually appealing since it becomes the focal point of the main living area.
Can I add a bathroom to a 300-square-foot studio ADU?
Absolutely. A standard bathroom requires approximately 35 to 40 square feet. In a 300-square-foot unit, that leaves about 260 square feet for the combined living, sleeping, and kitchen area — tight but functional. A compact bathroom with a corner shower, 24-inch vanity, and standard toilet fits comfortably in a 5-foot by 8-foot space.
What’s the difference between efficiency unit plans and standard studio plans?
Efficiency unit plans are specifically designed for maximum space optimization. They typically feature Murphy beds, apartment-sized appliances, and minimized circulation space. Standard studio plans might prioritize comfort over pure efficiency, resulting in slightly larger footprints or more generous room dimensions.
How long does it take to build a studio ADU?
Permitting typically takes 2 to 6 months depending on your jurisdiction. Construction itself runs 3 to 6 months for a 400-square-foot studio, assuming no major complications. Sites with challenging access, significant slope, or required utility upgrades can extend the timeline by 1 to 3 months.
Will a studio guest house increase my property taxes?
Yes, in most cases. An ADU is considered an improvement to your property and will likely trigger a reassessment. The exact impact depends on your state and local assessment practices. Some states offer exemptions or delayed reassessment for ADUs. Consult a local tax professional or your county assessor’s office for specifics in your area.
Studio ADU Plans: Your Next Step
The best studio ADU plans aren’t the most elaborate ones. They’re the ones that match your actual needs, your budget constraints, and your site’s unique conditions. An open concept ADU in the 400-square-foot range gives you the most flexibility for the least cost in the vast majority of scenarios.
Start by confirming what your local jurisdiction allows. Then identify where on your property the unit will sit most efficiently. Finally, work with a designer or contractor who understands compact living to create studio ADU plans that feel spacious despite their modest footprint.
Ready to move forward? Pull your local zoning code, schedule a site walkthrough with a qualified ADU builder, and start visualizing how an open layout could transform that unused corner of your property into a functional, income-generating space.