
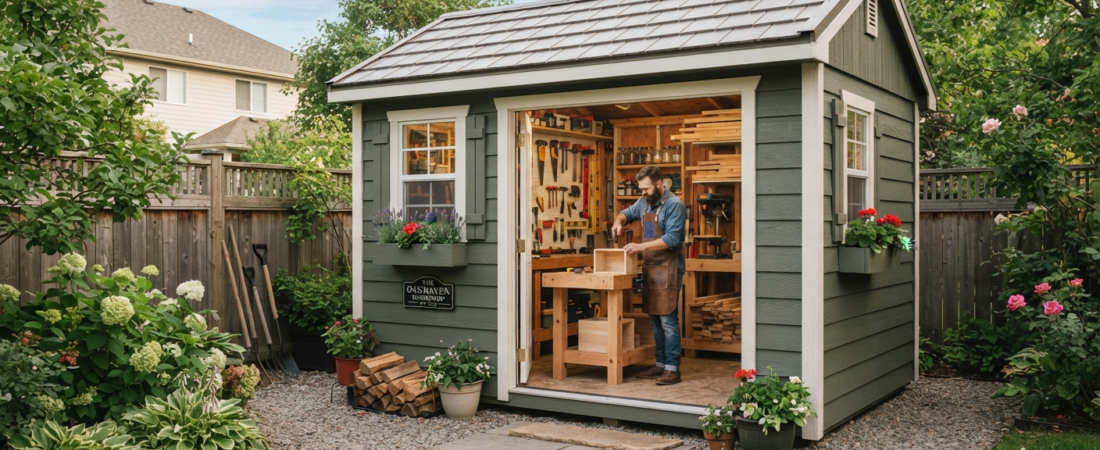
Shed plans under 200 sq ft are the sweet spot for homeowners who want a functional backyard building without the hassle of a massive construction project. The most popular size is a 10×12 shed at 120 square feet, which fits a workbench, tool storage, and still leaves room to move. These compact outbuildings typically cost between $2,000 and $6,000 to build, depending on materials and whether you add electricity or a foundation upgrade.
Why 200 Square Feet Is the Smart Size for Backyard Buildings
Most homeowners hit a wall when they start planning a backyard shed. The 10×10 or 10×12 footprint appears everywhere in plan catalogs, and for good reason. It delivers enough floor space for a workbench along one wall, shelving on another, and still leaves a clear path to the door.
Anything over 200 square feet starts pushing into permit territory in many municipalities. A 12×16 shed equals 192 square feet and sits right at the edge. Jump to a 14×14 or 16×16 and you are likely looking at a building permit, foundation inspection, and possibly a zoning variance. That is where the fun stops for a weekend DIYer.
Staying under 200 square feet keeps the process simple. You can often skip permits entirely, choose a basic gravel or paver foundation, and frame the whole thing over a long weekend or two. The trade-off is real, but most people who build a small shed first end up wishing they had started there rather than going too big too fast.
Top Compact Shed Designs That Fit Under 200 Sq Ft
Not every small shed looks the same. The design you choose changes how you use the space, how much it costs, and how hard it is to build. Here are the most practical compact shed designs that stay under the 200 square foot mark.
1. The Classic 10×12 Gable Shed at 120 Sq Ft
This is the workhorse of backyard storage. A 10×12 gable shed gives you 120 square feet of floor space with a simple pitched roof that is straightforward to frame and sheathe. You get full-height walls on all four sides, which means you can install standard 4×8 shelving units without cutting boards to fit.
The gable roof also creates a small loft area if you want it. Some builders leave the loft open for seasonal items stored in bins. Others close it off with plywood and use it as a dry storage zone for things like holiday decorations or camping gear. The roof pitch determines how much usable loft space you actually get, so check your local snow load requirements before going too shallow.
2. The 8×10 Lean-To Shed at 80 Sq Ft
An 8×10 lean-to is the smallest practical option that still feels like a real building. It attaches to an existing structure, usually a house wall or fence line, which cuts the framing in half on one side. That also means one less exterior wall to weatherproof and insulate.
This design works best as a dedicated tool shed or a potting station for gardeners. The footprint is tight, so you will likely use vertical storage almost exclusively. A single workbench along the back wall leaves about 5 feet of clear floor space, which is enough for one person to move around comfortably.
3. The 12×16 Workshop Shed at 192 Sq Ft
A 12×16 shed hits 192 square feet, which keeps it under the 200 square foot threshold in most jurisdictions. This is the size where a real workshop starts to feel possible. You can fit a full workbench along one wall, a tool cabinet on another, and still have room for a small table saw or a drill press on a mobile stand.
The extra width also makes ventilation easier. A 12-foot wall gives you room for two windows on opposite sides, which creates a cross-breeze that matters when you are doing anything that generates dust or fumes. If you plan to run electricity in this space, the 12×16 gives you enough wall area for a proper subpanel and outlet placement.
4. The 10×10 Square Shed at 100 Sq Ft
Square footprints are deceptively useful. A 10×10 shed feels more open than an 8×12 of the same square footage because the walls are evenly spaced on all sides. You can walk around a workbench without hitting a corner, and storage shelves on two walls do not fight for the same linear footage.
This size is popular for hobbyists who need a small creative studio. A potter, woodworker, or painter can set up a central work table and still have wall storage for supplies. The square layout also makes the roof framing slightly simpler since the span is equal in both directions.
Step-by-Step: How to Build a Shed Under 200 Sq Ft From Scratch
Building a shed under 200 square feet is one of the most rewarding DIY projects a homeowner can take on. The scale is manageable, the material list is finite, and the learning curve is gentle. Here is the practical sequence that most experienced builders follow.
Step 1: Pick Your Site and Check Local Rules
Before you buy a single board, confirm your local setback requirements. Most towns require a shed to be at least 3 to 5 feet from a property line. Some HOAs have their own rules about shed style and placement. A quick call to your building department or a review of your municipal code online will save you from tearing down a finished structure later.
Also consider sun exposure and drainage. A shed that sits in a low spot will collect water and potentially damage your stored items. Pick a site with good natural drainage or plan to grade the ground away from the structure.
Step 2: Pour a Level Foundation
The foundation choice depends on your budget and how long you plan to keep the shed. Concrete pavers on compacted gravel are the most common approach for sheds under 200 square feet. You lay a 4-inch layer of crushed stone, compact it well, and set paver blocks at 4-foot intervals along the perimeter and in the center for floor joist support.
A poured concrete slab is more expensive and permanent but eliminates any chance of the floor settling unevenly. For a 10×12 shed, a 4-inch slab with rebar mesh runs significantly more than pavers but lasts decades with zero maintenance.
Step 3: Frame the Floor Platform
Floor framing starts with pressure-treated 2×6 or 2×8 rim joists laid directly on the foundation blocks. Interior joists spaced 16 inches on center run perpendicular between the rim joists. Cover the frame with 3/4-inch exterior-grade plywood and you have a solid subfloor ready for finishing.
Leave the floor framing slightly above the pavers to allow airflow underneath. This prevents moisture from wicking into the wood and causing rot over time.
Step 4: Build and Raise the Walls
Frame walls on the subfloor before raising them. This is safer and faster than building wall-by-wall in place. Each wall consists of top and bottom plates with studs spaced 16 inches on center. Cut openings for doors and windows before you raise the walls.
Once all four walls are framed, tilt them up together and brace them temporarily with 2x4s nailed to the ground. Plumb each wall, then secure the corners with metal brackets and screw the walls to the floor frame.
Step 5: Install Roof Framing and Sheathing
A simple gable roof on a 10×12 shed uses 2×6 rafters spaced 24 inches on center with a 4/12 to 6/12 pitch. Cut the rafters with a circular saw, install a ridge board, and raise the rafters in pairs. Once the roof frame is secure, cover it with 7/16-inch or 1/2-inch OSB or plywood sheathing.
Apply roofing felt and asphalt shingles, or consider a standing-seam metal roof if you want something that lasts 40 years with no maintenance. Metal roofing is lighter and installs faster, which matters when you are working alone.
Step 6: Add Siding, Doors, and Finishing Touches
Siding choice affects both the look and the maintenance schedule. T1-11 plywood siding is the most budget-friendly option and comes pre-grooved for a clean look. Cedar shake or board-and-batten costs more but resists rot naturally and ages gracefully.
Install a 30-inch or 36-inch shed door, add vented soffit panels for airflow, and finish with trim boards around the door and corners. A coat of exterior paint or stain seals the wood and ties the whole thing together.
Cost Breakdown: What It Really Costs to Build a Small Shed
Cost is the question that drives every decision. The numbers below reflect average material costs for a 10×12 shed built with standard dimensional lumber and basic finishes. Labor is excluded since this is a DIY build.
| Component | Estimated Cost | Notes |
|---|---|---|
| Foundation (pavers and gravel) | $300 to $600 | Varies by site preparation needs |
| Lumber for floor, walls, and roof | $1,200 to $1,800 | Pressure-treated framing, plywood sheathing |
| Roofing (shingles or metal) | $250 to $700 | Metal roofing costs more upfront, lasts longer |
| Siding and trim | $400 to $900 | T1-11 is cheapest, cedar is premium |
| Door and hardware | $150 to $400 | Pre-hung doors save installation time |
| Windows and vents | $100 to $300 | Basic 2×2 vents or a single double-hung window |
| Fasteners, sealant, paint/stain | $200 to $400 | Do not skip exterior-grade fasteners |
| Total estimated cost | $2,600 to $5,100 | Before tools and optional upgrades |
Adding electricity runs another $500 to $1,500 depending on whether you hire an electrician or pull the permit and do the work yourself. A basic outlet, a light fixture, and a few feet of Romex wire are the minimum. Most local codes require a licensed electrician for anything beyond a single outlet on a dedicated circuit.
Common Mistakes to Avoid When Building a Compact Shed
Even small sheds go wrong when builders skip details. The most frequent mistakes happen early in the process and compound as the build progresses.
Skipping the level check on the foundation. A foundation that is not level in both directions causes doors that bind, walls that rattle, and a roof line that looks crooked. Spend an extra hour checking levelness before you frame anything. It pays for itself immediately.
Using the wrong fasteners for exterior construction. Regular steel nails rust within a few years in an outdoor environment. Use hot-dipped galvanized or stainless steel fasteners for anything exposed to weather. The price difference is small compared to the cost of replacing rotted framing.
Forgetting ventilation. A sealed shed becomes a humidity trap. Store tools and materials in an unventilated space and you will see mold, rust, and warped wood within a couple of seasons. Install at least two soffit vents and a gable vent, or leave a small gap at the top of one wall for passive airflow.
Building without considering future needs. It is easy to plan only for what you store today. Think about what you might need next year. A 10×12 shed feels tight if you plan to add a lawnmower, a grill, and outdoor furniture. Leaving a little extra floor space or planning for a slightly larger footprint later can prevent regret.
How to Choose the Right Shed Plans for Your Project
Not all shed plans are created equal. Some are detailed enough to hand to a contractor and get an accurate bid. Others are sketchy outlines that leave critical dimensions unclear. Here is how to separate the useful plans from the filler.
Look for plans that include a complete materials list with specific board lengths and quantities. A good set of small outbuilding plans tells you exactly how many 2x4s, sheets of plywood, and bundles of shingles you need. This prevents multiple trips to the lumber yard and reduces waste from incorrect cuts.
Check that the plans show a foundation detail. A shed is only as stable as its base. Plans that skip foundation details assume you already know how to build one, which leaves beginners guessing.
Roof framing details matter too. The plan should show rafter cuts, ridge board placement, and how the roof ties into the walls. A compact shed design with unclear roof details often leads to leaks because the flashing and overlap are not specified.
Finally, verify that the plans match your local climate. A shed design intended for a dry southern climate may not account for heavy snow loads in the north. Look for plans that note snow load ratings or allow you to adjust rafter spacing and size based on your region.
FAQ: Shed Plans Under 200 Sq Ft
Do I need a permit for a shed under 200 square feet?
In most U.S. municipalities, sheds under 200 square feet do not require a building permit, but this varies by location. Some towns set the threshold at 120 square feet or 200 square feet, and some require permits regardless of size if the shed is permanently attached to a foundation. Always check with your local building department before starting construction to avoid fines or having to tear down a completed structure.
What is the easiest shed size to build for a first-time DIYer?
A 10×10 or 10×12 gable shed is the easiest size for a first build. The dimensions use standard lumber lengths with minimal cutting waste, the roof pitch is straightforward, and the wall framing follows a simple repetitive pattern. These sizes also fit most backyards without dominating the space, which makes them practical for people who are still learning.
Can I convert a small shed into a tiny workshop?
A 12×16 shed at 192 square feet is the smallest size that works comfortably as a tiny workshop. You need enough floor space for a workbench, tool storage, and room to move around safely. A 10×12 can work for light hobbies like model building or electronics repair, but larger power tools require the extra footprint of a 12×16 or bigger.
How much does a basic 10×12 shed cost to build?
A basic 10×12 shed built with standard materials and no electricity typically costs between $2,600 and $4,500 in materials. The final price depends on your choice of siding, roofing, and foundation. Buying used lumber or finding sales at home centers can reduce the cost by several hundred dollars.
What foundation works best for a compact backyard shed?
Concrete pavers on a compacted gravel base is the best foundation for most sheds under 200 square feet. It is affordable, relatively easy to install, and allows water to drain underneath the structure. A poured concrete slab is more durable but costs two to three times more and requires forming and curing time that slows the project.
How do I keep a small shed dry and ventilated?
Install soffit vents near the roof eaves and a gable vent near the peak to create passive airflow. Leave a small gap between the bottom plate and the floor framing if possible, and consider a low-cost solar-powered exhaust fan if the shed stores moisture-sensitive items. Seal the roof and siding with quality exterior caulk and paint to prevent water intrusion.
Your Next Steps: A Practical Checklist to Start Building
Before you order lumber or break ground, run through this checklist to make sure the project stays on track.
- Check local zoning and permit requirements for your address
- Measure your available backyard space and mark the shed footprint with spray paint
- Choose a specific shed plan with a complete materials list and foundation details
- Confirm the site drains well and does not sit in a low spot
- Order all materials at once to avoid multiple trips and price changes
- Set aside a budget buffer of 10 to 15 percent for unexpected costs
- Plan for ventilation and lighting before closing up the walls
- Take photos at each construction stage for reference and future expansion ideas
Building a compact shed under 200 square feet is one of the most practical investments a homeowner can make. It adds usable space without the complexity of a large addition, and the skills you learn framing a small shed translate directly to decks, fences, and larger outbuildings down the line. Pick a size that matches your actual needs, follow a detailed plan, and take the time to get the foundation and ventilation right. The result will be a sturdy backyard building that serves you well for decades.
Start by measuring your space and pulling local code requirements. Those two steps determine everything that follows, and getting them right early saves weeks of rework later.