
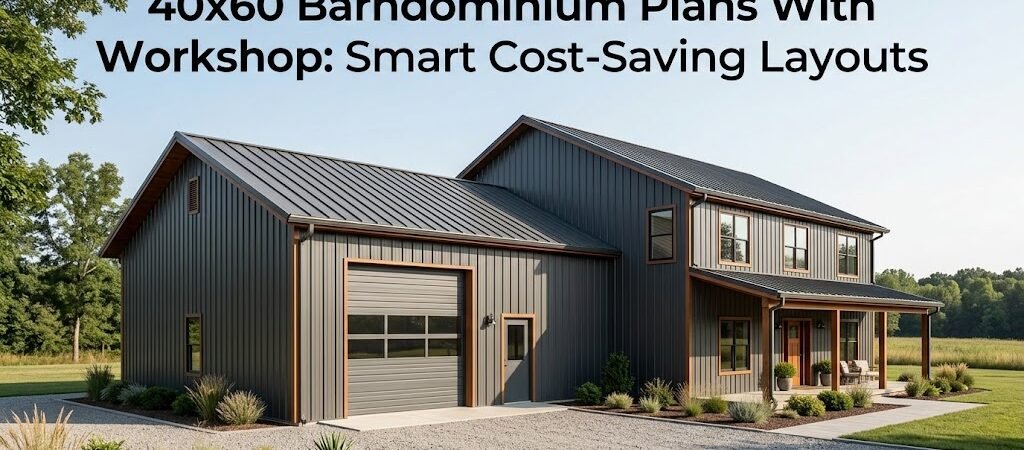
A 40×60 barndominium with workshop delivers roughly 2,400 square feet of combined living and workspace. The key to saving money lies in how you organize that footprint — placing the workshop adjacent to the living area, sharing structural walls, and designing an open floor plan that minimizes interior partitioning. These plans typically accommodate 2–3 bedrooms, 2 bathrooms, and a dedicated garage or workshop bay of 400–800 square feet.
What Makes 40×60 Barndominium Plans Cost-Effective?
If you’re researching 40×60 barndominium plans with workshop space, you’re likely weighing two priorities: functional living area and practical workspace, without blowing the budget. The good news is that a 40-by-60 layout is one of the most cost-efficient dimensions available. It hits a sweet spot — large enough for a full home and a serious workshop, compact enough to keep foundation, roofing, and framing costs manageable.Why is the 40×60 Footprint a Cost-Saver?
The 40×60 barndominium plan offers a rectangular footprint that minimizes exterior wall length relative to interior square footage. Fewer linear feet of wall means less siding, fewer windows, reduced foundation work, and simpler roof geometry. A simple gable or standing-seam metal roof over a 40-by-60 rectangle is far cheaper per square foot than a complex multi-gable design on a smaller footprint.- 200 linear feet of perimeter for a 40×60 building vs. 160 linear feet for a 30×50 layout.
- More interior area per foot of exterior envelope, directly lowering your cost per square foot.
How to Position Your Workshop to Cut Costs
How you position the workshop within a 40×60 barndominium plan has a direct impact on construction cost and long-term functionality. The three most common approaches each carry different trade-offs.1. Side-by-Side Layout
This layout splits the 40×60 rectangle into two equal 20×60 zones — one for living and one for the workshop, minimizing hallway space and centralizing plumbing.2. Front-Loaded Workshop
This arrangement creates a physical separation between your home and workspace, ideal for those needing distance from noise or dust.3. Integrated Open Layout
Blending the workshop and living space under one continuous roof can save on finish costs but best serves low-impact work activities.| Workshop Layout Strategy | Estimated Workshop Size | Construction Complexity | Privacy Level |
|---|---|---|---|
| Side-by-Side | 400–600 sq ft | Low | Moderate |
| Front-Loaded | 500–800 sq ft | Low to Moderate | High |
| Integrated Open | 400–600 sq ft | Low | Low |
What to Expect from the Living Space in a 40×60 Barndominium
The remaining living area in a 40×60 layout typically ranges from 1,600 to 2,000 square feet, enabling a spacious open-concept home. A large kitchen island serves multiple functions, replacing separate dining areas with a social hub.Cost-Saving Tips for 40×60 Workshop Plans
- Share the foundation slab: Opt for a single poured concrete slab for cost efficiency.
- Use a single HVAC zone: Cutting separate systems can save on ductwork and energy.
- Install workshop doors first: Facilitates parallel construction work to allow quicker access.
- Plan for high ceilings: Adequate height allows space for equipment and storage.
- Delay finish work on the workshop: This allows for budget flexibility.
Essential Considerations for Your Workshop
Enhancing your workshop requires planning for electrical capacity, internet access, and proper ventilation for various activities.Site and Zoning Factors Affecting Your 40×60 Plan
Confirm local factors like setback requirements, soil conditions, utility access, and zoning laws before finalizing your plans.When Does a 40×60 Barndominium With Workshop Make Sense?
This layout serves well for hobbyists needing workspace alongside living quarters or remote workers requiring professional-grade home offices.Final Checklist Before Commitment to Your 40×60 Plan
- Verify local building codes.
- Confirm lot sizes and dimensions.
- Choose optimal workshop layouts based on needs.
- Plan for comprehensive electrical and data infrastructure.
- Decide on HVAC setup.
- Get professional engineering guidance.
- Solicit multiple builder bids.
- Reserve a contingency fund for unexpected costs.