
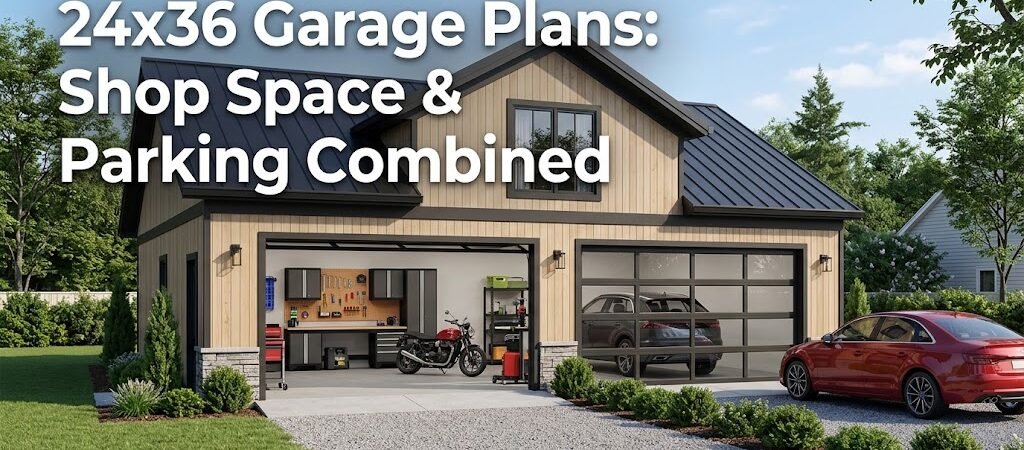
24×36 garage plans deliver 864 square feet of flexible space—enough room for two vehicles plus a full workshop. These multi-use garage designs typically cost $35,000 to $65,000 to build and work well as large detached garages with workshop areas, making them a smart investment for homeowners who need both parking and dedicated shop space.
“`
Why Are 24×36 Garage Plans Ideal for Multi-Use Buildings?
You’ve probably seen those tiny two-car garages that feel cramped the moment you try to open a trunk. The 24×36 footprint solves that problem by giving you 864 square feet of floor space—enough for two vehicles with room to spare, plus a full workshop area that doesn’t feel like an afterthought. This size sits in a practical middle ground. It’s large enough to serve as a proper 24×36 garage plans without hitting the regulatory thresholds that trigger extra permitting requirements in many jurisdictions. Simultaneously, it’s small enough that you can often avoid the expensive foundation and engineering requirements that come with larger commercial-scale structures. The layout flexibility is where these plans really shine. You can dedicate one side to vehicles and the other to a workshop, split it evenly, or design it around your specific workflow. A large detached garage at this size also leaves room for storage lofts, workbenches along the walls, and even a small office nook if you work from home part-time.Layout Options for Your 24×36 Garage Plans
Option 1: Vehicle-First Layout with Workshop Alley
This configuration places two cars side-by-side in the front 24×16 section—about 384 square feet—and reserves the rear 24×20 portion as a dedicated workshop. The alley-style setup means you drive in, park, and walk through into your work area without navigating around open car doors. The workshop section gets utilities, workbenches, and tool storage. The vehicle area stays clean with just epoxy flooring and overhead lighting. This separation keeps oil stains and sawdust out of your parking zone.Option 2: Side-by-Side Split
A full-width 24-foot frontage lets you divide the space down the middle. One 12×36 bay handles vehicles while the other 12×36 bay becomes your shop. This layout works especially well if you want a separate door for workshop access—useful when a vehicle is blocking the main garage door. You’ll need a 12-foot-wide bay minimum for comfortable vehicle parking. Standard car widths run about 6 to 6.5 feet, so two vehicles fit with roughly 2 feet of walking space between them.Option 3: Three-Bay Configuration
If you own three smaller vehicles—a truck, a car, and a motorcycle or ATV—dividing the 24-foot width into three 8-foot bays gives each vehicle its own space. The remaining wall area along the 36-foot length becomes prime real estate for workbenches and storage cabinets. This layout sacrifices some individual bay width but maximizes vehicle capacity. It’s a common choice for hobbyists with multiple project vehicles.Option 4: Loft-Over-Workshop Design
Adding a mezzanine level over part of the workshop creates roughly 400 additional square feet of storage or workspace. You’d park under the open section and climb a ladder or staircase to the loft for projects that need more room. This approach works best with 12-to-14-foot ceiling heights on the main floor. Building codes typically require guardrails on lofts over 30 inches high, so factor that into your plan review.Cost Breakdown: What Do 24×36 Garage Plans Actually Cost?
Here’s where the numbers get real. A 24×36 shop building runs anywhere from $35,000 to $65,000 depending on finish level, location, and whether you DIY the labor or hire contractors.| Build Level | Cost Range | What You Get |
|---|---|---|
| Basic | $35,000 – $42,000 | Concrete slab, basic door, minimal insulation, unfinished interior |
| Mid-Range | $42,000 – $55,000 | Insulated walls, heated, epoxy floors, electrical rough-in, one or two overhead doors |
| High-End | $55,000 – $65,000+ | Full insulation, HVAC, finished interior, multiple doors, lighting, workbench built-ins, potential loft |
Electrical and Plumbing Considerations for Workshop Garage Plans
A proper 24×36 garage plans setup needs more than just a few outlets. Your electrical plan should account for 240-volt circuits for welders and large tools, 120-volt general lighting, and dedicated circuits for compressors and bench equipment. Plan for at least four 20-amp circuits on 120-volt and one 240-volt circuit. A standard 100-amp service panel can handle this, but if you’re adding an EV charger or running a full HVAC system, upgrade to 200 amps. Plumbing is optional but valuable if you’re building workshop garage plans that include a sink, parts washer, or half-bath. Running water and drain lines through the slab costs more upfront but saves significant money compared to cutting into finished concrete later. If you plan to heat the space, a mini-split HVAC system rated for 800 to 1,000 BTUs per square foot will keep a well-insulated 24×36 shop building comfortable in most climates. That’s roughly an 8,000 to 10,000 BTU unit for the main area.Foundation Options and What They Mean for Your Budget
The foundation choice impacts cost, timeline, and what you can build on top. A poured concrete slab is the standard for large detached garage projects at this size. A 6-inch-thick slab with rebar reinforcement runs $6 to $12 per square foot installed. For 864 square feet, that’s $5,184 to $10,368 just for the floor. Add a vapor barrier and you’ll prevent moisture issues that can damage tools and stored items. Gravel or crushed stone bases work for lighter structures but aren’t recommended if you’re parking vehicles. The weight of even a midsize SUV exceeds 4,000 pounds, and a gravel surface will shift and crack under that load over time. Pier foundations are cheaper but create an unfinished underside that’s hard to insulate. If you want a conditioned workshop space, a slab-on-grade is the only practical choice at this size.Permitting and Zoning: What Do You Need to Know Before Building?
Most municipalities require permits for structures over a certain square footage, and 864 square feet almost always crosses that threshold. Setbacks vary by zoning district—typically 5 to 15 feet from property lines—but you need to verify this with your local building department before finalizing any 24×36 garage plans. The U.S. Department of Housing and Urban Development provides general guidance on accessory structure regulations that can help you understand what to expect. Check HUD.gov for resources on local zoning compliance and building code requirements. HOA restrictions may also apply if you live in a planned community. Some neighborhoods limit the size, appearance, or placement of detached structures. Review your covenants before pouring concrete. Wind and snow load requirements vary by region. A 24×36 shop building in a high-wind zone needs different framing specs than one in a moderate climate. Your plan set should account for local code requirements, not just generic dimensions.Insulation and Climate Control for Year-Round Workshop Use
If you’re using this space as a functional workshop, insulation isn’t optional. An uninsulated metal or wood building becomes unusable in extreme temperatures—too hot for comfort in summer, too cold for precision work in winter. R-13 walls and R-19 ceilings are the minimum for a conditioned space. R-21 walls and R-30 ceilings provide better performance in climates with temperature swings above 40 degrees Fahrenheit. Spray foam insulation adds R-value per inch and acts as a vapor barrier, which matters if you’re storing sensitive tools and materials. Sealing gaps around doors and windows matters as much as the insulation rating. A single poorly sealed overhead door can account for 30 percent or more of your heating and cooling loss. Use weatherstripping and consider a thermal break at the door threshold.Door Selection: What Works Best for a 24×36 Multi-Use Garage?
Door choice affects functionality, security, and energy efficiency. A single 16-foot overhead door handles two vehicles if they’re parked close together, but two 9-foot doors give you more flexibility—you can open just the side you need and reduce heat loss. Insulated sectional doors with R-12 to R-16 ratings are worth the upgrade if you’re heating the space. The difference in monthly energy costs can exceed $50 in colder climates, paying for the upgrade within a few years. Consider a standard 36-inch walk-in door in addition to your overhead door. This lets you enter the workshop section without opening the entire 16-foot door, saving energy and improving security when vehicles are parked inside.Design Tips for Professional Results in Your Garage Build
Here’s something most plan sets don’t emphasize: ceiling height. A 12-foot clear height on the vehicle side gives you room for a storage loft above without feeling cramped below. Eight-foot ceilings work for the workshop section if you don’t need the loft, but going taller on one side creates visual interest and functional flexibility. Placement of electrical panels and main service entries matters more than people realize. Position your panel near the center of the building to minimize wire runs to both the vehicle and workshop zones. Running conduit through exterior walls is cheaper than chasing it through finished drywall later. Lighting layout should follow your workflow, not just cover the space evenly. Task lighting over workbenches and specific work areas prevents shadows and eye strain. General ambient lighting can be lower intensity since you’ll be doing detailed work at benches, not driving around in the dark.FAQ: Common Questions About 24×36 Garage Plans
Can I park two full-size trucks in a 24×36 garage?
Yes. A full-size pickup is about 8 feet wide. Two side-by-side leave roughly 8 feet of remaining width for walking space and door clearance. You’ll need to fold mirrors and park carefully, but it fits.Do I need a permit for an 864-square-foot detached garage?
In most jurisdictions, yes. Structures over 200 square feet typically require permits. Check with your local building department for exact requirements in your area.How long does it take to build a 24×36 shop building?
A basic shell takes 4 to 8 weeks with professional contractors. A fully finished space with electrical, plumbing, and insulation runs 3 to 5 months. DIY builds often take 6 to 12 months depending on experience and time invested.Can I convert a 24×36 garage into an ADU later?
It’s possible but complicated. ADU conversion requires plumbing, kitchen facilities, egress windows, and separate HVAC. Building with these requirements in mind from the start is far cheaper than retrofitting later. If ADU potential matters to you, design accordingly from day one.What’s the resale value impact of a 24×36 garage?
A well-built detached garage with workshop space typically adds $25,000 to $45,000 in perceived value, depending on market and finish quality. It’s one of the higher-return additions a homeowner can make, especially in markets where workshop space is in demand.Is 24×36 the optimal size for a multi-use garage?
It’s one of the most popular sizes for a reason. The 24-foot width aligns with standard lumber lengths, reducing waste. The 36-foot depth gives you enough room for vehicles plus a functional workshop without requiring a massive footprint. It’s a practical balance of space and cost.Your Next Steps: A Checklist for Building with 24×36 Garage Plans
- Verify zoning setbacks and HOA restrictions with your local authority
- Order a site-specific plan set that accounts for local wind and snow loads
- Get all required permits before purchasing materials
- Choose your foundation type based on vehicle weight and intended insulation level
- Plan electrical circuits for both 120V and 240V needs before framing
- Spec insulated overhead doors if you plan to heat the space
- Include a walk-in door for separate workshop access
- Position the electrical panel centrally to minimize wire runs
- Budget 10 to 15 percent contingency for unexpected site conditions
- Schedule inspections at each required phase—framing, electrical, final